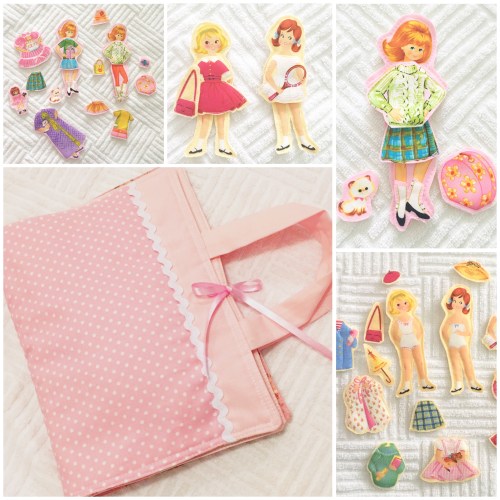
Now that presents have been opened, I can share this cute little quiet book I made for my granddaughters.
Handmade gifts take more time, but as the years go by, they are usually the ones that outlast the others, especially if we take care of them.
.
It was a lot of fun, although much more time-consuming than I had expected (isn’t that true of almost all craft projects?!?)
I made two of these Quiet Books – one for each of my granddaughters.
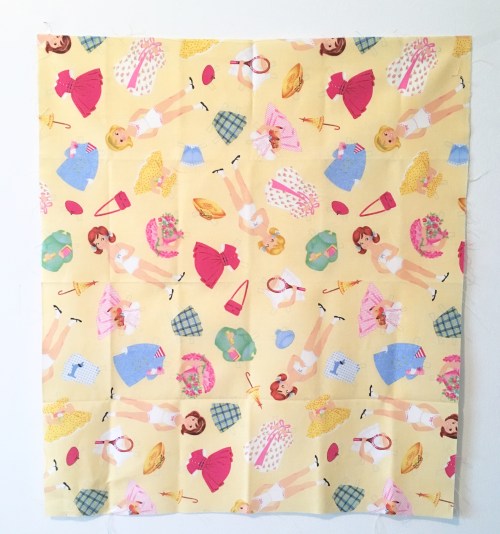
I bought these fabrics years ago – before I ever had granddaughters! I knew those cute little dolls & accessories were going to be the base of some great project in the future (You say that to yourself, too, when you buy fabric?).

.
I used this stabilizer because it’s light, but it also gives a little more “stability” to the fabric. It also adds an adhesive to the back, which I thought would be useful when working with several layers.

.
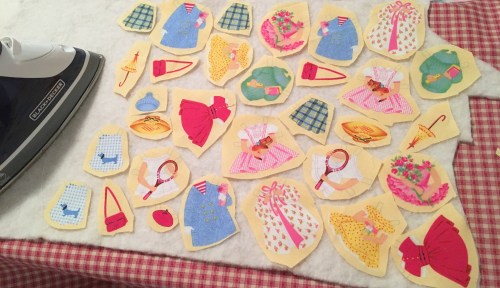
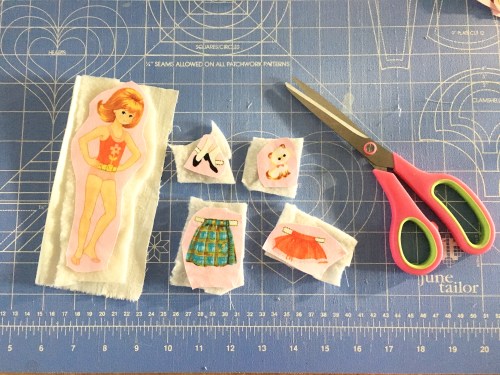
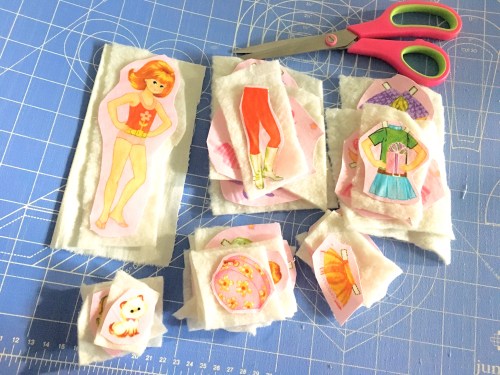
Instead of cutting everything out first, I decided to iron-on the stabilizer onto the whole piece of fabric. It makes cutting out those tiny pieces so much easier! Then I rough-cut around the edges and peeled the paper from the back (don’t forget this step or else you won’t have fusible anything). I placed them on light-weight batting and ironed them carefully, moving the iron very slowly.
.
After doing this process with the first doll, I decided to cut out the shapes first and then iron them to the batting. Either way works fine.
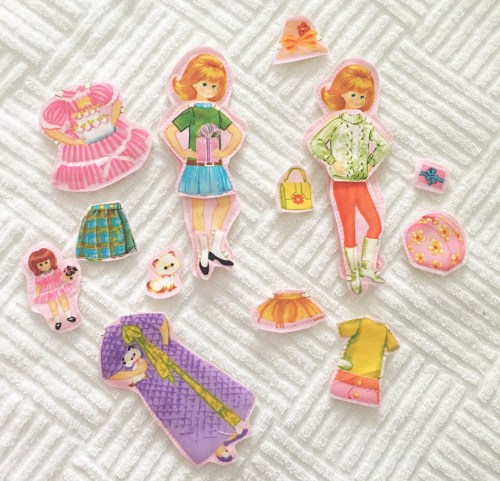
Pretty soon you’ll have a little stack, ready to be sewn down.

.
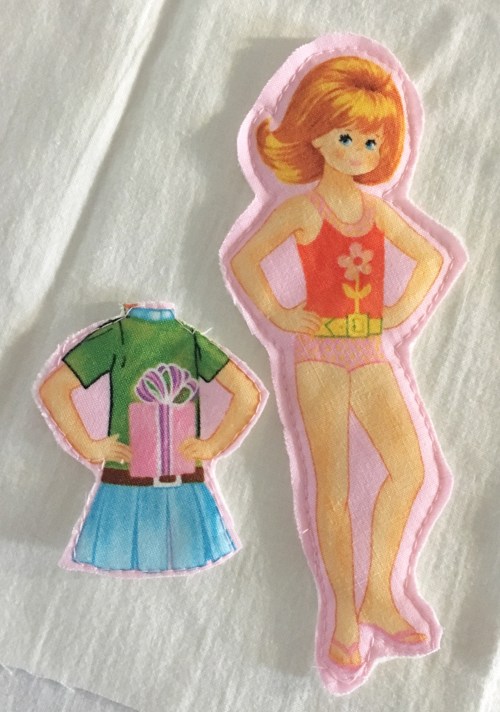
I then sewed around the edge of each piece. Tip: Go slowly!
.
I wasn’t sure if the clothes would “stay” on the dolls, but they do!


.
Isn’t that the cutest little kitty?!
I kept thinking of my granddaughters, praying for them, and smiling… thinking to myself, “They’re going to have so much fun playing with this little Quiet Book.”
.

.
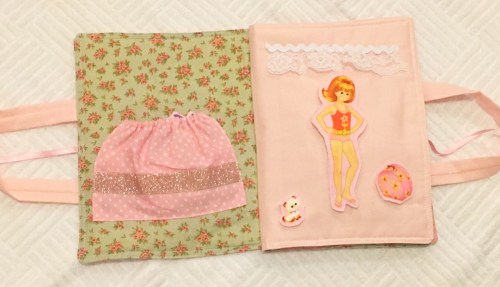
Then it was time to make the actual “book” where all these pieces would go.
I had chosen the fabrics before starting the project, so that was a time-saver. I kept it very simple. In each page I put a “pocket” to hold the clothes, while on the other side there was space for the doll. This pocket has elastic to hold the tiny pieces in, and a little sparkle ribbon at the bottom. On the other side, there’s a little rick-rack and lace to make it feel like a dressing room for the dolly.
.
The elastic helps keep thinks inside. (We’ll see how well that works when the girls start to play with all the pieces!) 🙂

.
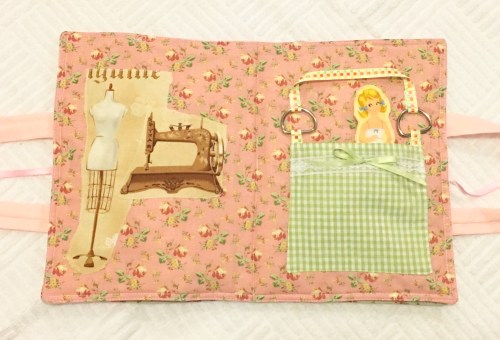
The second “page” has a different dolly, with a set of clothes and accessories of her own. I made this pocket look like a totebag or purse. I’m hoping to teach the girls how to sew when they get older, so I thought it was appropriate to put a dress form and sewing machine on here. :).
.
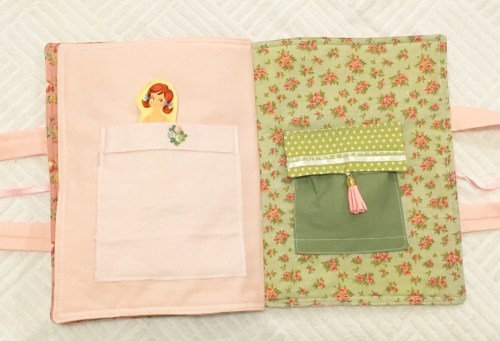
The third and last page has a soft, flannel pocket, almost looks like a comfy bed, where the doll goes. On the other side is a pocket with a flap, holding all her dresses and other cute items for her.
.
I sewed on a little tassel to add some sparkle and a touch of pink. The girls can use this to open up the flap.

.
I have to tell ya, at any age, it’s fun putting outfits together with these sweeties.
 .
.
.
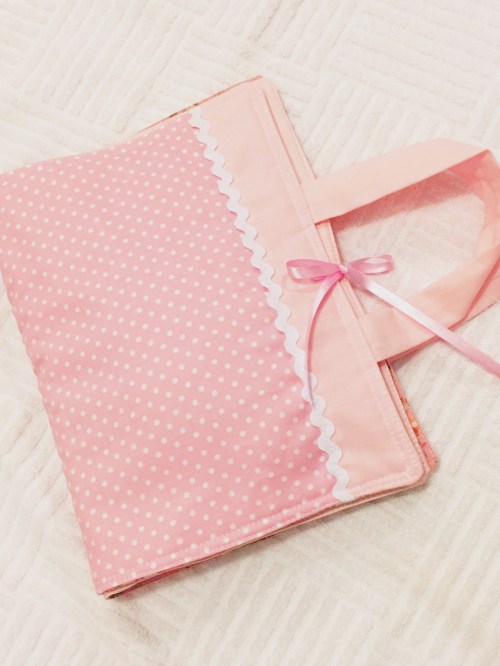
Here’s the outside. Nice and simple. Not too complicated.
.
.

.
I hope you got some ideas of your own and you’re off to sew something amazing! Have fun and Happy Sewing! Also…
Happy New Year, everyone!
Daisy


I love this idea of fabric dress up dolls. As a young child I spent many hours playing with paper dolls. Your post has reminded me of quiet gentler days. Thank you so much for sharing x
When I was a little girl, I enjoyed playing with paper dolls more than with “real” dolls, I’m not sure why. I couldn’t wait to make paper dolls for my granddaughters but since they’re still too young to do that, I thought these fabric ones would do. They seem to like them and will use them even more as they grow older… then I can make them some real paper dolls! 😊
This is amazing. I can just imagine how much time and effort it took, but I know you enjoyed every minute. Nothing like making something for the grandkids.
Yes, making little things for them feels almost like I’m playing a game. It makes all the time it takes go by much faster. Thanks for taking the time to comment, Lillian, i really appreciate it… it’s so good to hear from you! I loved seeing your post about what your daughters gave you for Christmas! Really special! 😊
Super clever, and super cute, Daisy!
Thanks, Laura! 😊
This is so amazing! What a precious project for your girls!
Thanks, Debbie, I think they’ll enjoy playing with them.
Have a blessed New Year! 😊
It’s wonderful, you make such lovely things! Such a fun thing for the girls to use their imaginations playing with.
Thank you for your kind comment. Most of what I make is either for my grand kids or for friends, and it’s really so much fun that it’s like a de-stresser for me. If I could, I’d sew or quilt something every day! 🙂
Omygosh Daisy I love, love, LOVE this! ❤ I want one…
They take a lot of time, but they sure are cute! 🙂
This is the cutest yet Daisy!! Oh my gosh! Did it take days and days to make?? I’ll bet they love it. So smart to find that fabric and hang on to it for the perfect use. And how are you doing?? Back to feeling well?? hugs hugs.
This is super cute!
This is so lovely! All together the project is just beautiful. Thank you for sharing what you have done for your little ones!