Feeds:
Posts
Comments

Posts Tagged ‘Sewing’

Small Book Cover

This is a small book cover I made for a little Bible I have. The cover was badly worn but the size is nice and compact, perfect for taking to church and on trips.

20131115-155941.jpg

I put a little notebook in the outside pocket for taking notes or writing thoughts.

20131115-160115.jpg

This is the inside. I put in two pockets, one on each side for pencil, highlighter, bookmark, and whatever else I need.

It was a fun and quick project.

Have a wonderful weekend, everyone!

Daisy

Read Full Post »

Notebook Cover

I am in the midst of moving, so I have been away from the blogging world and I have missed it!

I won’t be finished with the moving process (packing, cleaning, unpacking, cleaning) until 2 weeks from now.

I thought I’d share a notebook cover I made not long ago.  It went very quickly and it was fun.
For more examples of notebook or journal covers, see HERE.


DSC_0168

I wanted something practical but also pretty…


DSC_0171

It’s great to have it with me whether I need to take notes or  to refer to notes.


Here’s what the front outside looks like.  I used three different fabrics, …really just pieces that I had left over from other projects.  I liked how they looked together.

DSC_0175

As you can see, I added some lace, a button, and an elastic closure.
Some of the lace I used was left-over from my daughter’s wedding dress. … Sigh….
It was a tiny piece but I wanted something special like that to give it some sentimental value.


This is the inside without the notebook in it.  I put in a red ribbon so I could find my place quickly.
I just hate when I can’t find my place, don’t you?

DSC_0172

I added a small long pocket on the inside front for a pen and a highlighter,
and in the back I added a cute, small pocket for little notebooks, bookmarks,
or some chocolate or gum.  That’s always a nice surprise.  🙂


Here’s the outside open so you can see the whole thing.

DSC_0174


It’s nice to have something personal, …it makes me want to write in it.
Sometimes I sit and write in the mornings, just jotting down my thoughts.

DSC_0169

It goes perfectly with a nice, hot cup of tea.

Happy Sewing!  ..Happy Writing!

Daisy

Read Full Post »

Quick Project and Gift

I needed a quick project for a gift I wanted to make for my friend’s little girl (she’s 8 yrs old)– (the little girl, …not my friend.)

She likes bright, cheery colors, so when I found this fabric in my stash, I knew it was the one for her.

IMG_0608


Now… what to make for her?….   Hmmmm….

She loves to read and also color, write, paint… (she’s very creative)…

So I thought she’d enjoy a little tote bag of her own to carry these small items.


I didn’t have heavy weight interfacing, so I used canvas (my Dad’s an upholsterer so I get remnants for free!) as the lining.
It worked great and gave the tote bag a real store-bought feel because of the extra sturdiness.  Note: please use a heavy weight needle in your sewing machine (same you’d use for denim) in order to sew all these layers without a problem.

IMG_0612


I layered the lining, canvas, and outside fabric, then cut the same size “square” from each bottom corner
(you can tell my square is not “square”, but that’s ok, it still turned out fine.) 🙂
The important thing is that both corner cuts are the same.

I made the tote bag about 10 inches long by 8 inches wide… just right for a little girl.

IMG_0613


I cut a pocket for the inside (to hold pencils, markers, little writing pads…

IMG_0614


For the straps, I used the colorful fabric (and canvas inside for weight),  and a piece of satin ribbon…

IMG_0615


I ironed the straps so that it would be easy to sew…

IMG_0617


Then I sewed the satin ribbon as close to the edge of the ribbon as possible…

IMG_0618


It looked nice on the outside…

IMG_0619


For the closure, I hot-glued 3 buttons together (the large red, the orange, and the blue) to match the fabric.
I used a half-inch wide ribbon to wrap around the button and keep all the goodies inside the tote bag.

IMG_1582


Little Erika loved it!

IMG_1581


…and it was fun to make!

IMG_1582


I also made her a small journal cover (out of the same fabric) to tuck into her tote bag.
She’s happily being creative with her new little gifts.


Have a wonderful weekend,

Daisy

Read Full Post »

Vintage Pattern

I have so much fun going into antique stores…


DSC_0097


I was able to find this large magazine ad, along with several others (I’ll be posting them soon), for sewing patterns.  For those of you who love vintage or old sewing patterns, I thought this would be fun to see.

Happy hunting,

Daisy

Read Full Post »

It’s so much fun to work with pre-cut fabric!

If you haven’t tried it yet, and you like to sew, I encourage you to try these colorful, beautiful, pre-cut bundles.


DSC_0047

They come in endless varieties of color combinations and different sizes of cuts…
… i.e. Charm Packs (5″X5″ squares),
Layer Cakes (10″X10″),
Fat Quarters (18″X21″),
and other variations of these.


DSC_0048

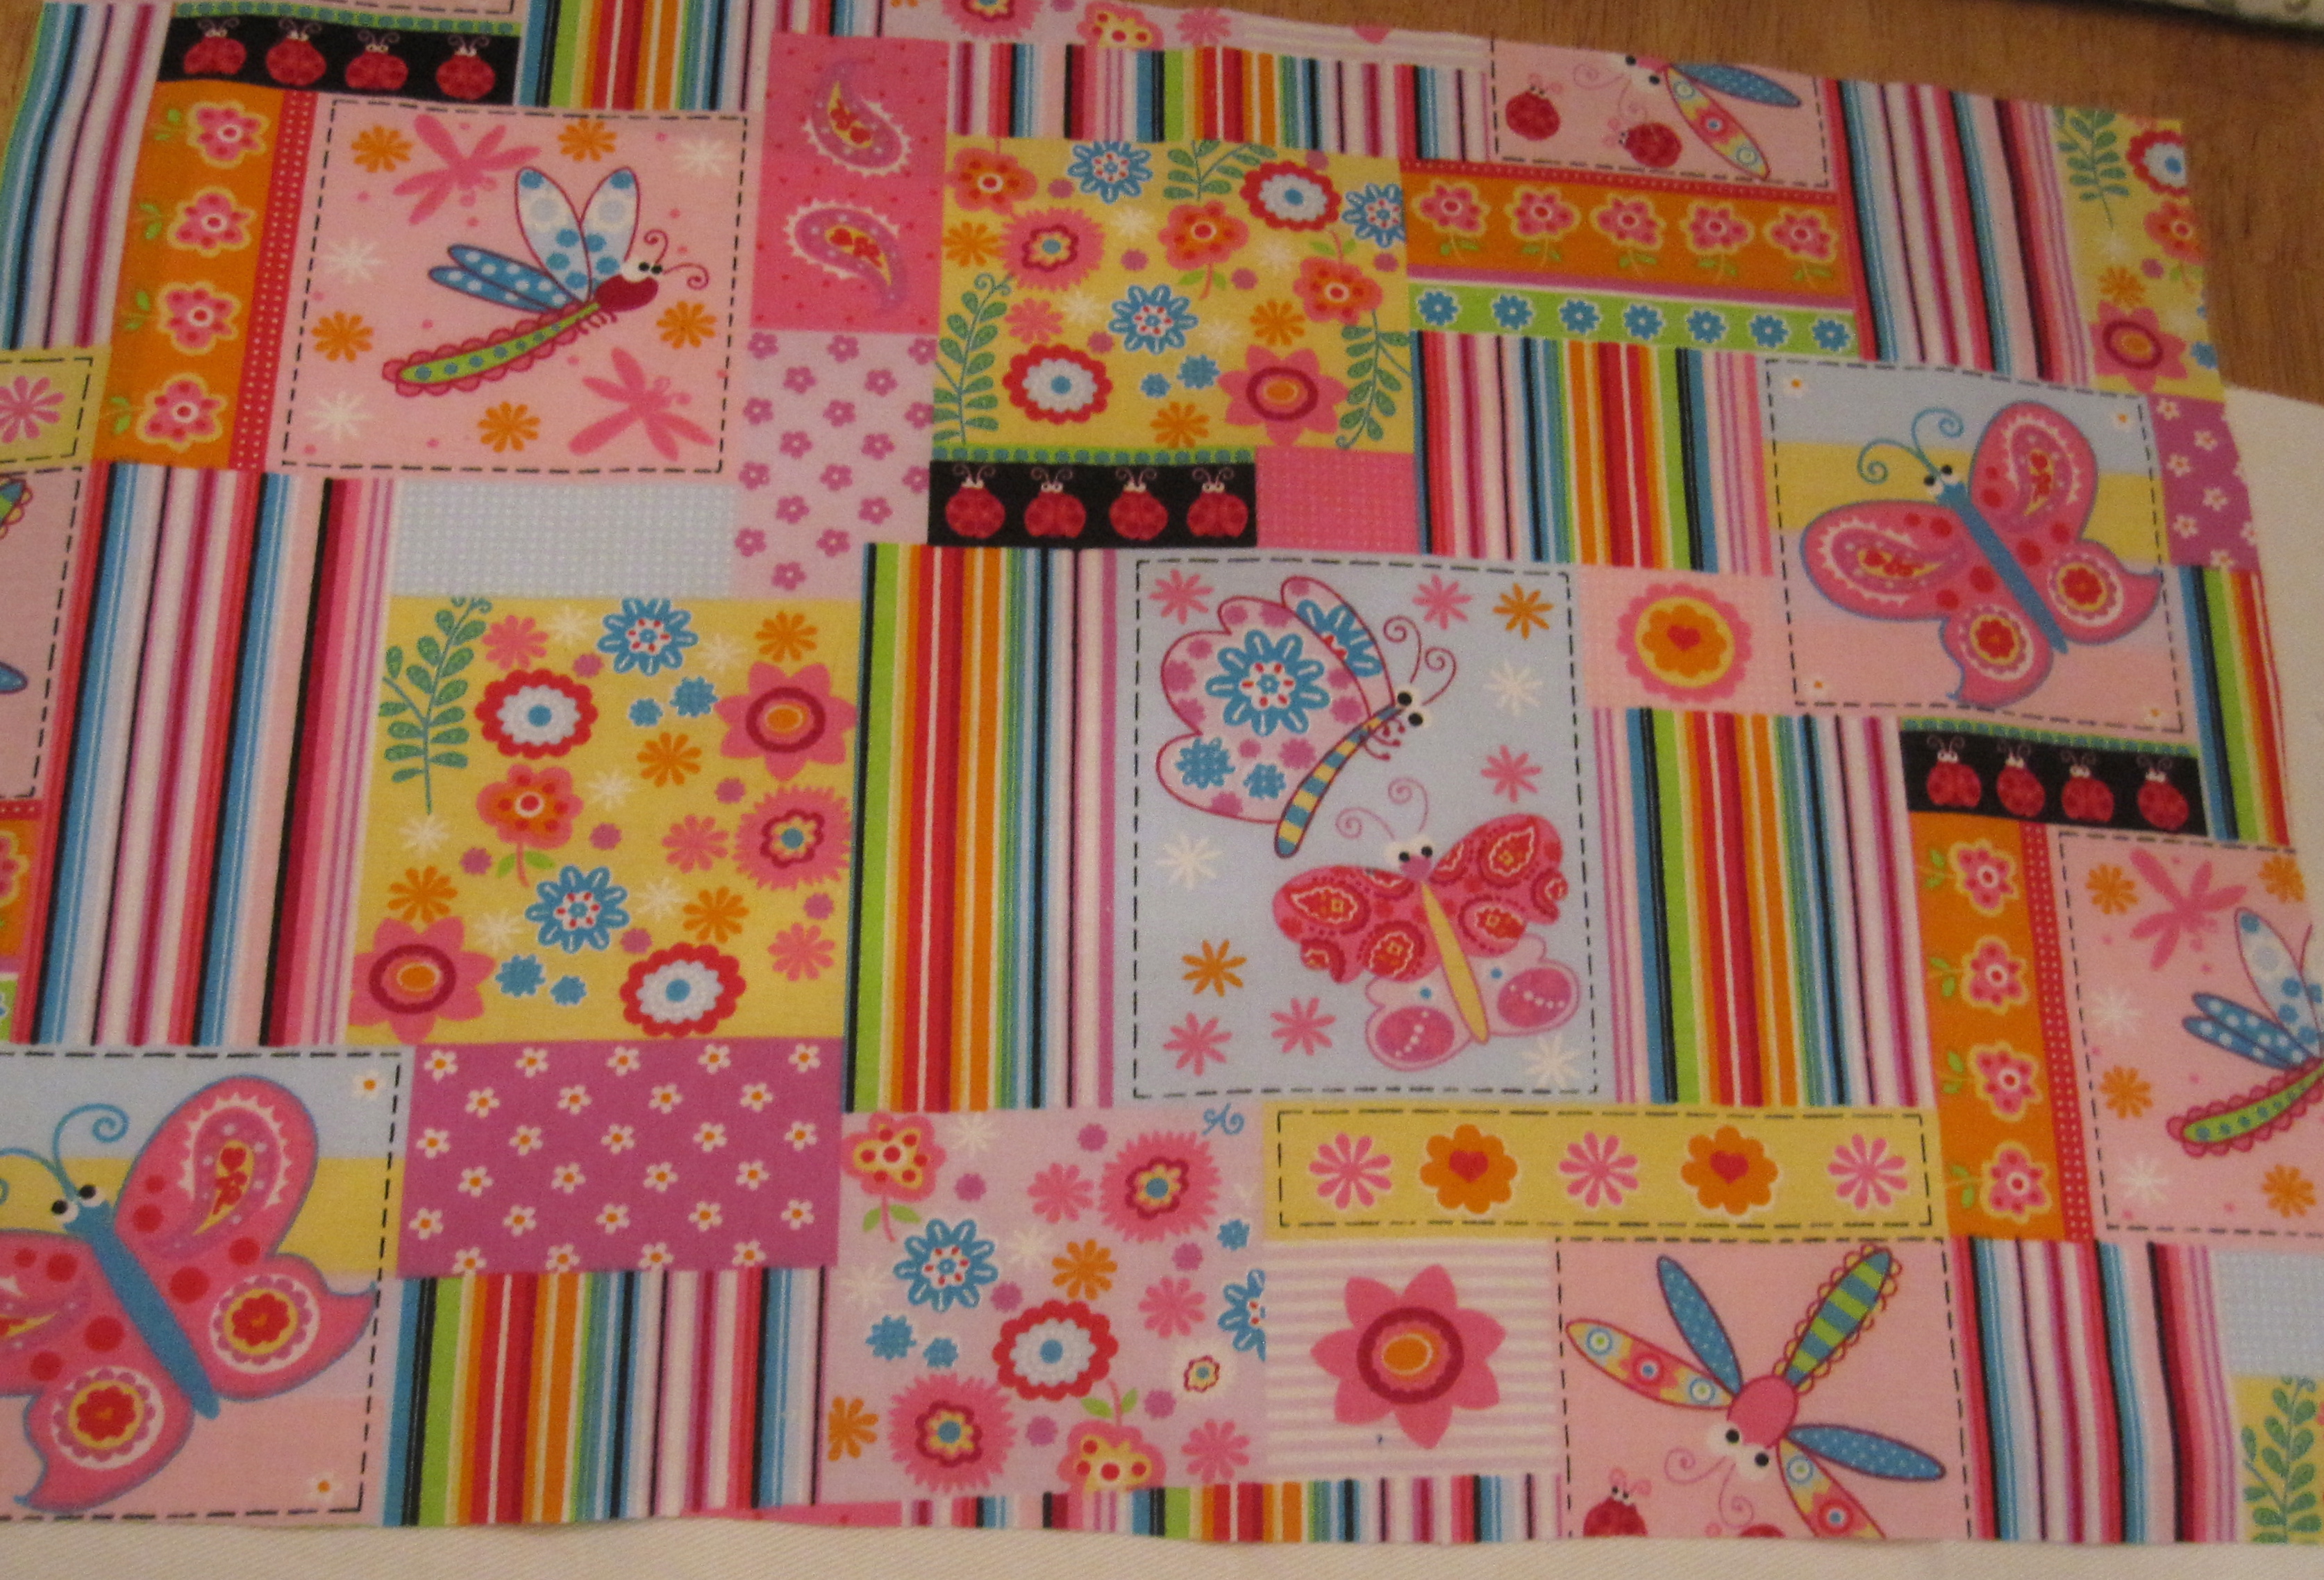
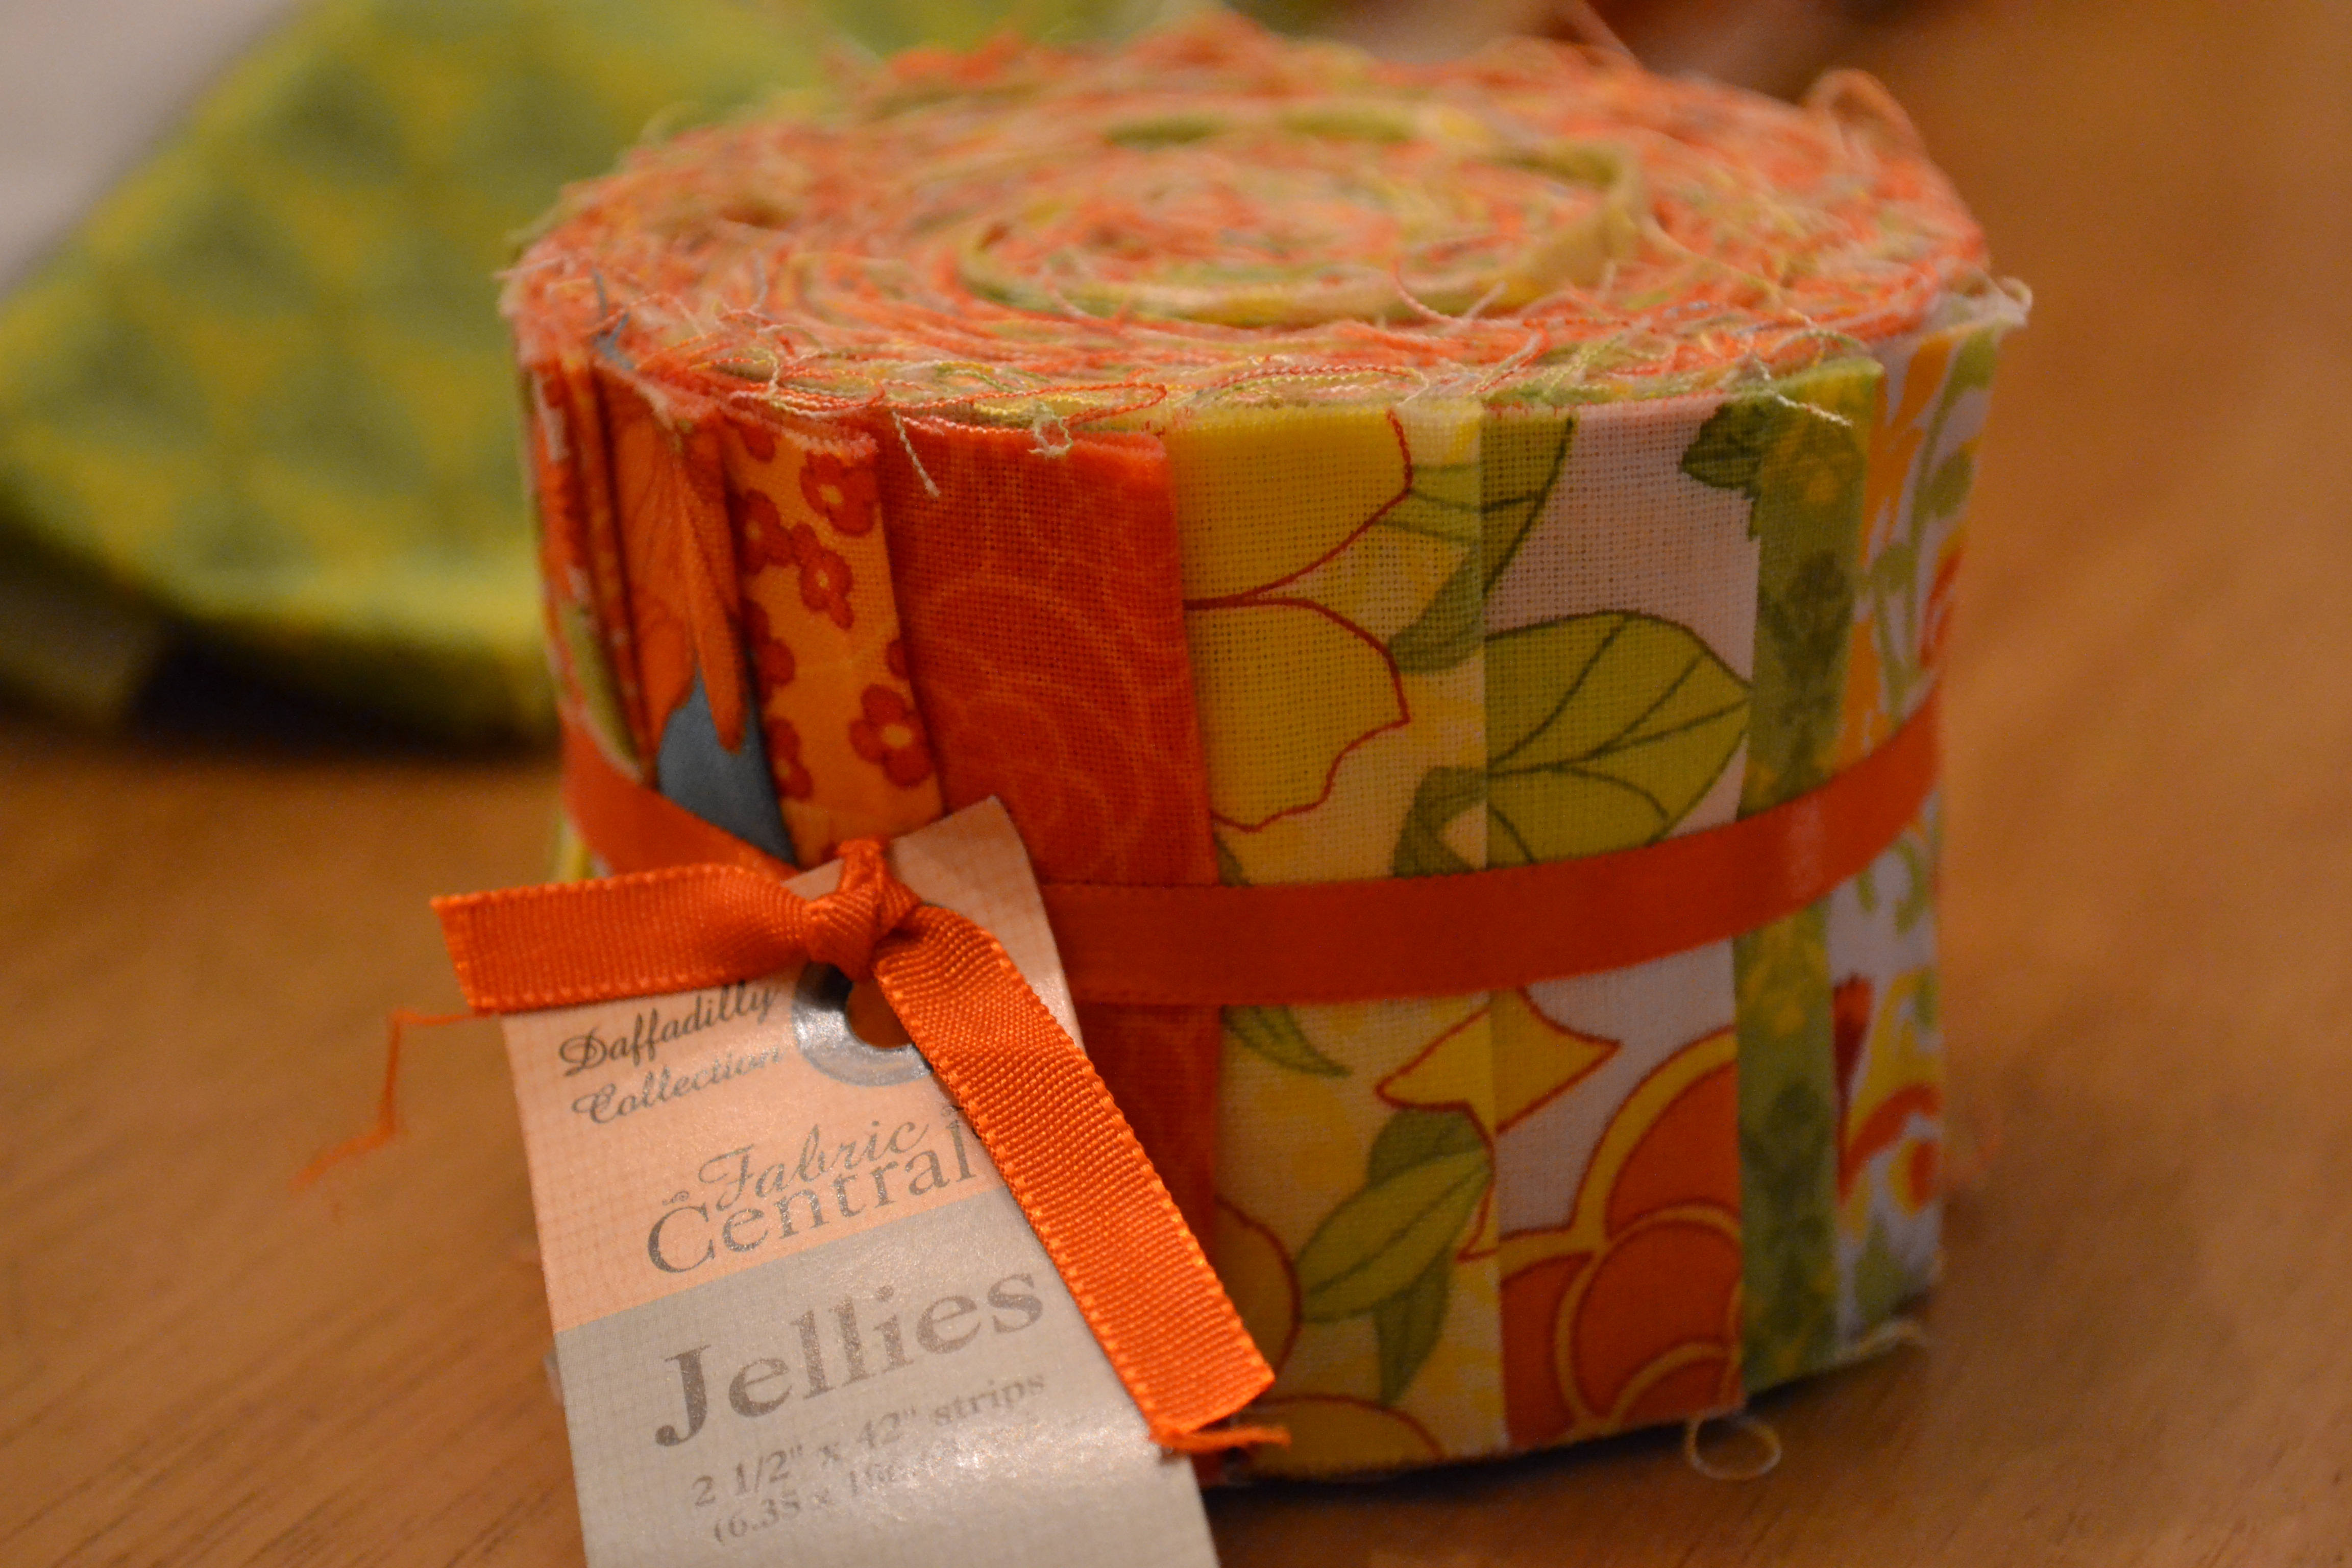
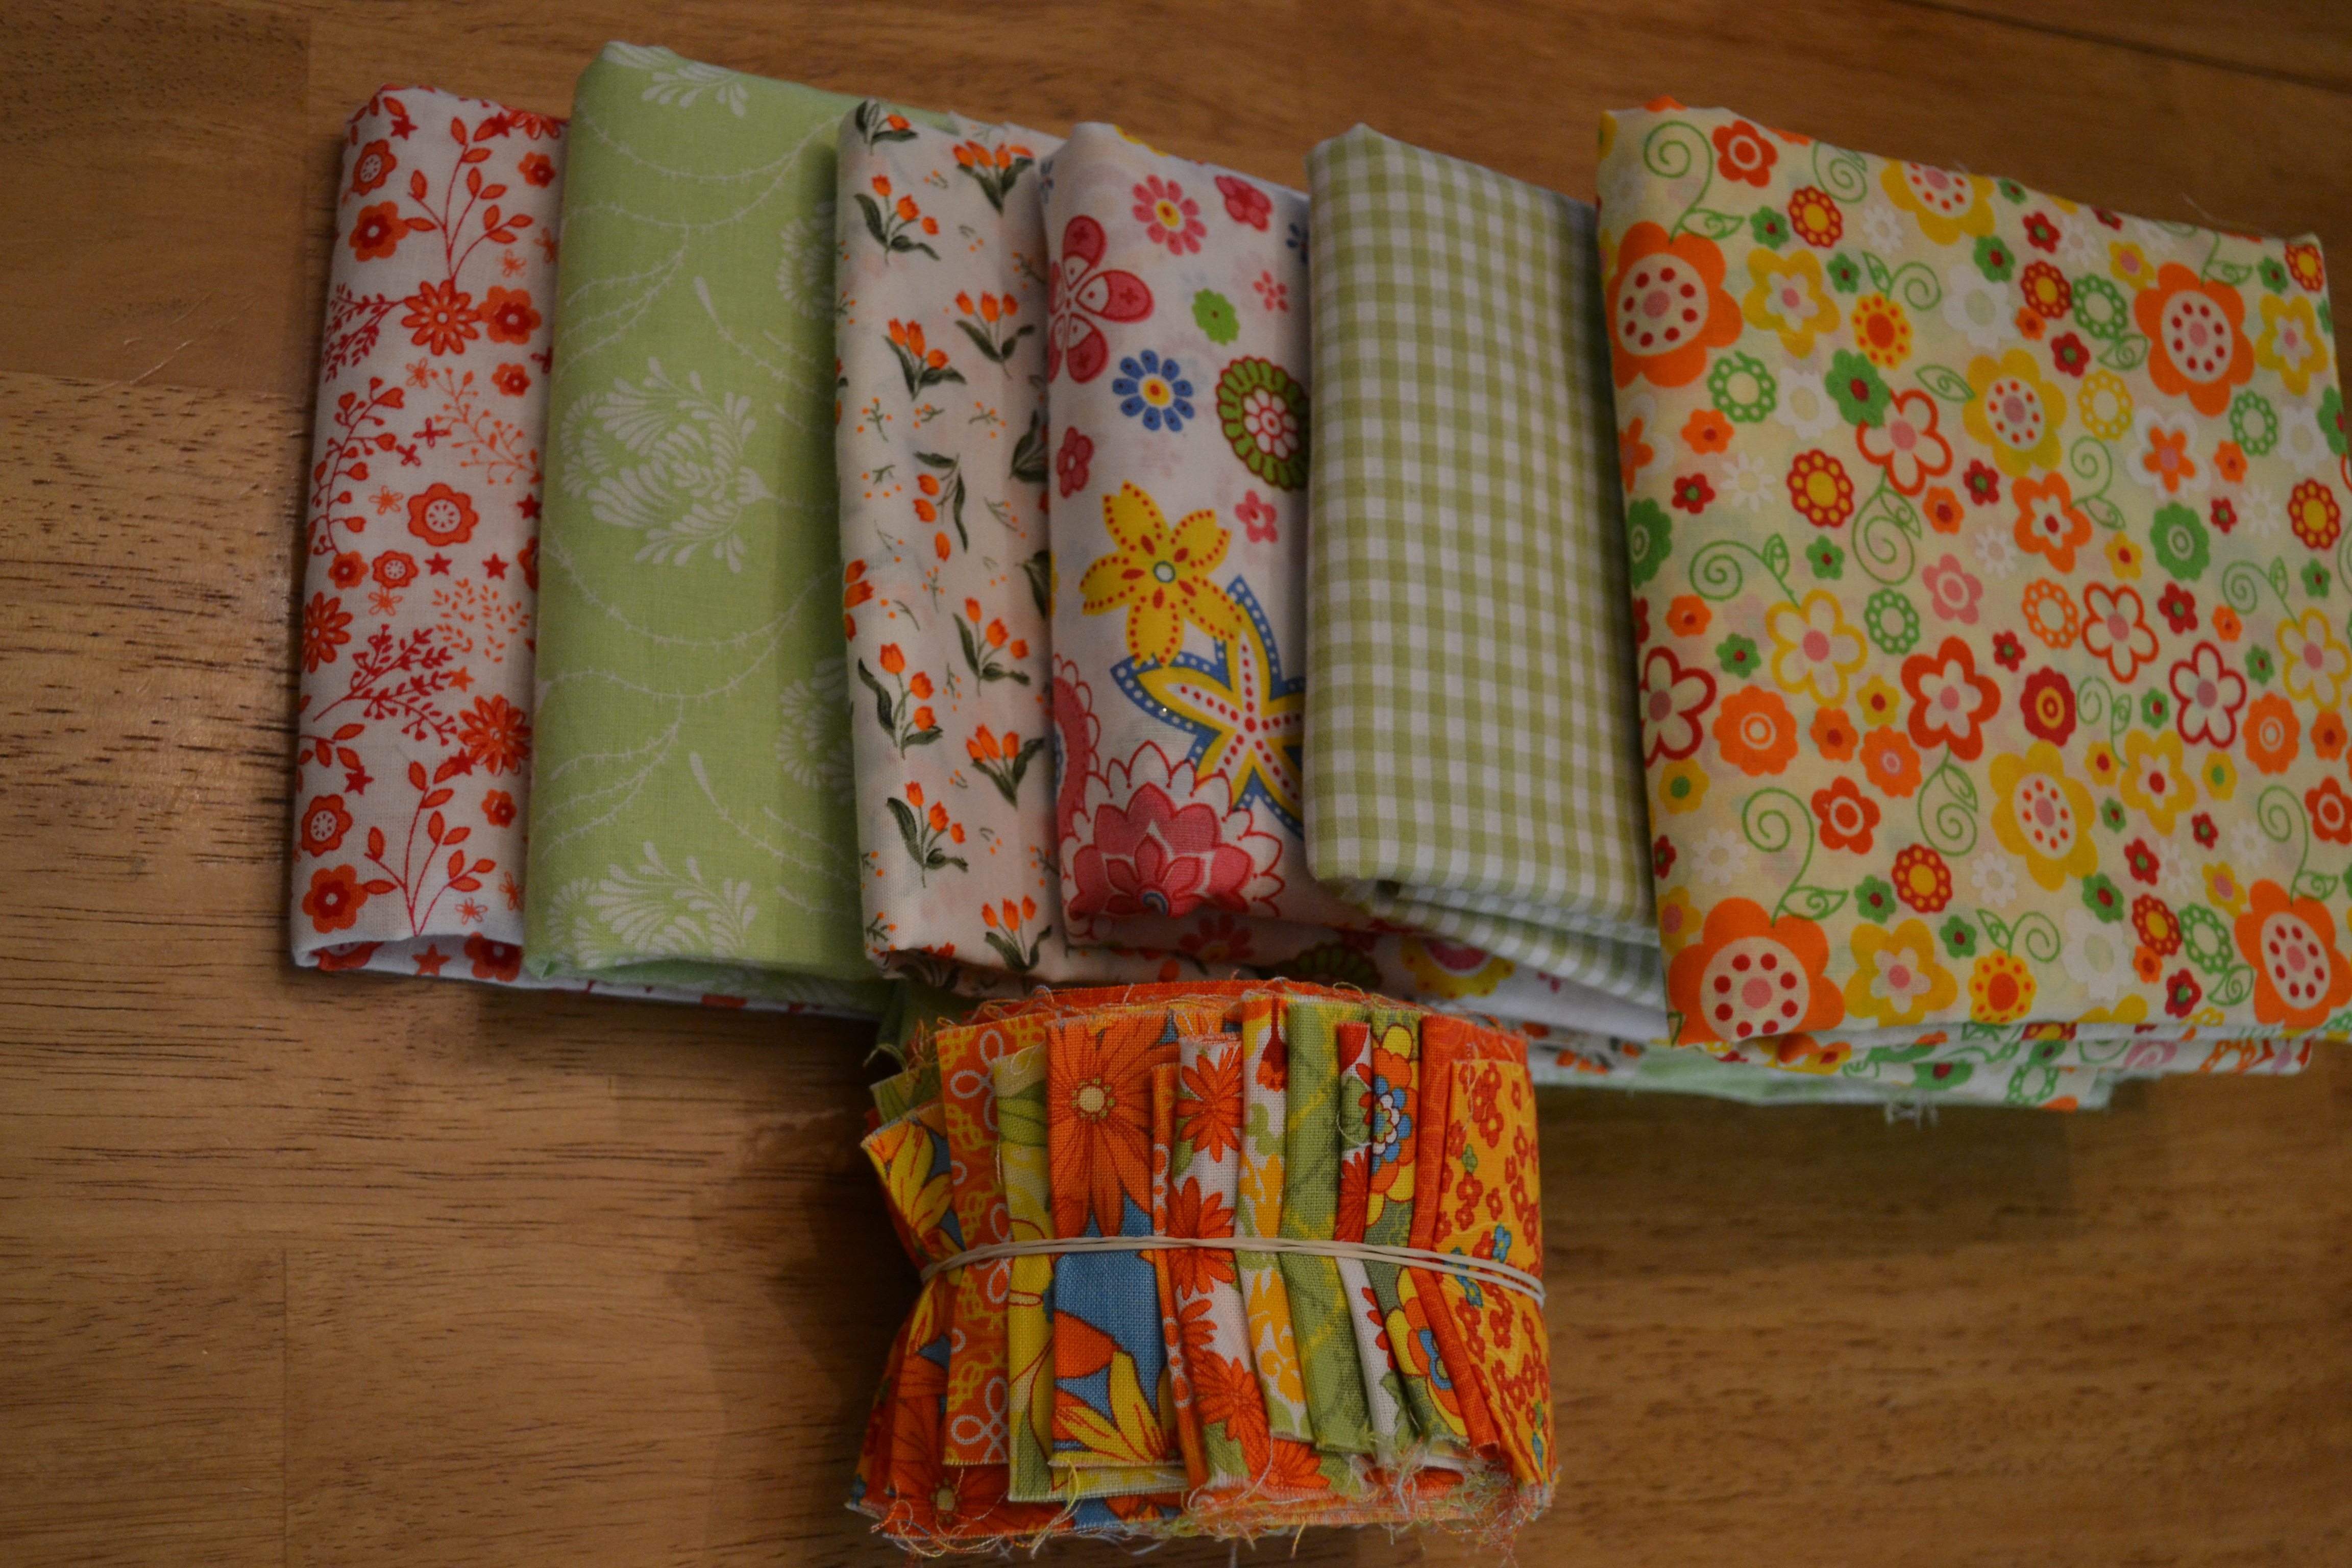
This particular one is called a jelly roll.

I know.  They all have fun names.


DSC_0051

Jelly rolls usually come in rolls of 24 strips measuring 2 1/2″ X 44″.  This particular one had 20 strips.

You can see the nice bright colors.


DSC_0048


Fun fabrics!!


DSC_0044

When you open up the jelly roll, you usually find 2 strips of each fabric.

The great thing is that they are all coordinated for you and precut!

This saves a lot of time, trying to match fabrics and find a variety that will go together,
not to mention all that cutting!


DSC_0045

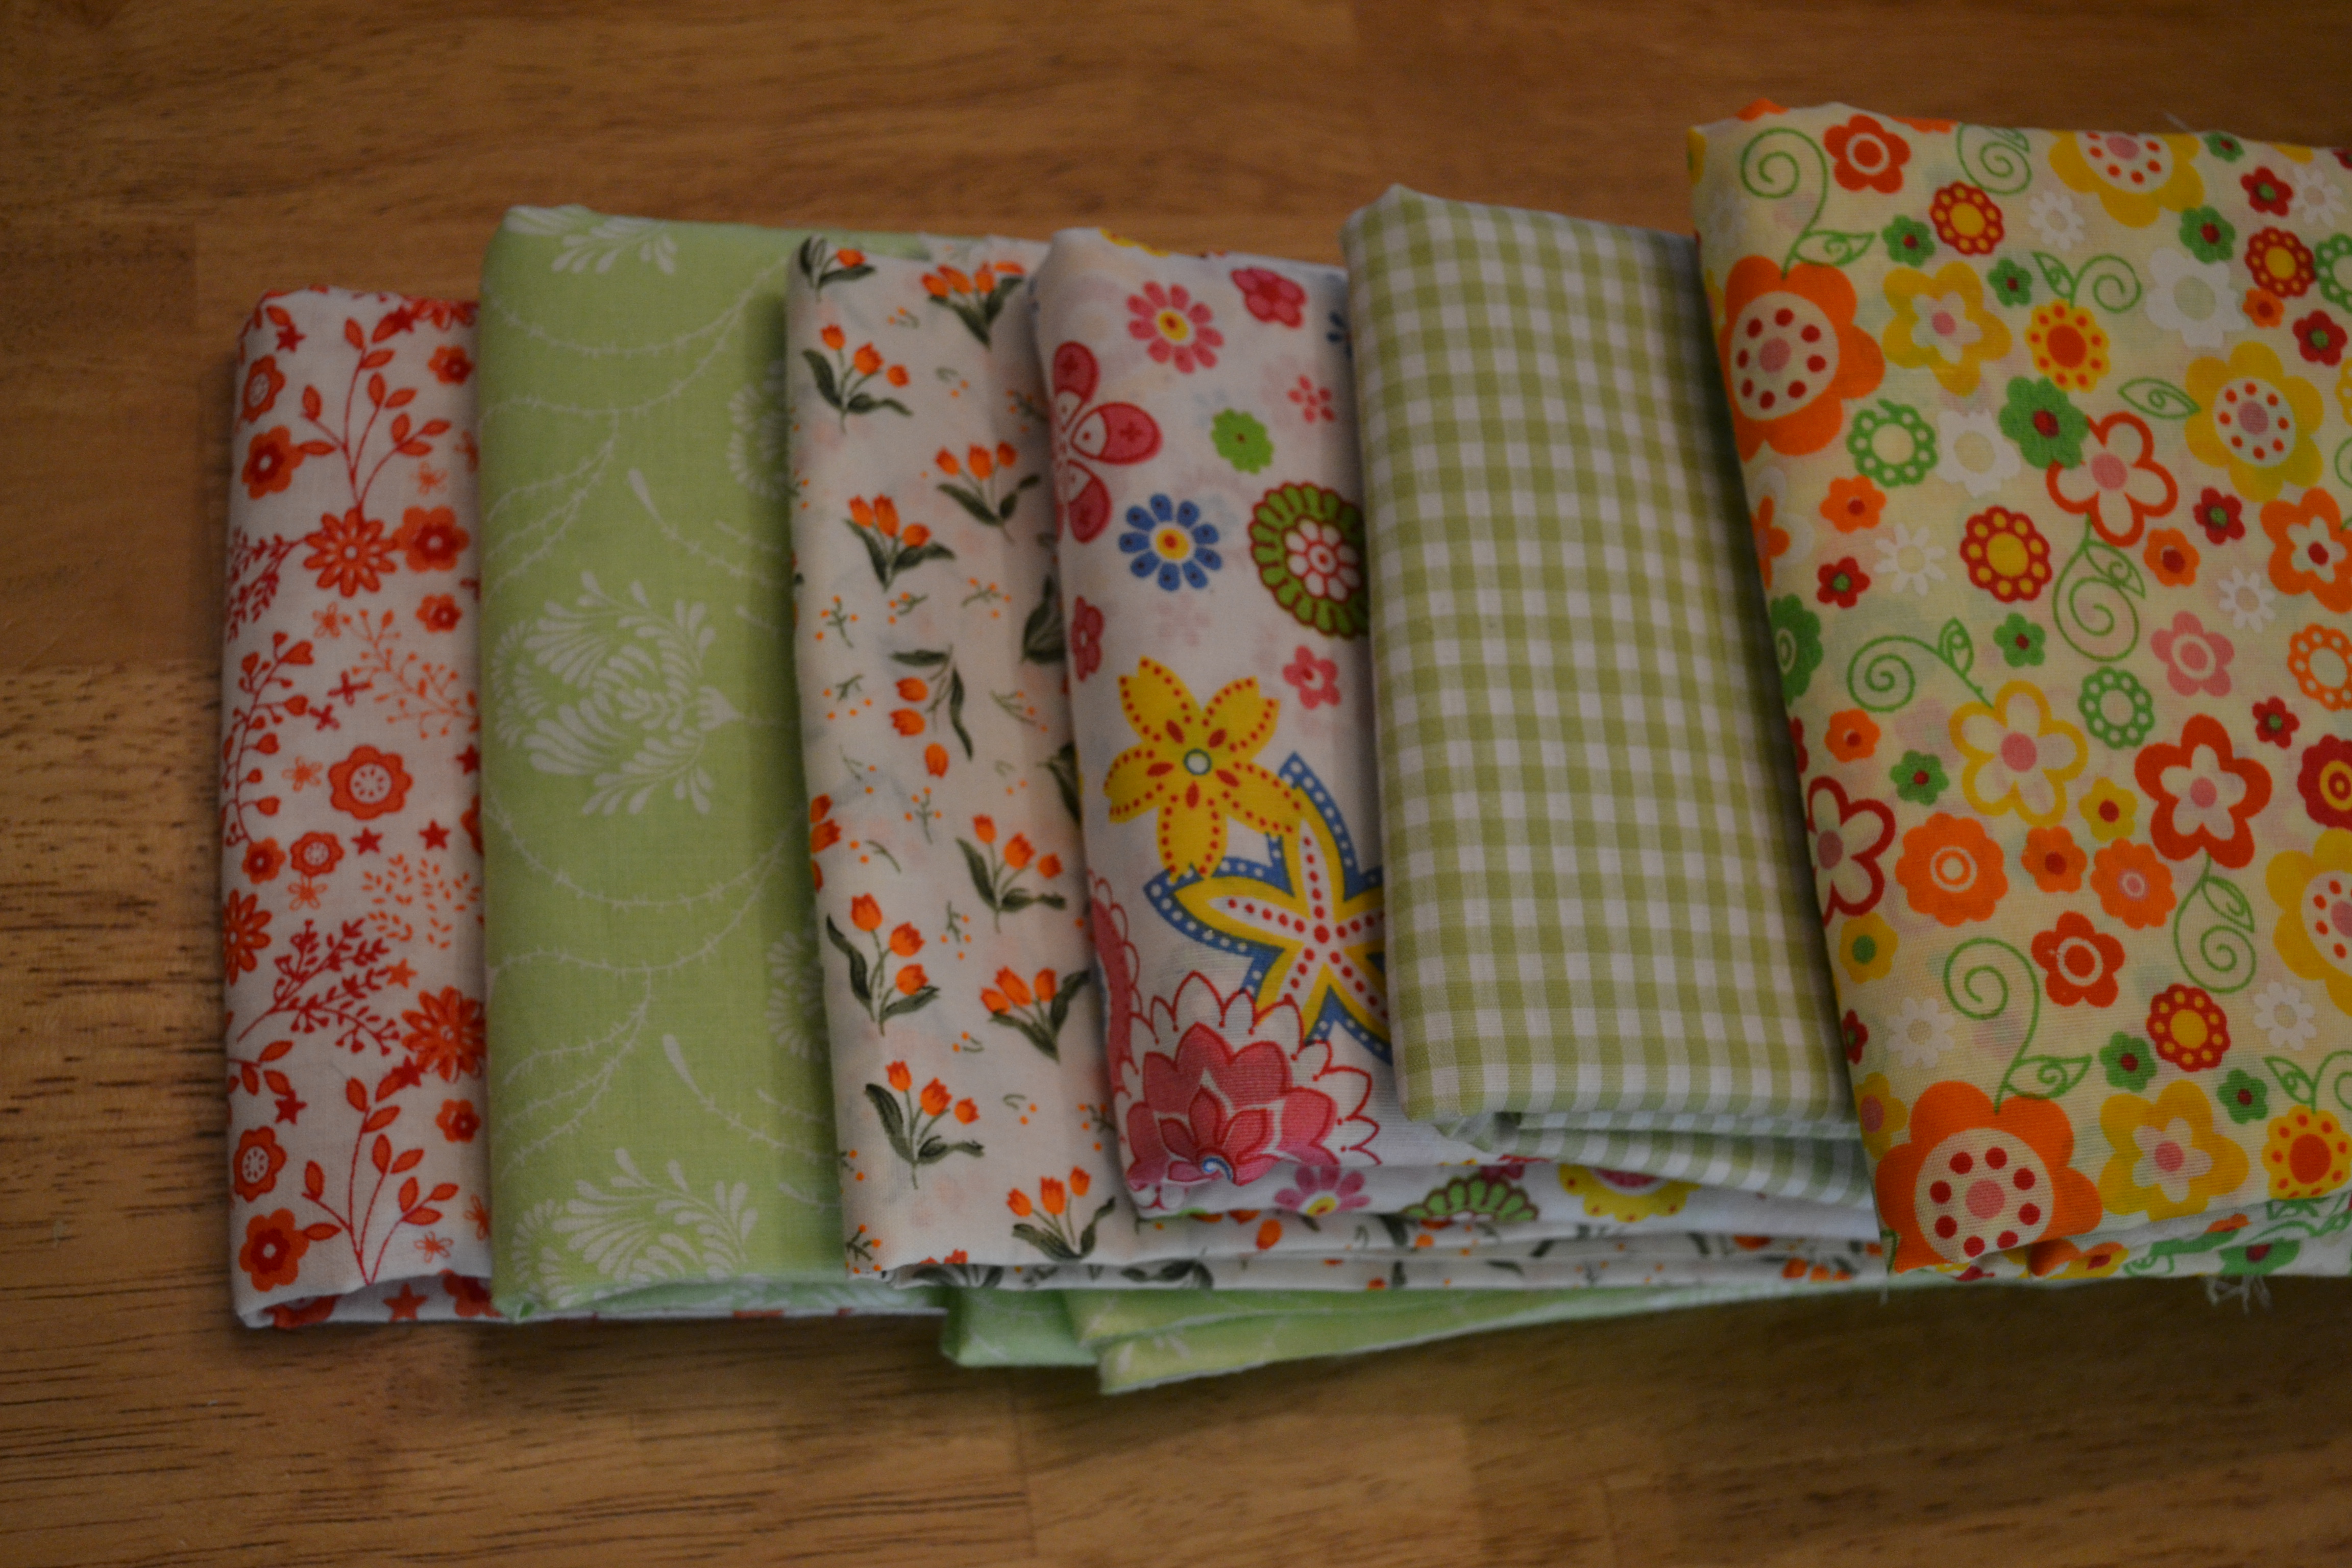
I wanted to make a Queen-size quilt, so I added some more fabrics from my stash that I thought worked well with the jelly roll.
I’ll use these for more strips, borders, and binding.

DSC_0046

They balance the brightness of the jelly roll fabrics.


DSC_0068

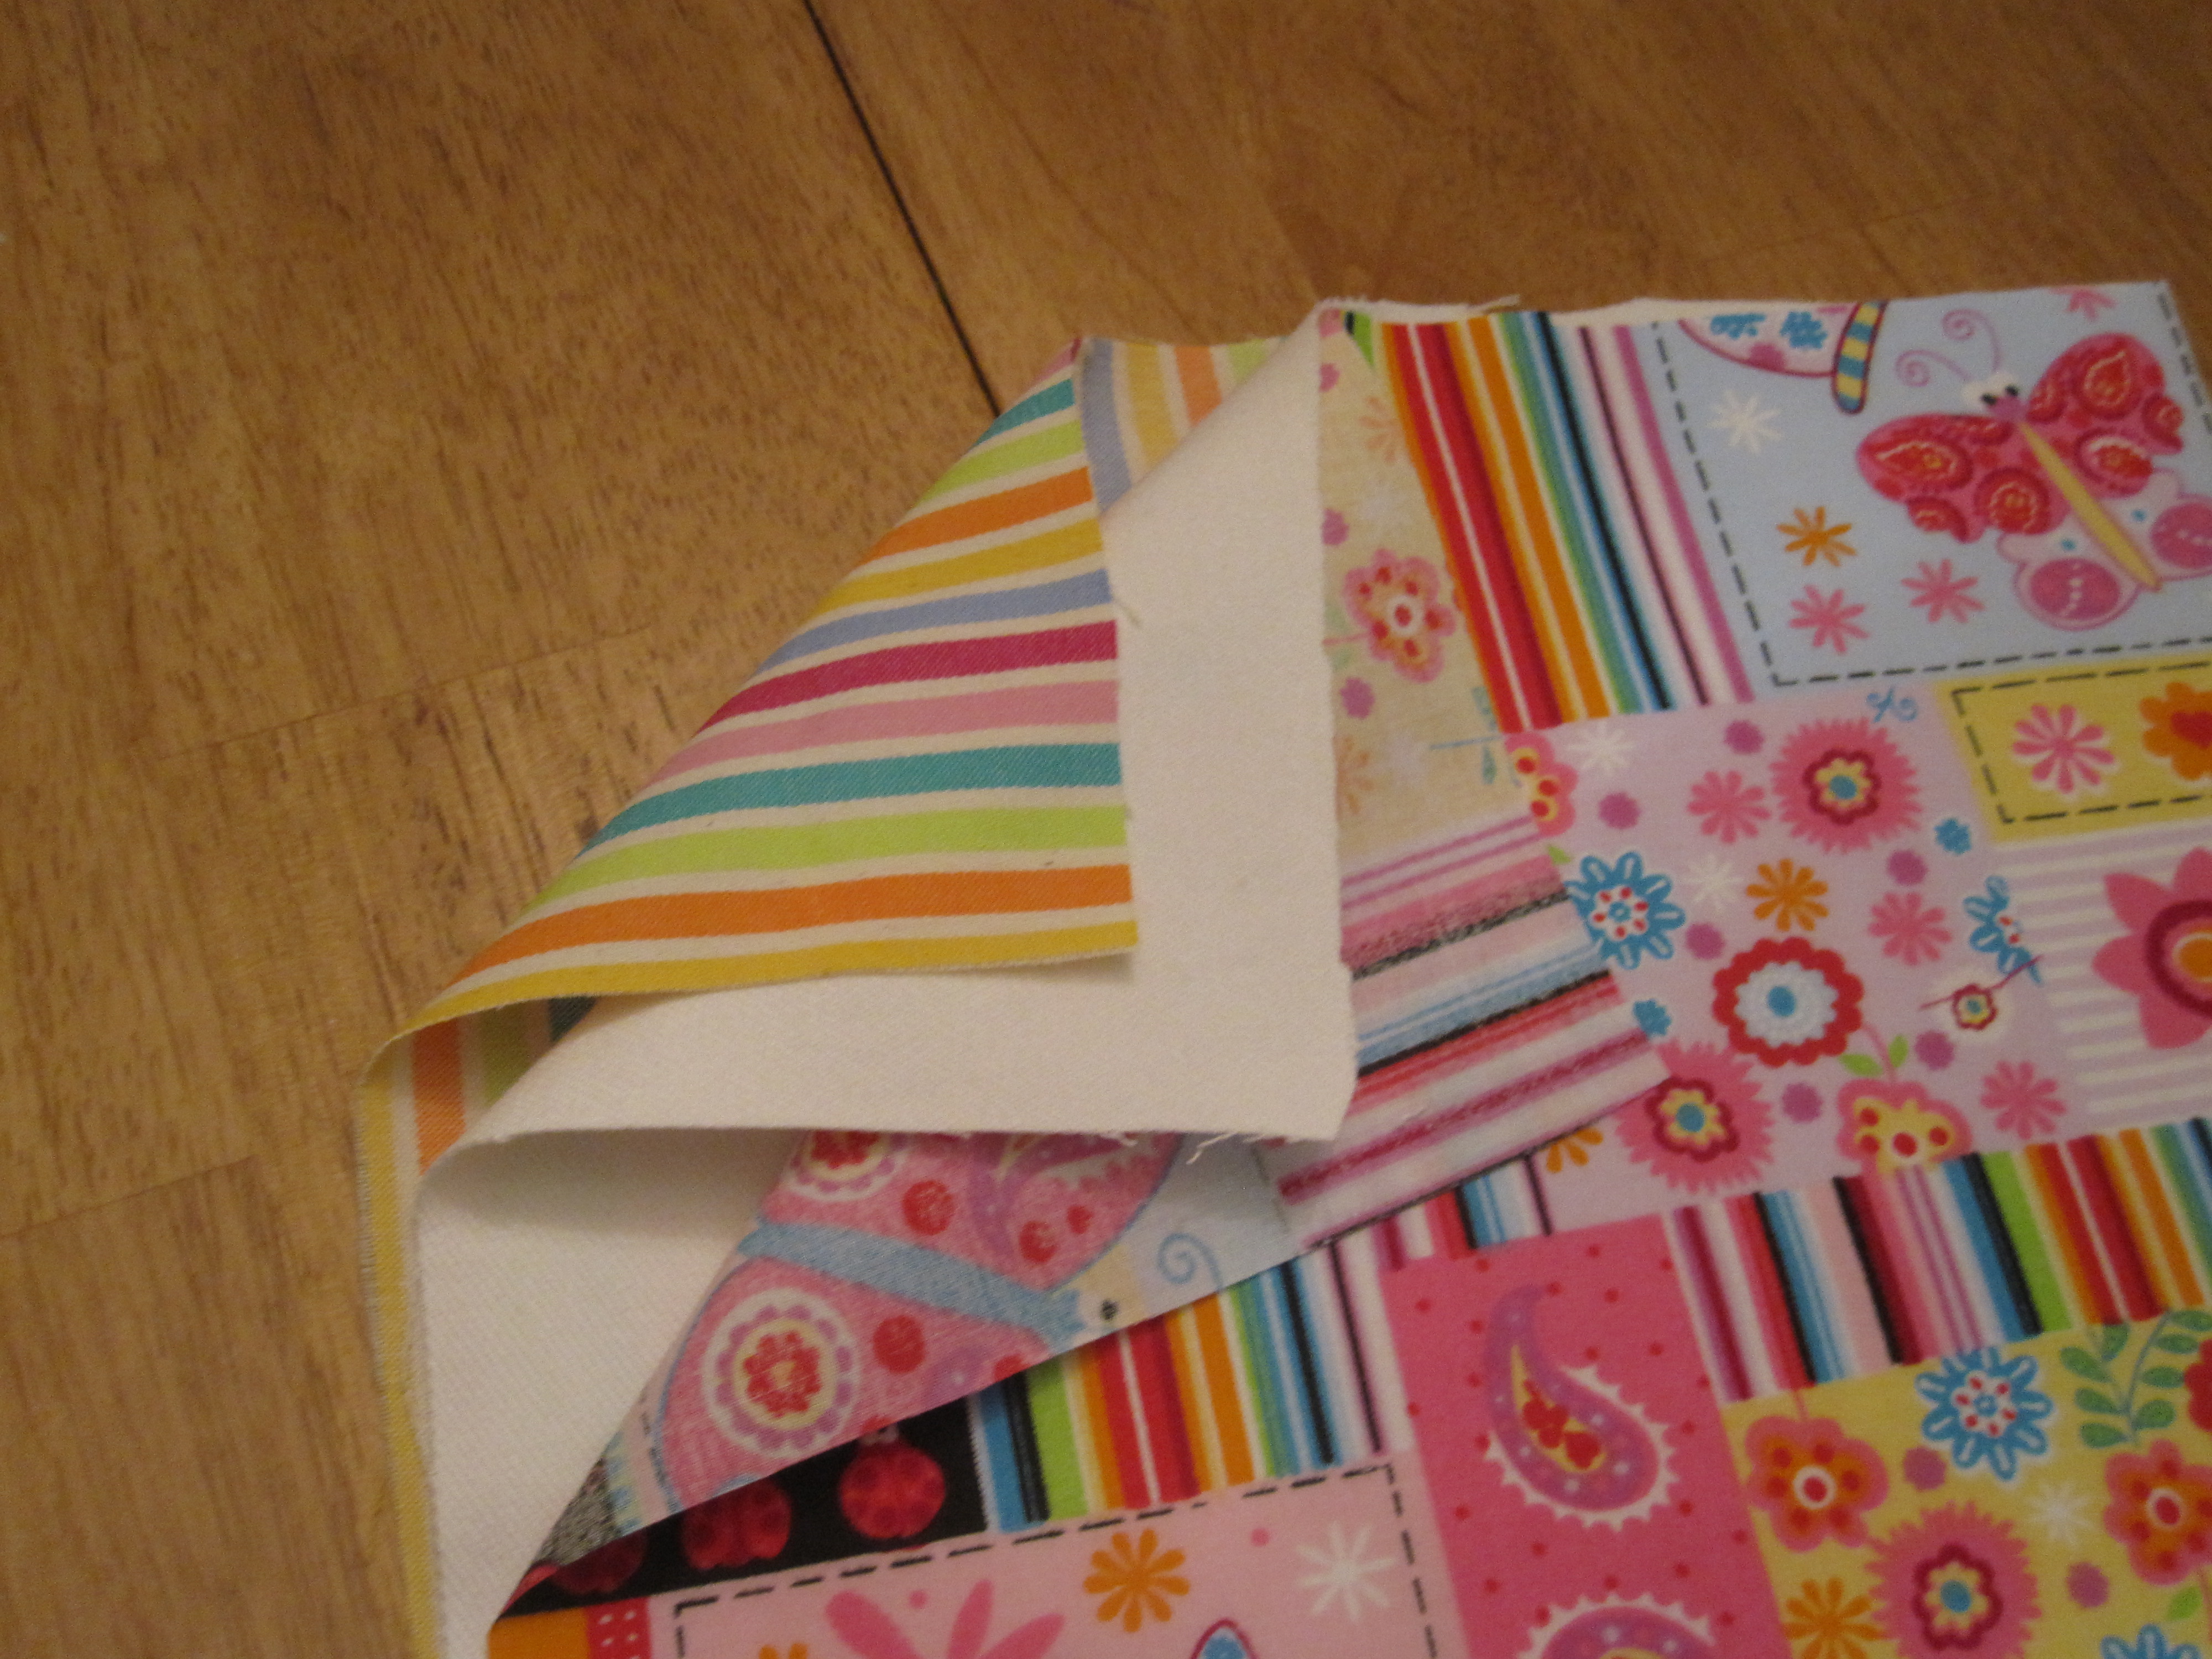
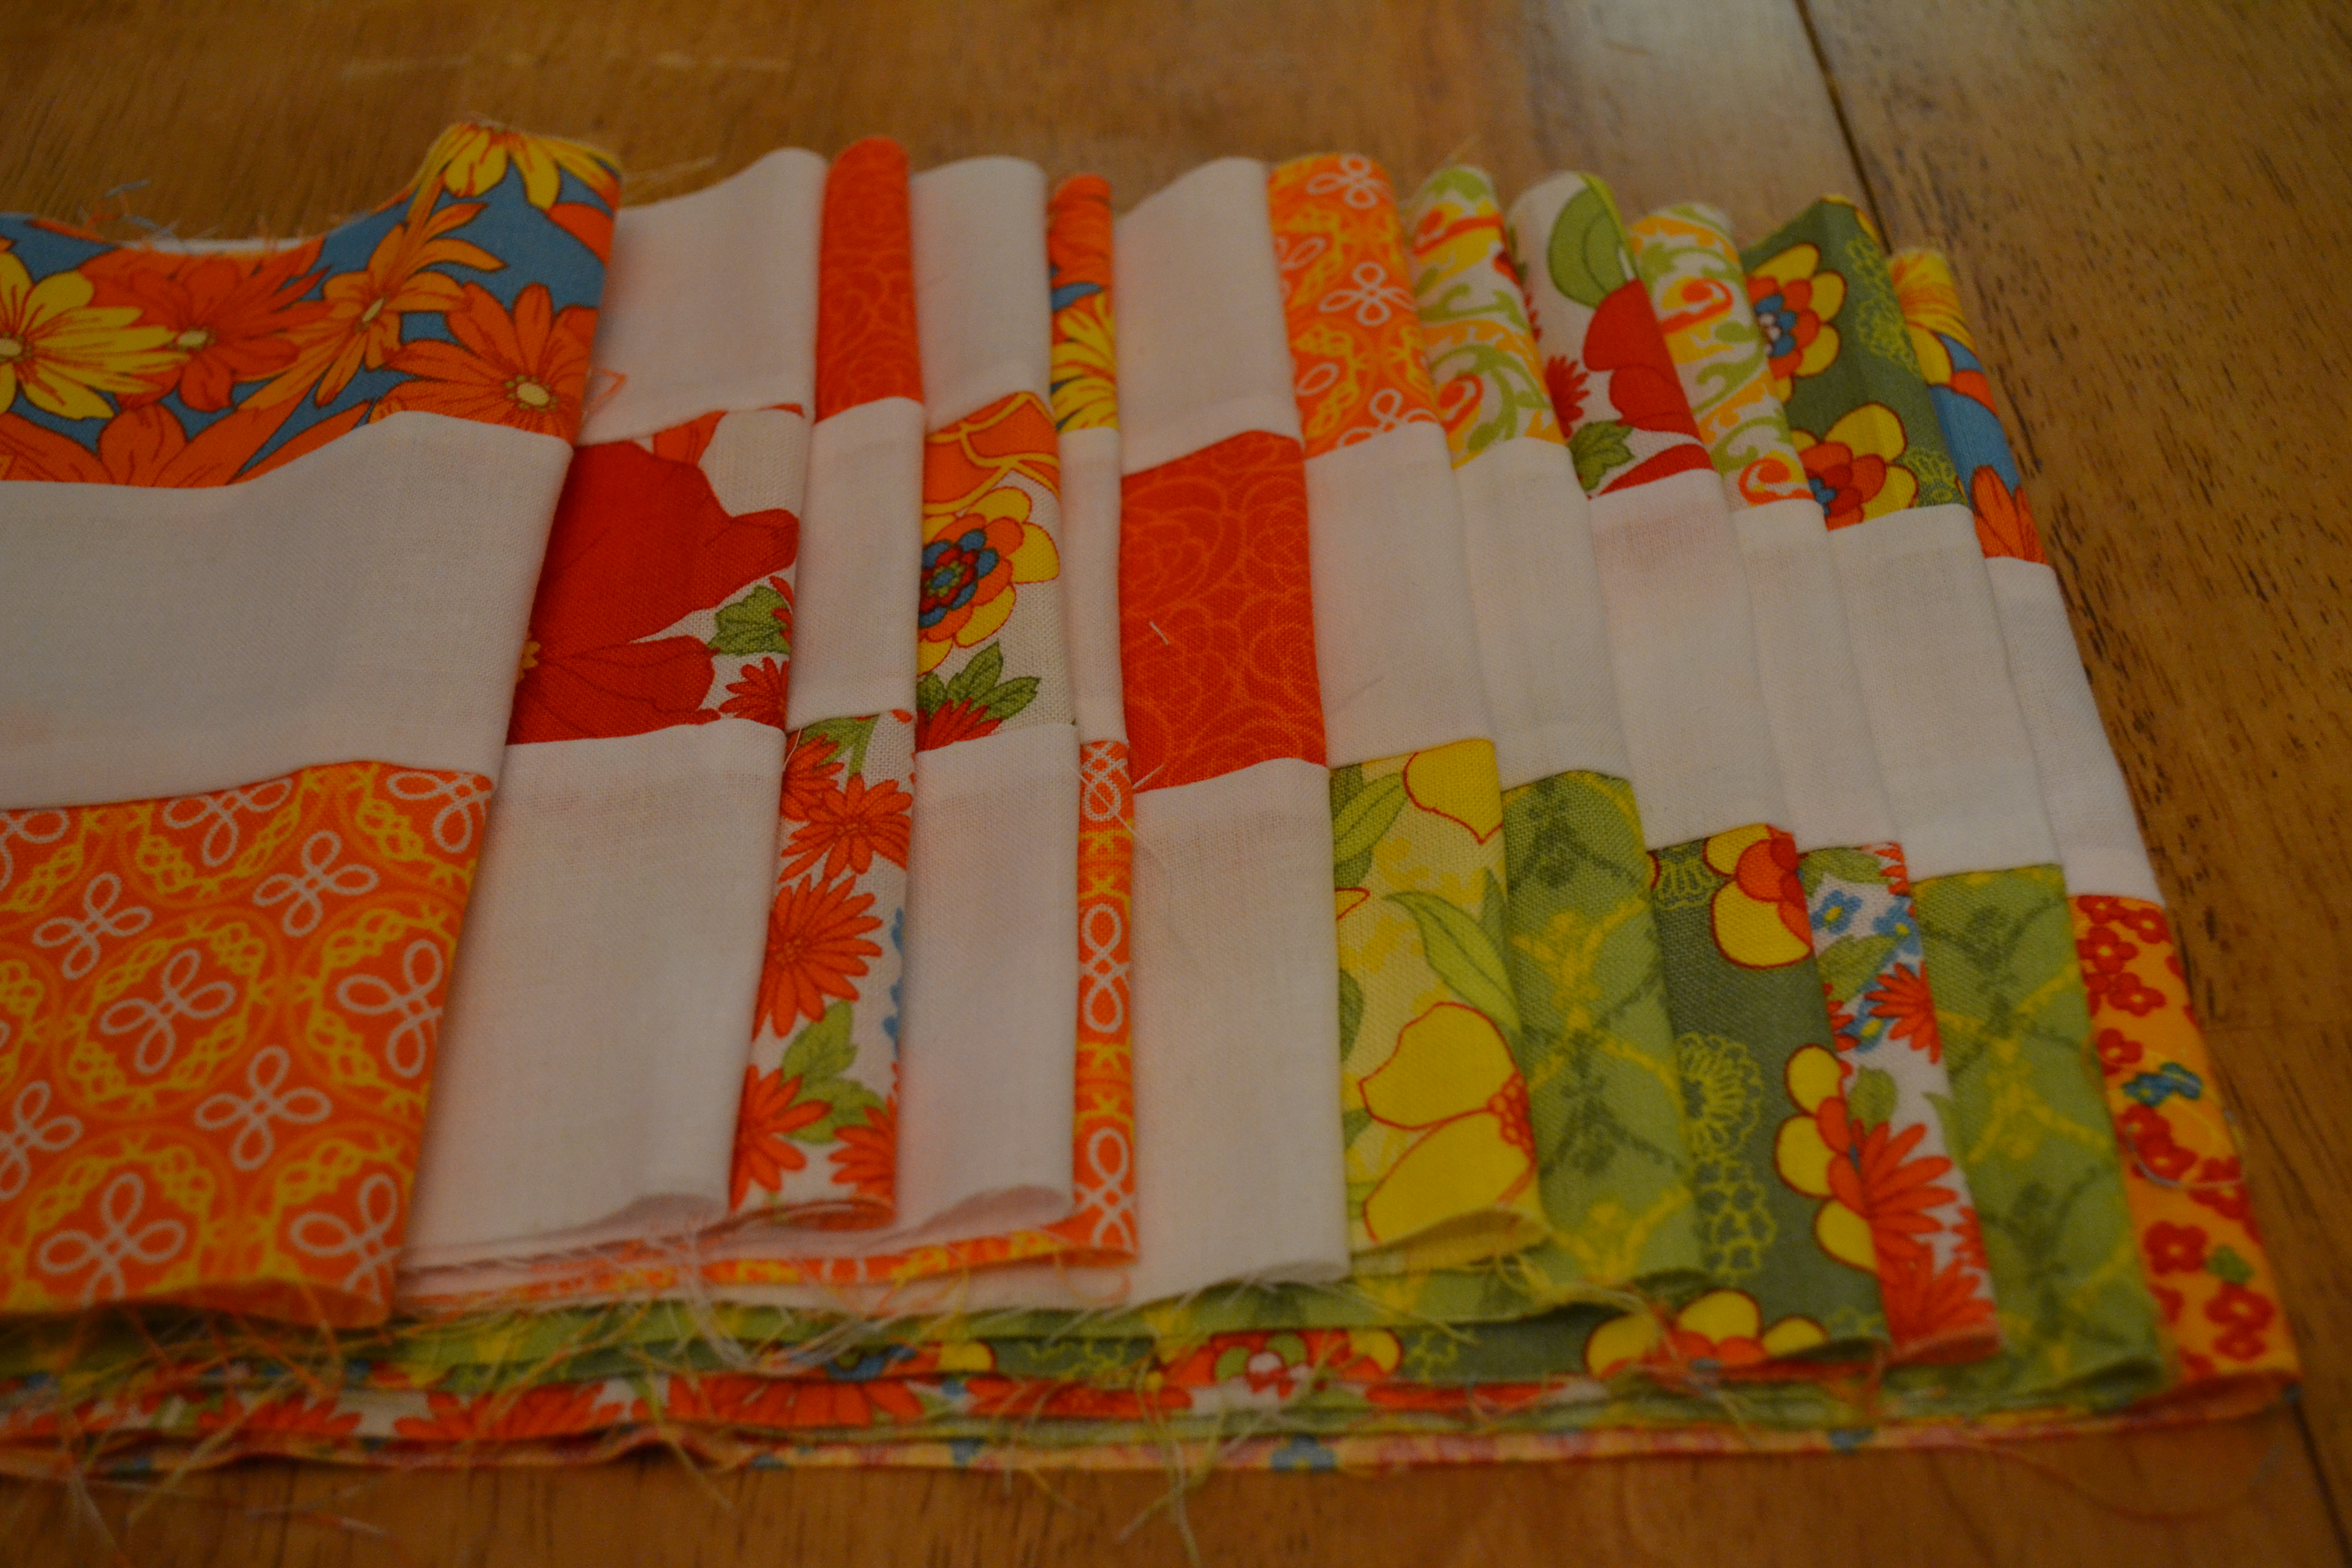
I cut some white fabric into same size strips as the jelly roll and sewed 3 strips together…

Some with the white center and prints on the top and bottom…  some with the print center and 2 whites.


DSC_0057

This goes pretty fast and soon I had a stack.


DSC_0067

It was so much fun working with these bright, colorful fabrics!

The white makes the prints look great!


DSC_0064

I then cut those strips into 2 1/2″ strips…


DSC_0064

This is what they look like when I put all the little stacks together.

Now, all I have to do is sew them together to make a Postage Stamp Quilt.  I will be working on this in the days to come…

I’ll post on the finished top as soon as I finish it.  🙂


If you’re interested in these precut fabrics, you can get them in many different places now.

Here are just a few of my favorites:

Hobby Lobby
Great store!  I always use a coupon when I go.  If you have their phone app you don’t have to worry about cutting newspaper coupons!

Missouri Star Quilt Co.
Great online store.  They have a wonderful Daily Deal special online!

Wal-Mart
The selection at the store is so much better than online!

Joann Fabrics
Limited selection but you can get a significant discount if you use a coupon. (They also have a phone app available)  I recommend you buy at the store since they don’t have much available online.

There are many other sites but these are the ones I have found to be the most economical… and of course, that’s important to us, isn’t it?!

(I am not advertising for these companies, they don’t know I exist :))


Happy Quilting!

Daisy

Read Full Post »

Quilt on a Budget

I’ve been working on this quilt on & off for a while and finally pieced it together.
It was fun!

I chose fabrics that I had in my stash, most of which I’d bought at WalMart.  I bought some extra to make sure I had enough variety.

Quilts don’t have to be expensive… the most I paid was $2 yard!


DSC_0021

It is a bright & cheery quilt with mostly yellows/blues/greens… one of my favorite combinations.

The “pattern” I chose to do is called a “Disappearing Nine Patch”.
It’s great for any skill level.


DSC_0238

I sewed the fabrics into strips of 3.  They strips measured 6 in x 45 in.


DSC_0241

I then cut the long strips into 6 in. strips, and sewed three random strips together to make a mock 9-square patch.


DSC_0242

I then cut the 9-patch block down the center, both vertically & horizontally.


DSC_0246

I put together random blocks, flipping them and trying to keep seams from meeting other seams…

Putting different fabrics together is what makes it fun.
The look I was going for was a totally random, unplanned look.


DSC_0023

Sewing the squares together and then the strips went quickly.
I enjoyed the bright fabrics.  I love blues.


DSC_0024

Here’s a closer look…


DSC_0021

Now, all I have to do is hand quilt it!
I picture evenings on the couch, while “watching” TV…


Have fun quilting,
or, if you don’t quilt,
enjoy the warmth of a cozy quilt.

Daisy

Read Full Post »

New Fabric!

I enter giveaways whenever I get the chance…but I’ve never actually won one…until recently!

I was so excited when I opened the package I received in the mail, and found a whole set of pre-cut fabric!


The fabric was all neatly folded…


I like the variety of colors.  I would never have chosen these colors to go together but somehow they look pretty nice.


I just love new fabric! My imagination starts picturing possibilities…


I can hardly wait to get started.  I’m in the middle of a big sewing project now and also have several quilts in the piecing process, but I definitely want to work on this one soon!

Thanks to Bistro Quilts for their generous giveaway!!  If you’d like to check out their blog, it’s BistroQuilts.com

Happy sewing!

Daisy

Read Full Post »

Journaling is so popular now, with so many different types of notebooks and even mixed media journals (I’m working on one now, and it’s so much fun!).  I thought I’d make my friend a cover for her personal Journal so she could take it with her on her many trips.  I had fun making it and she loved it.  Here’s what it looked like on the outside:

Okay, I’m blessed to have a Dad that’s an upholsterer and he gives me all kinds of fabric remnants, along with trims, tassels, and other left-overs.  I know! That’s pretty nice!!


This is what the inside looks like.  The gold quilted fabric is silk (SO nice!) and feels so soft and smooth, while the white & gold/yellow fabric has some texture to it and feels equally nice.  I sewed pockets on the “flaps” so she could put in a note pad and a pen or pencil.  I also sewed in a ribbon at the top center  so she could mark the spot in her journal and just open right up to it.  (I really like that little detail when I’m journaling).


I tucked in a lacy bookmark I made her and a pen.  Tucking in the journal or notebook of your choice is easy and quick.


I sewed a ribbon on the side back in the center so I could wrap it around the nice button sewn on the outside.  It keeps the journal secure while looking feminine and pretty as well.


Here’s another Journal cover I made for a friend:


I thought she would like the fabric.  This journal was made the same as the other, just a bit smaller. Here’s the inside:

Once again I sewed pockets for a notepad & pen, highlighter;  added the ribbon on center top for a marker, and a ribbon on side back for closure.


The button looks real fancy but I bought it at Wal-Mart very inexpensively.  I had purchased both these buttons for other projects but they went so well with these fabrics that I decided to go ahead and use them for these Journal covers.

It’s great when you can both give gifts that you know they’re going to love as well as have fun making them.

Happy Sewing! 🙂
Daisy 

Read Full Post »

« Newer Posts