Feeds:
Posts
Comments

Archive for the ‘Gifts’ Category

I love making things for my grand kids!  The tiny pieces and fabrics are so much fun to work with!

.


.

.

My daughter gave me this magazine about two years ago.  I’ve looked through it countless times, dreaming planning which projects I was going to make, with what fabric, and for whom.


.

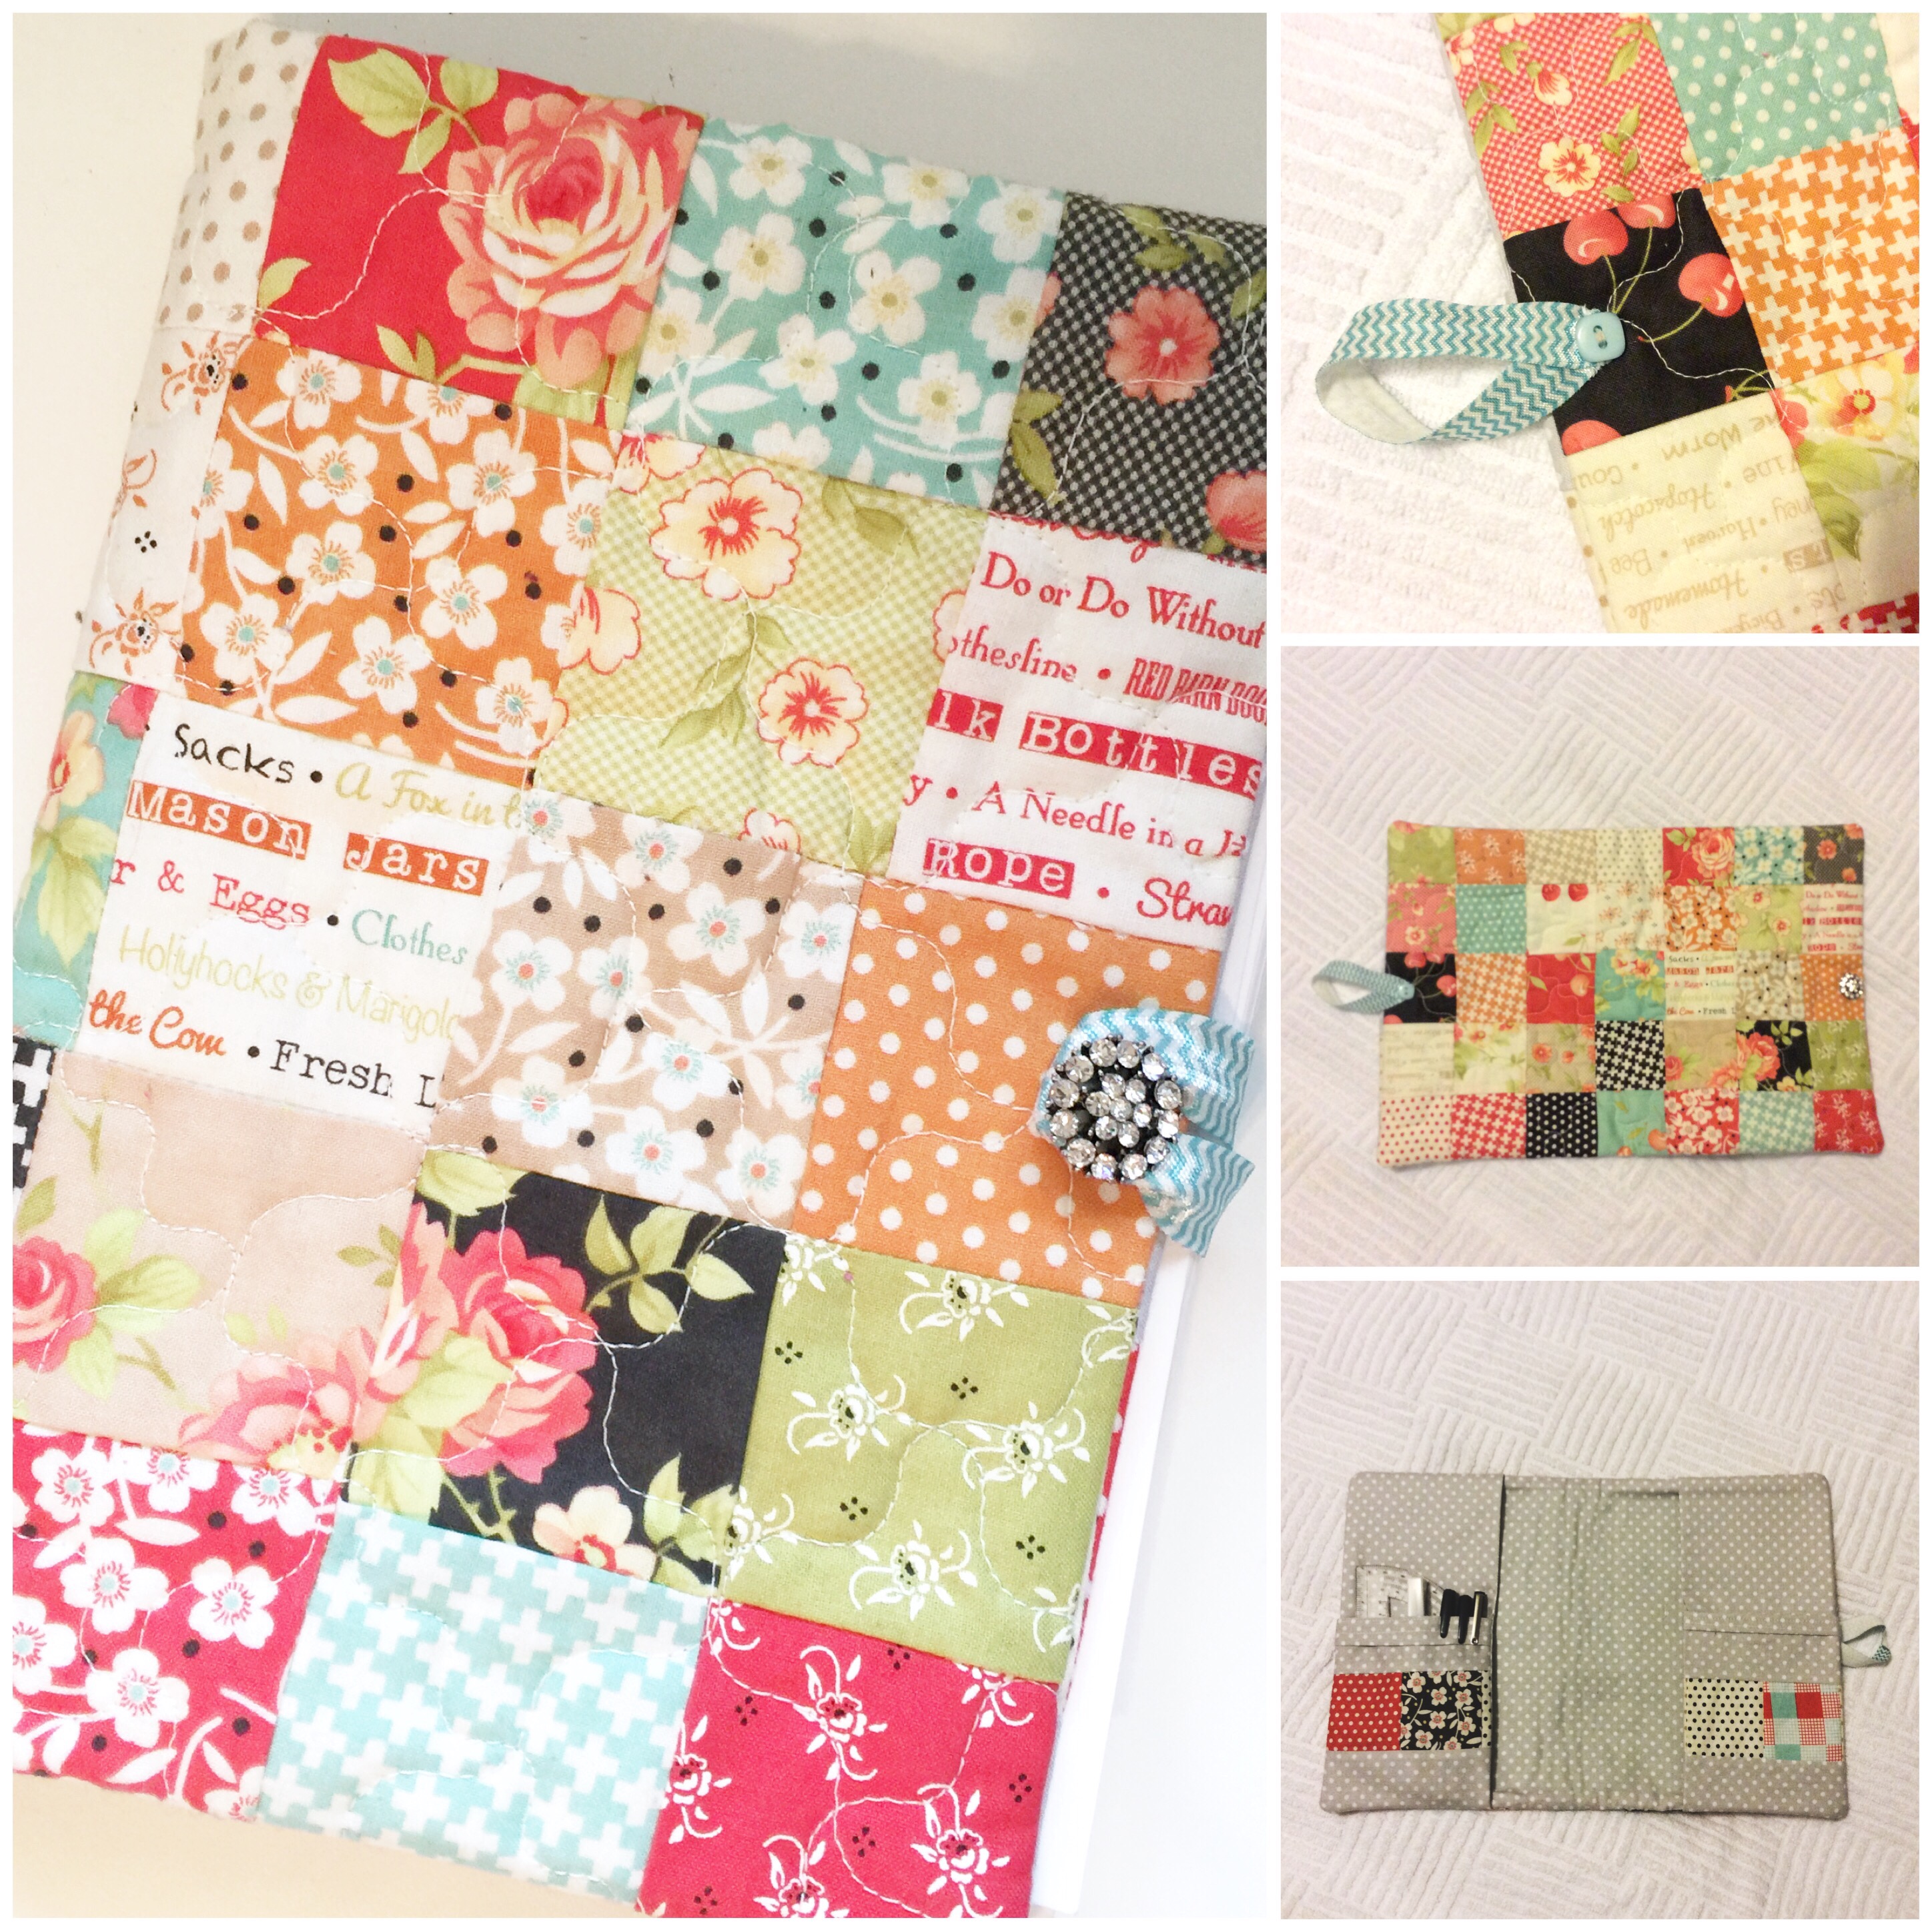
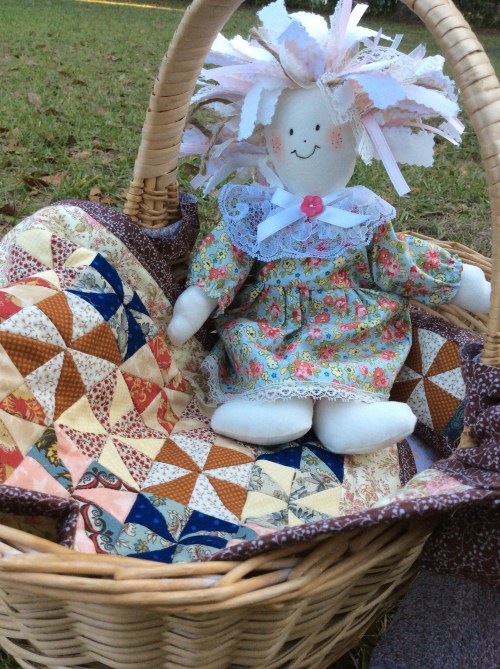
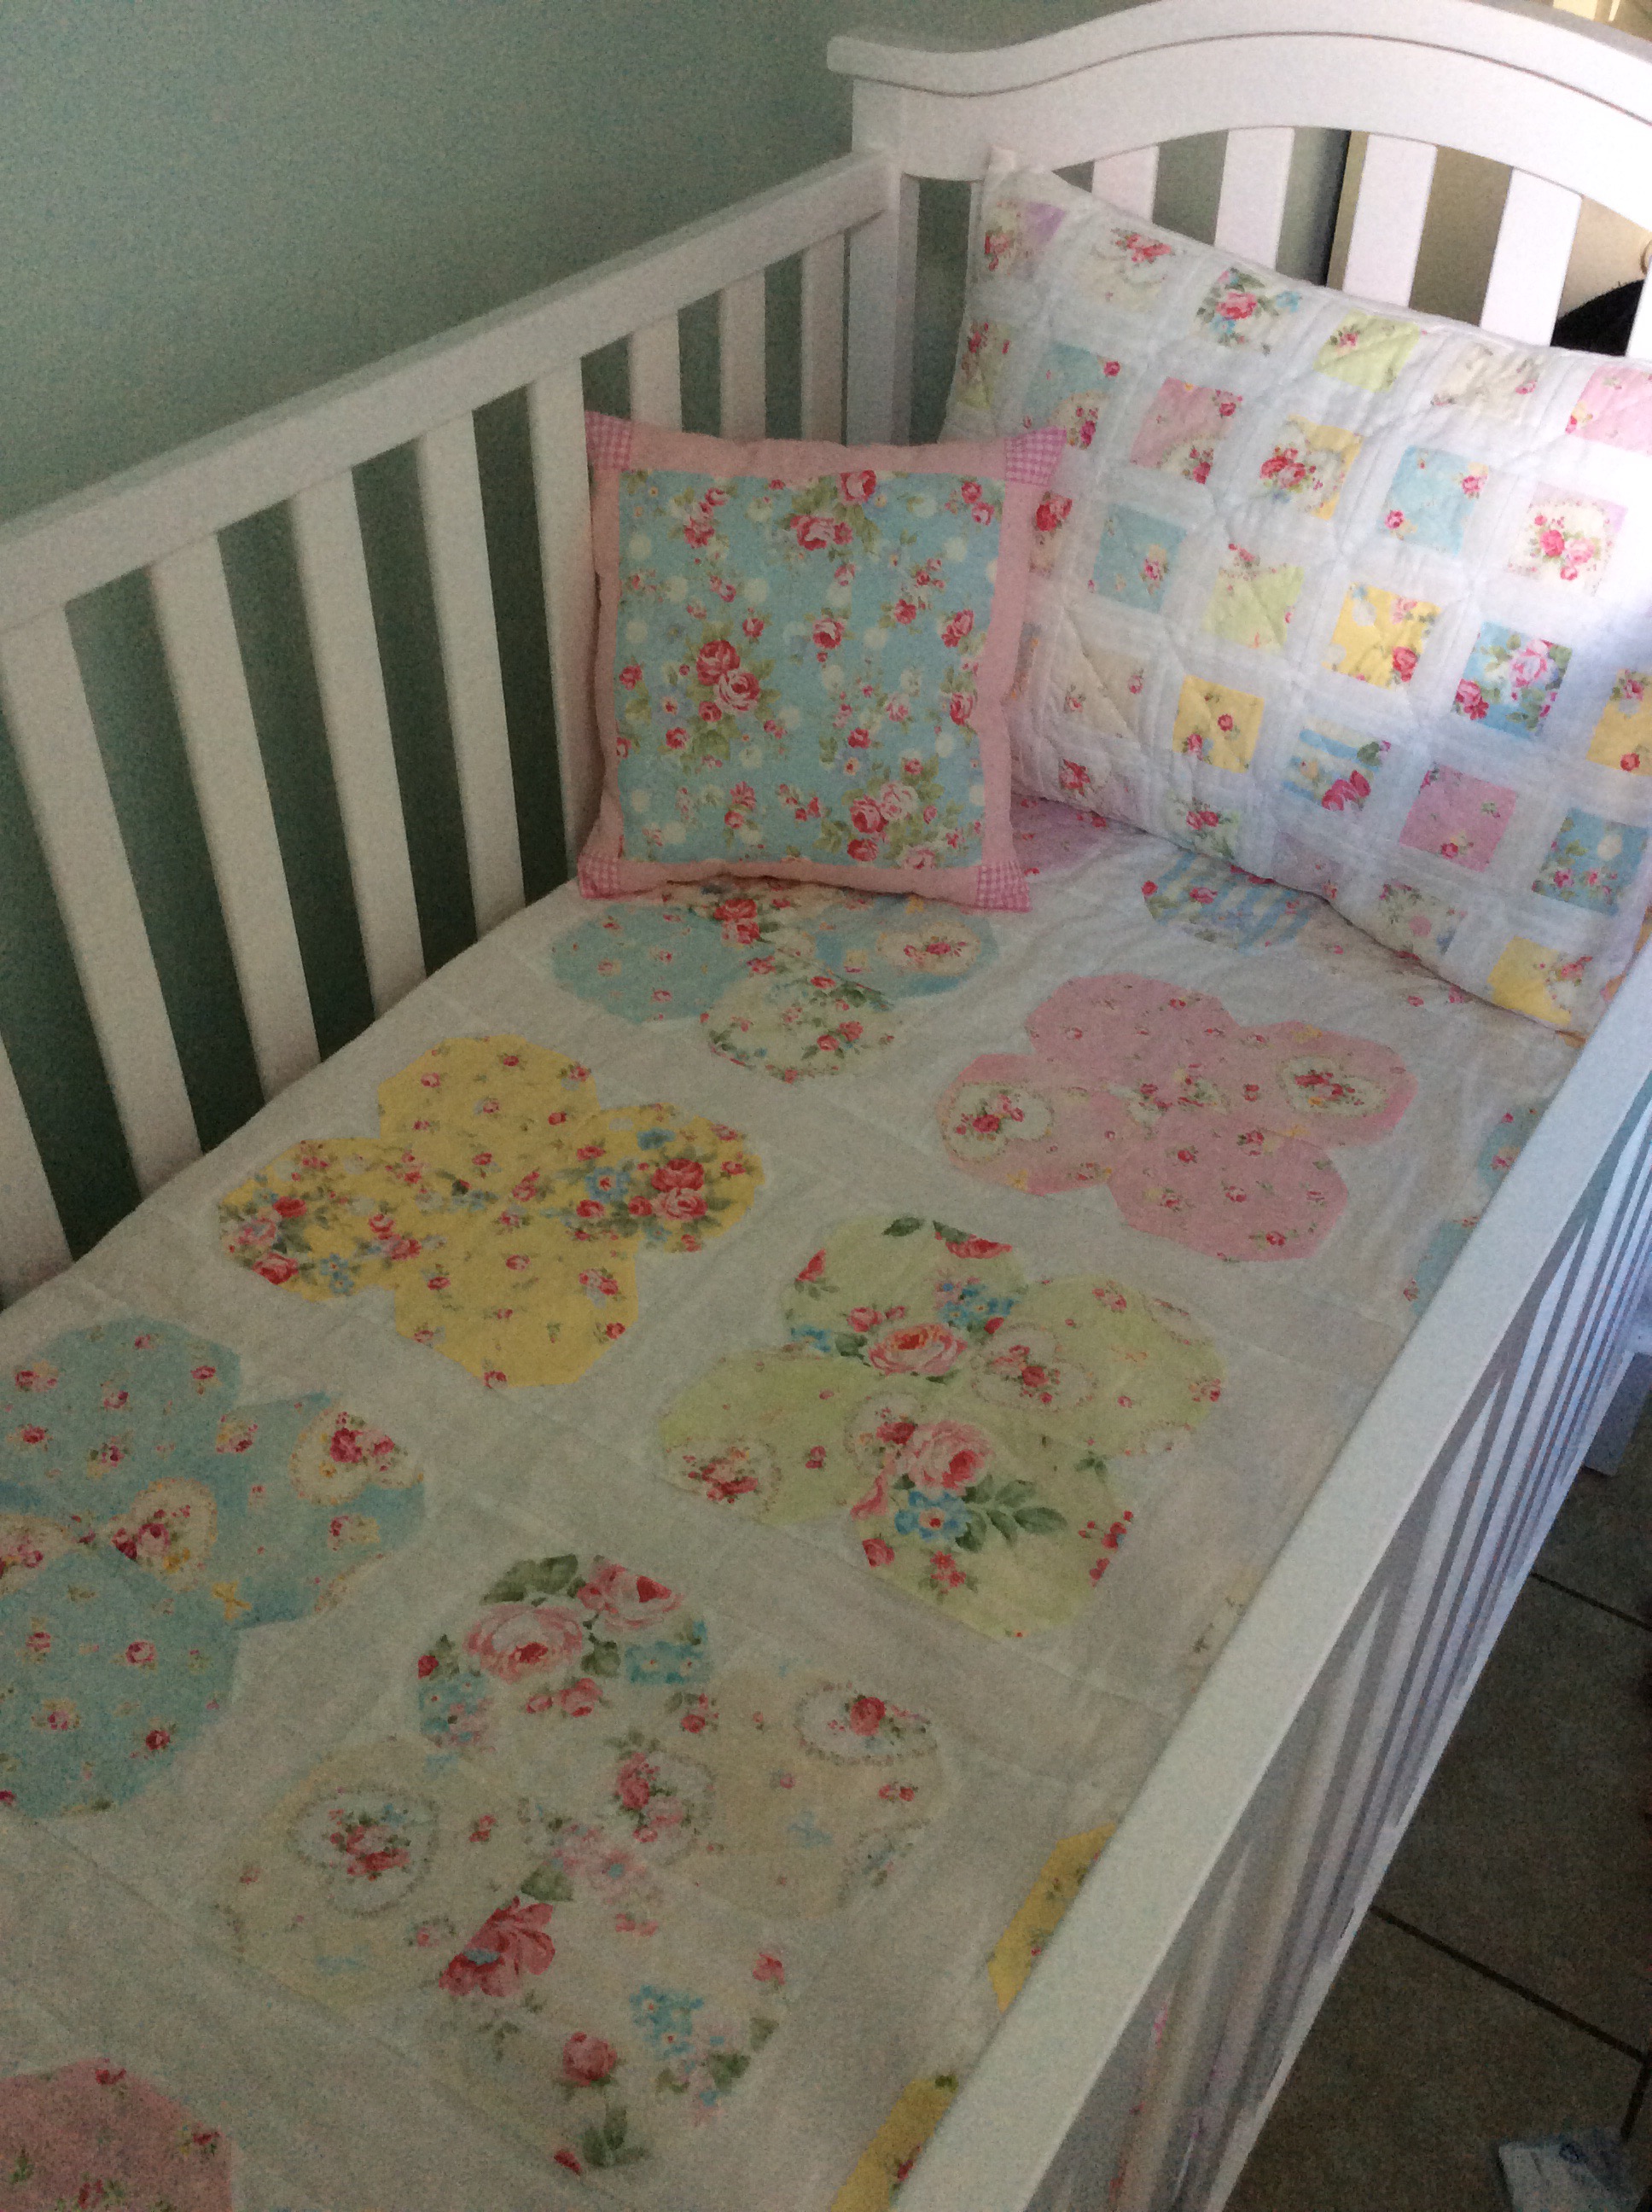
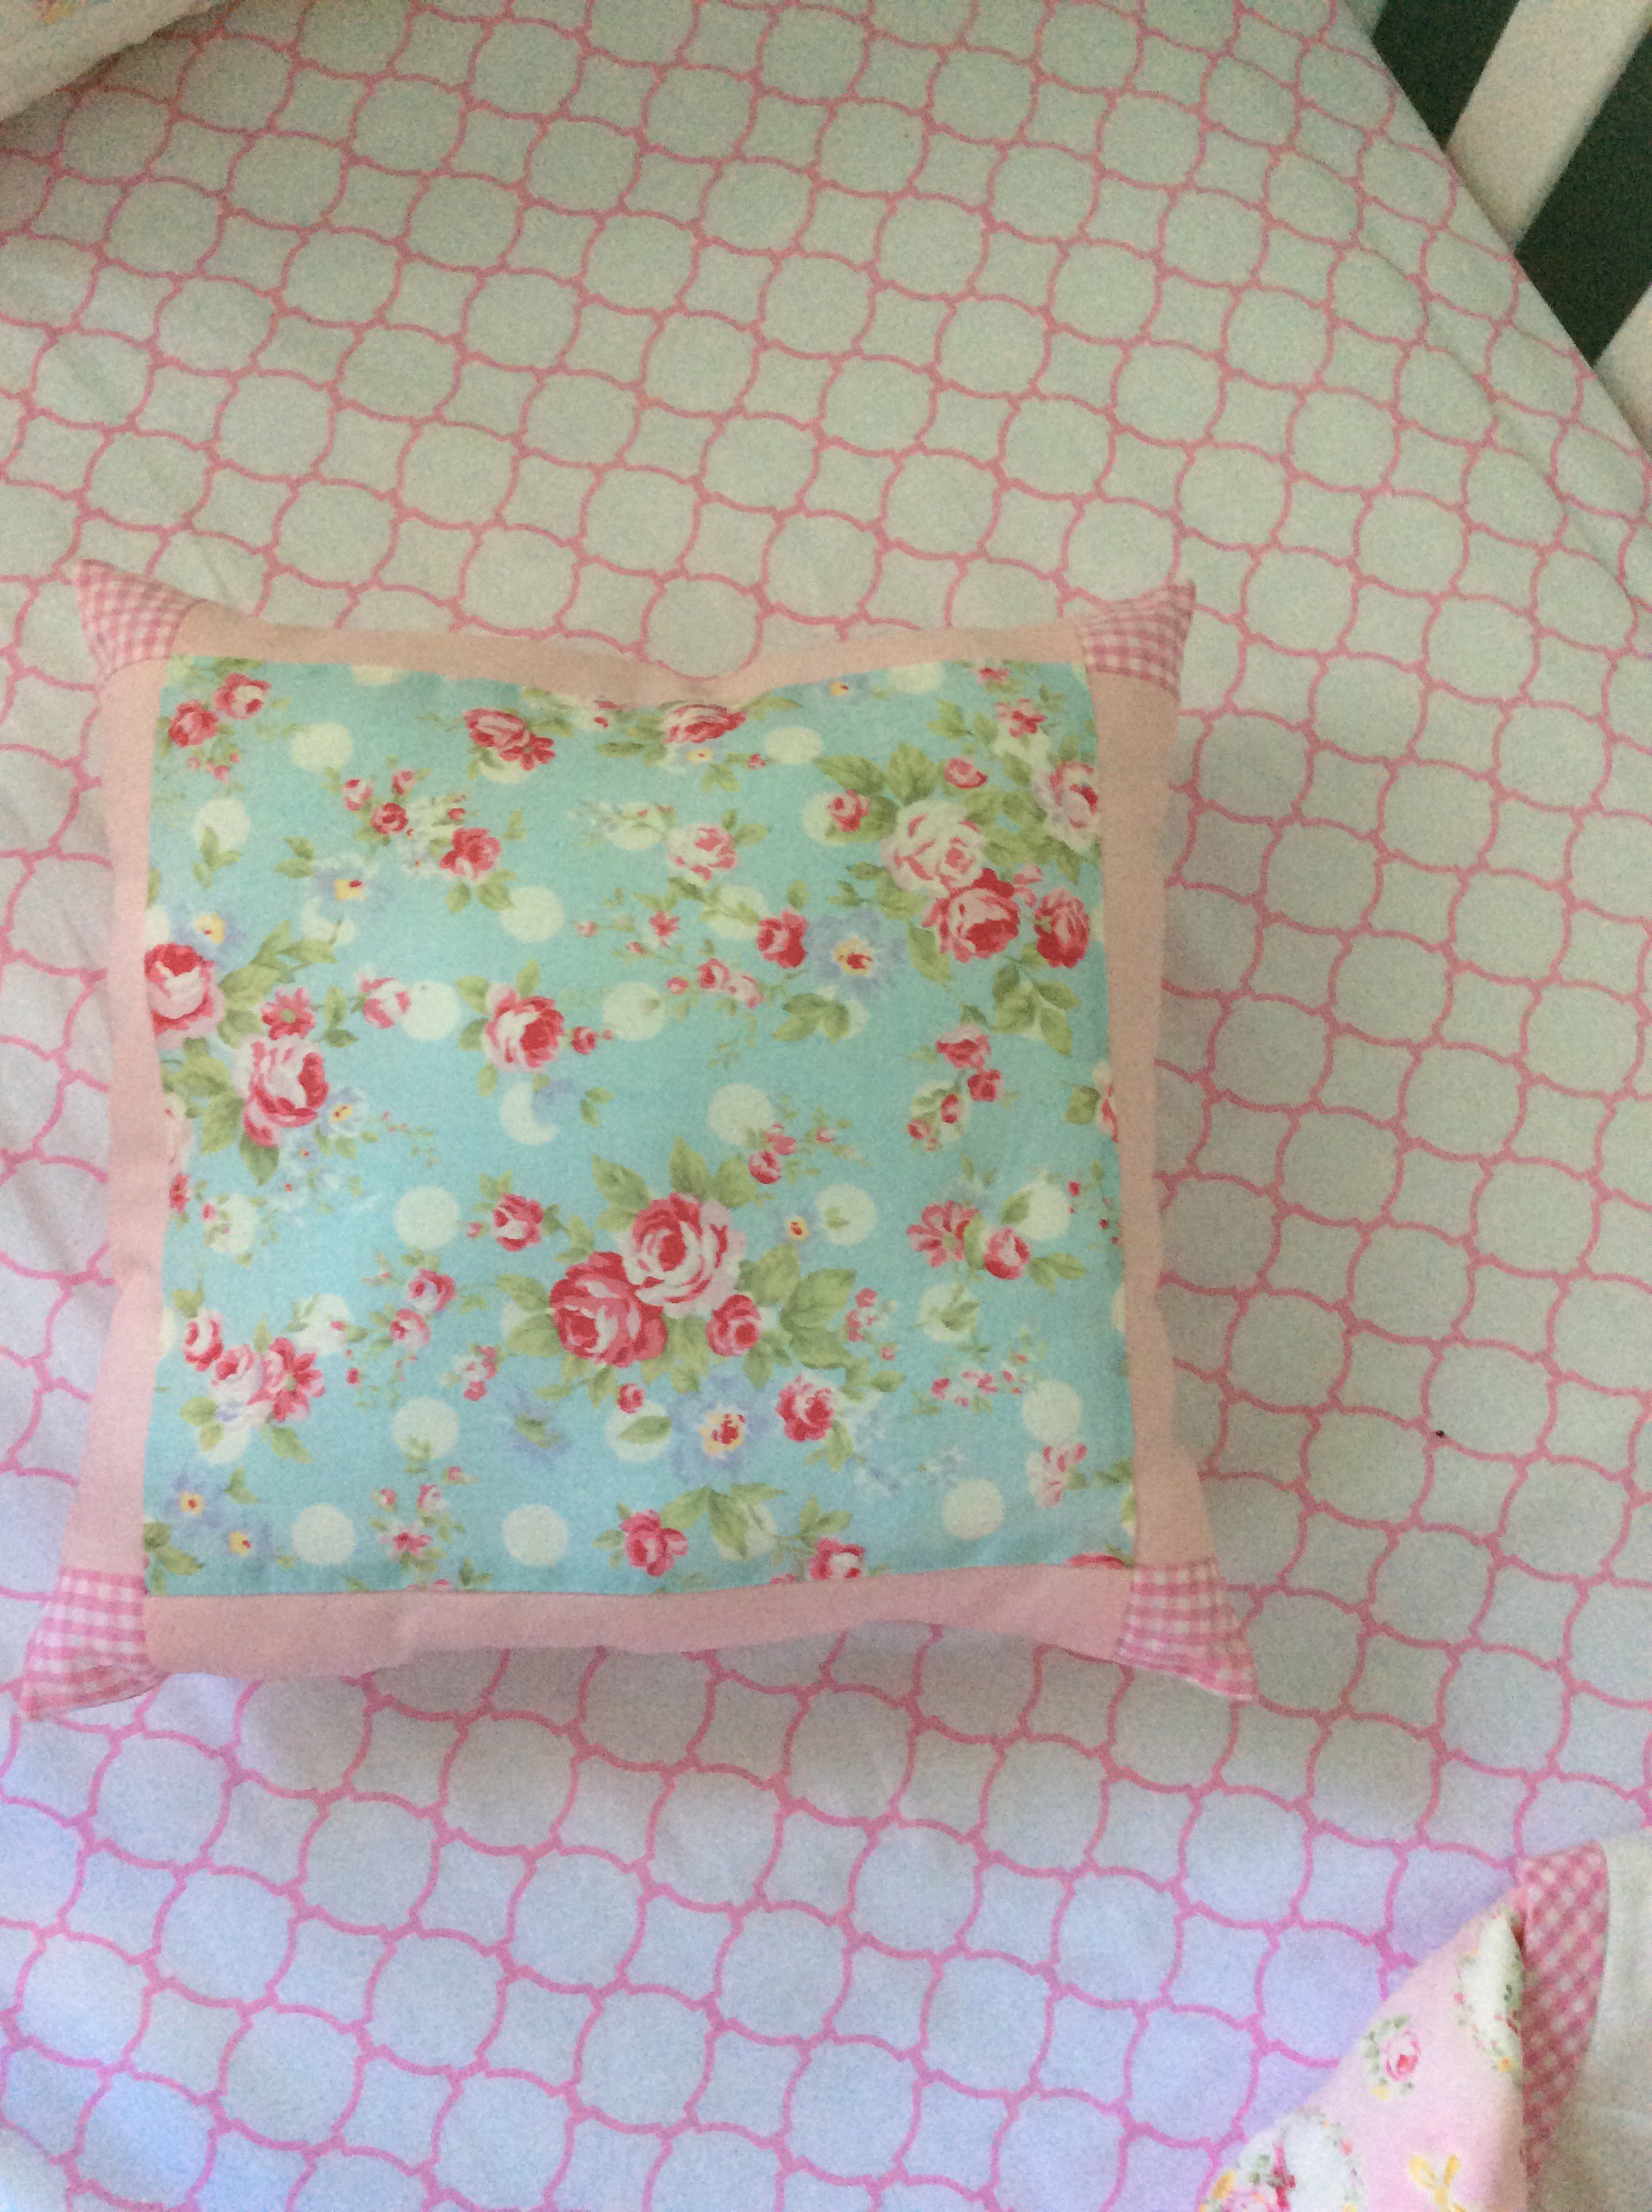
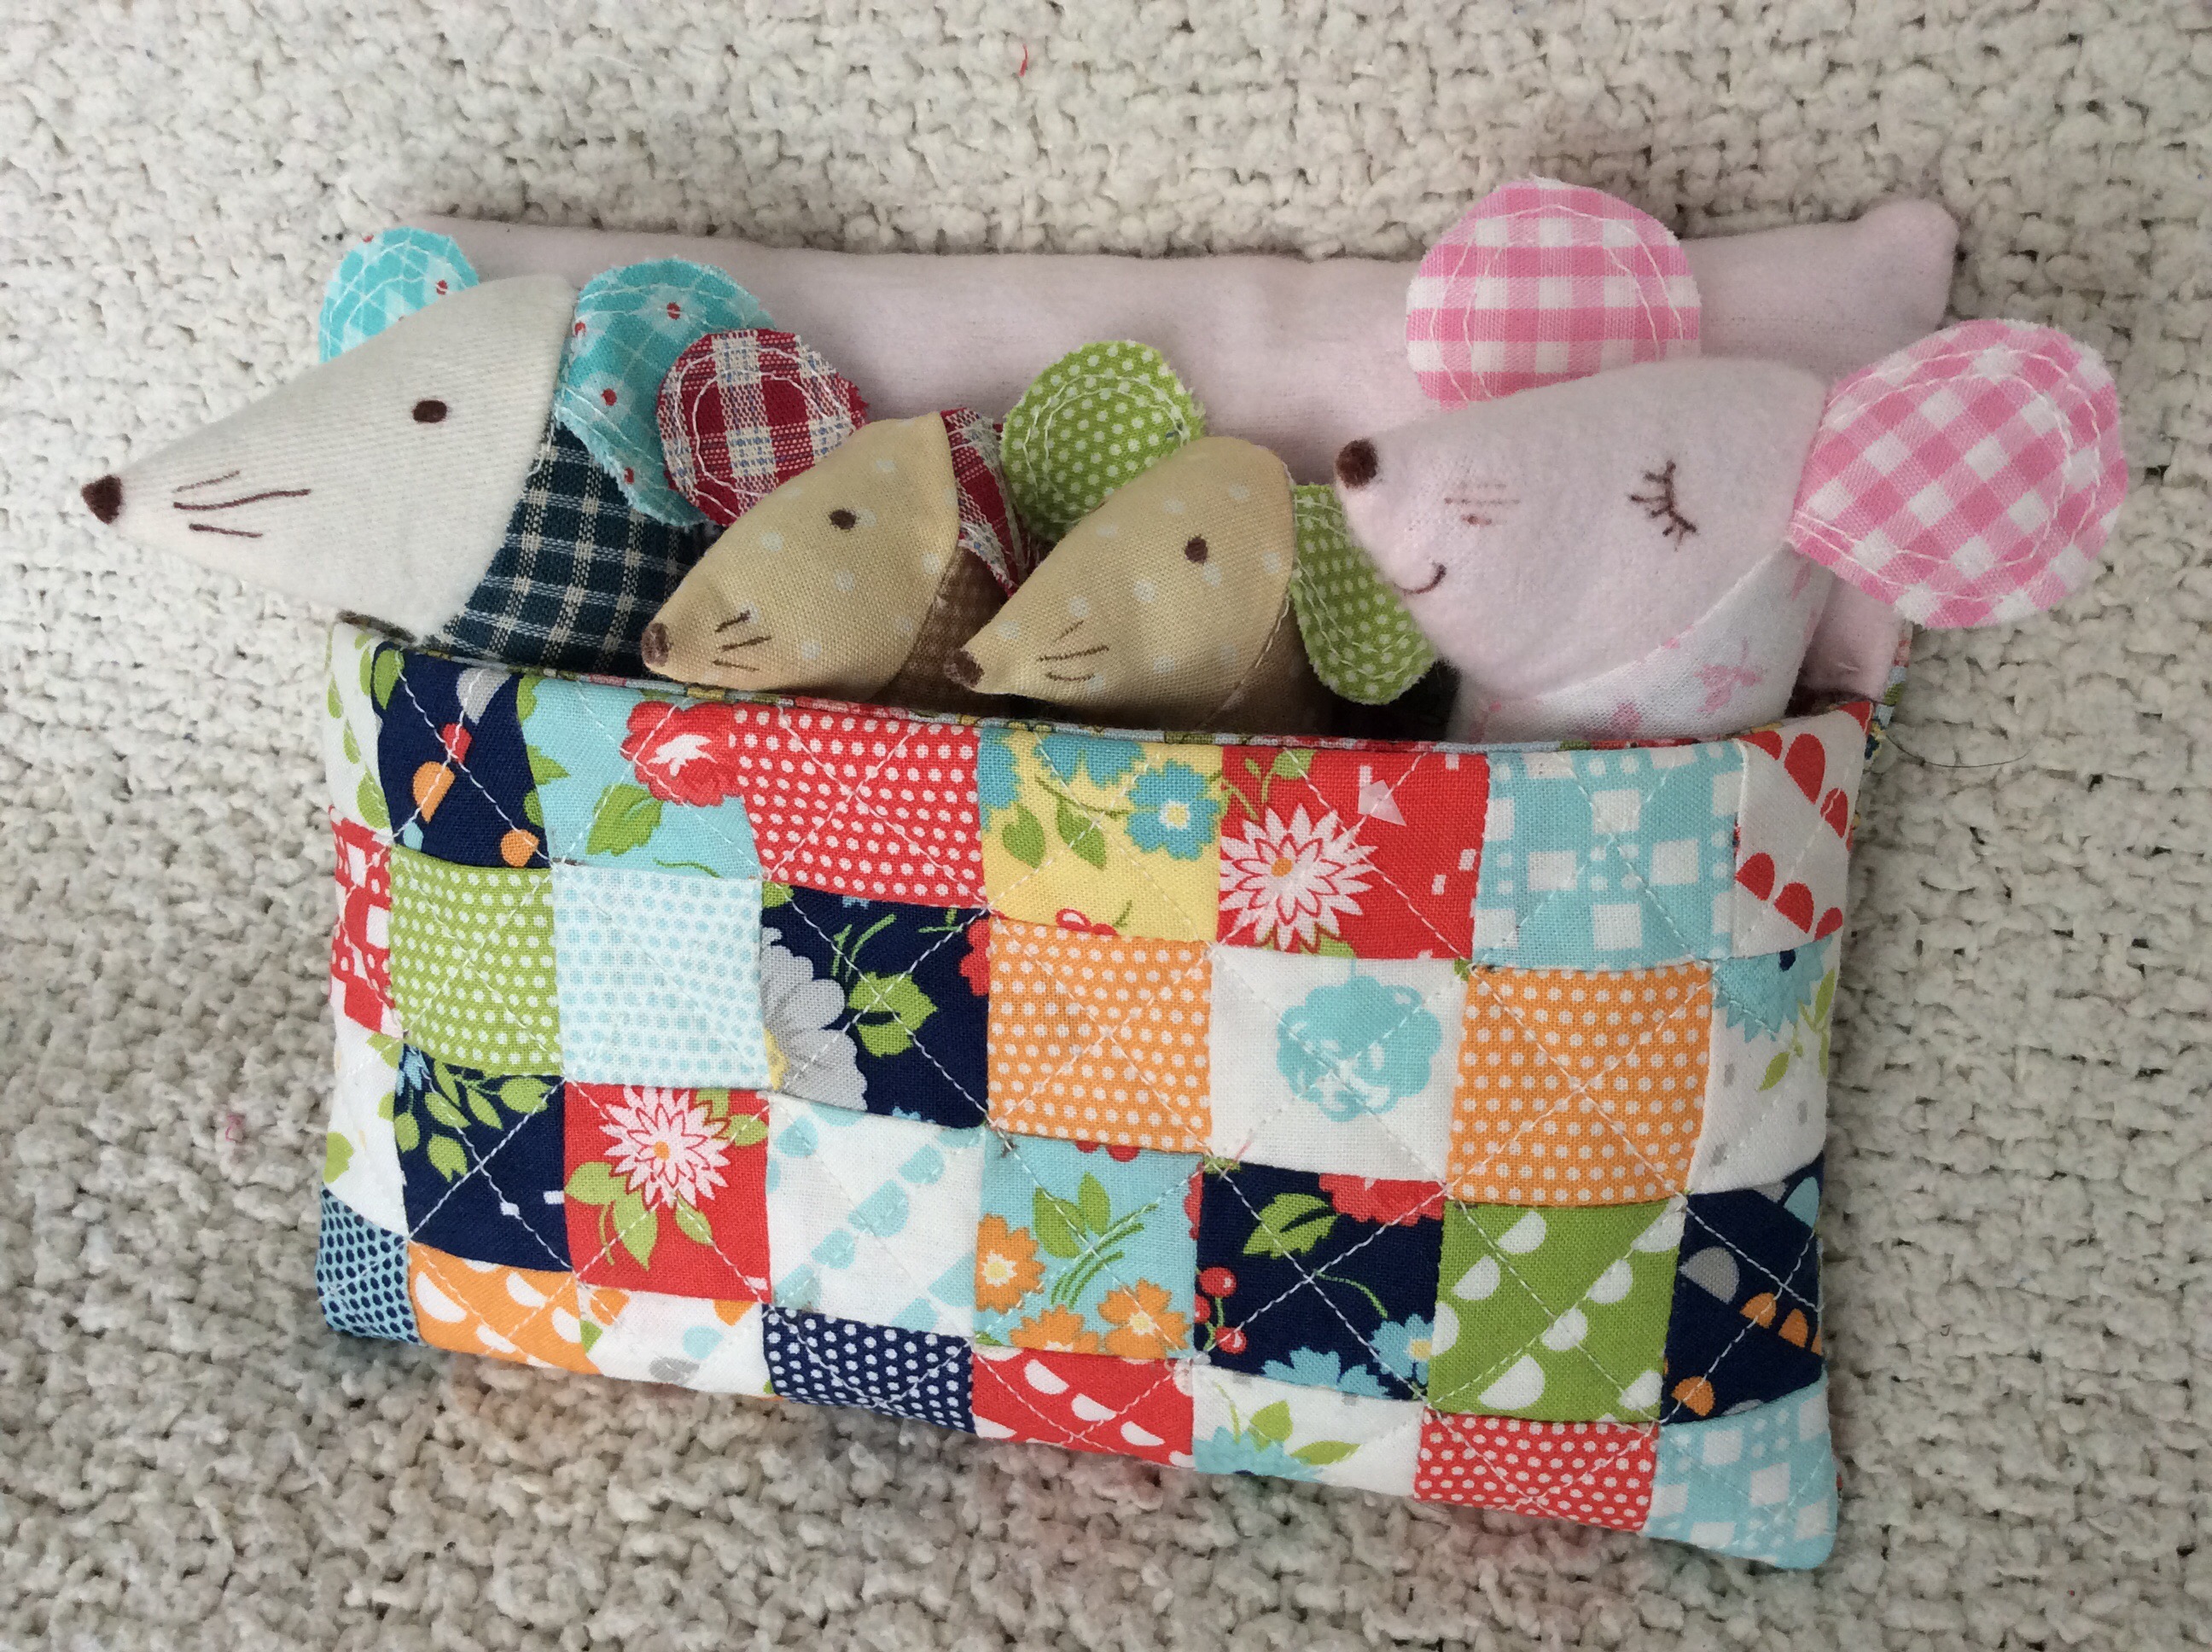
You see the project pictured on the top right?  That’s the one I had picked out for one of my grand kids birthday.  I just thought it looked so cute!

If you’d like to get the pattern, you can find it by clicking here.  I love the website for this magazine!  It has so many ideas, patterns, and helpful tips!  The designer of this project is Jo Carter, and her website is http://www.twoowls.typepad.co.uk.  

.

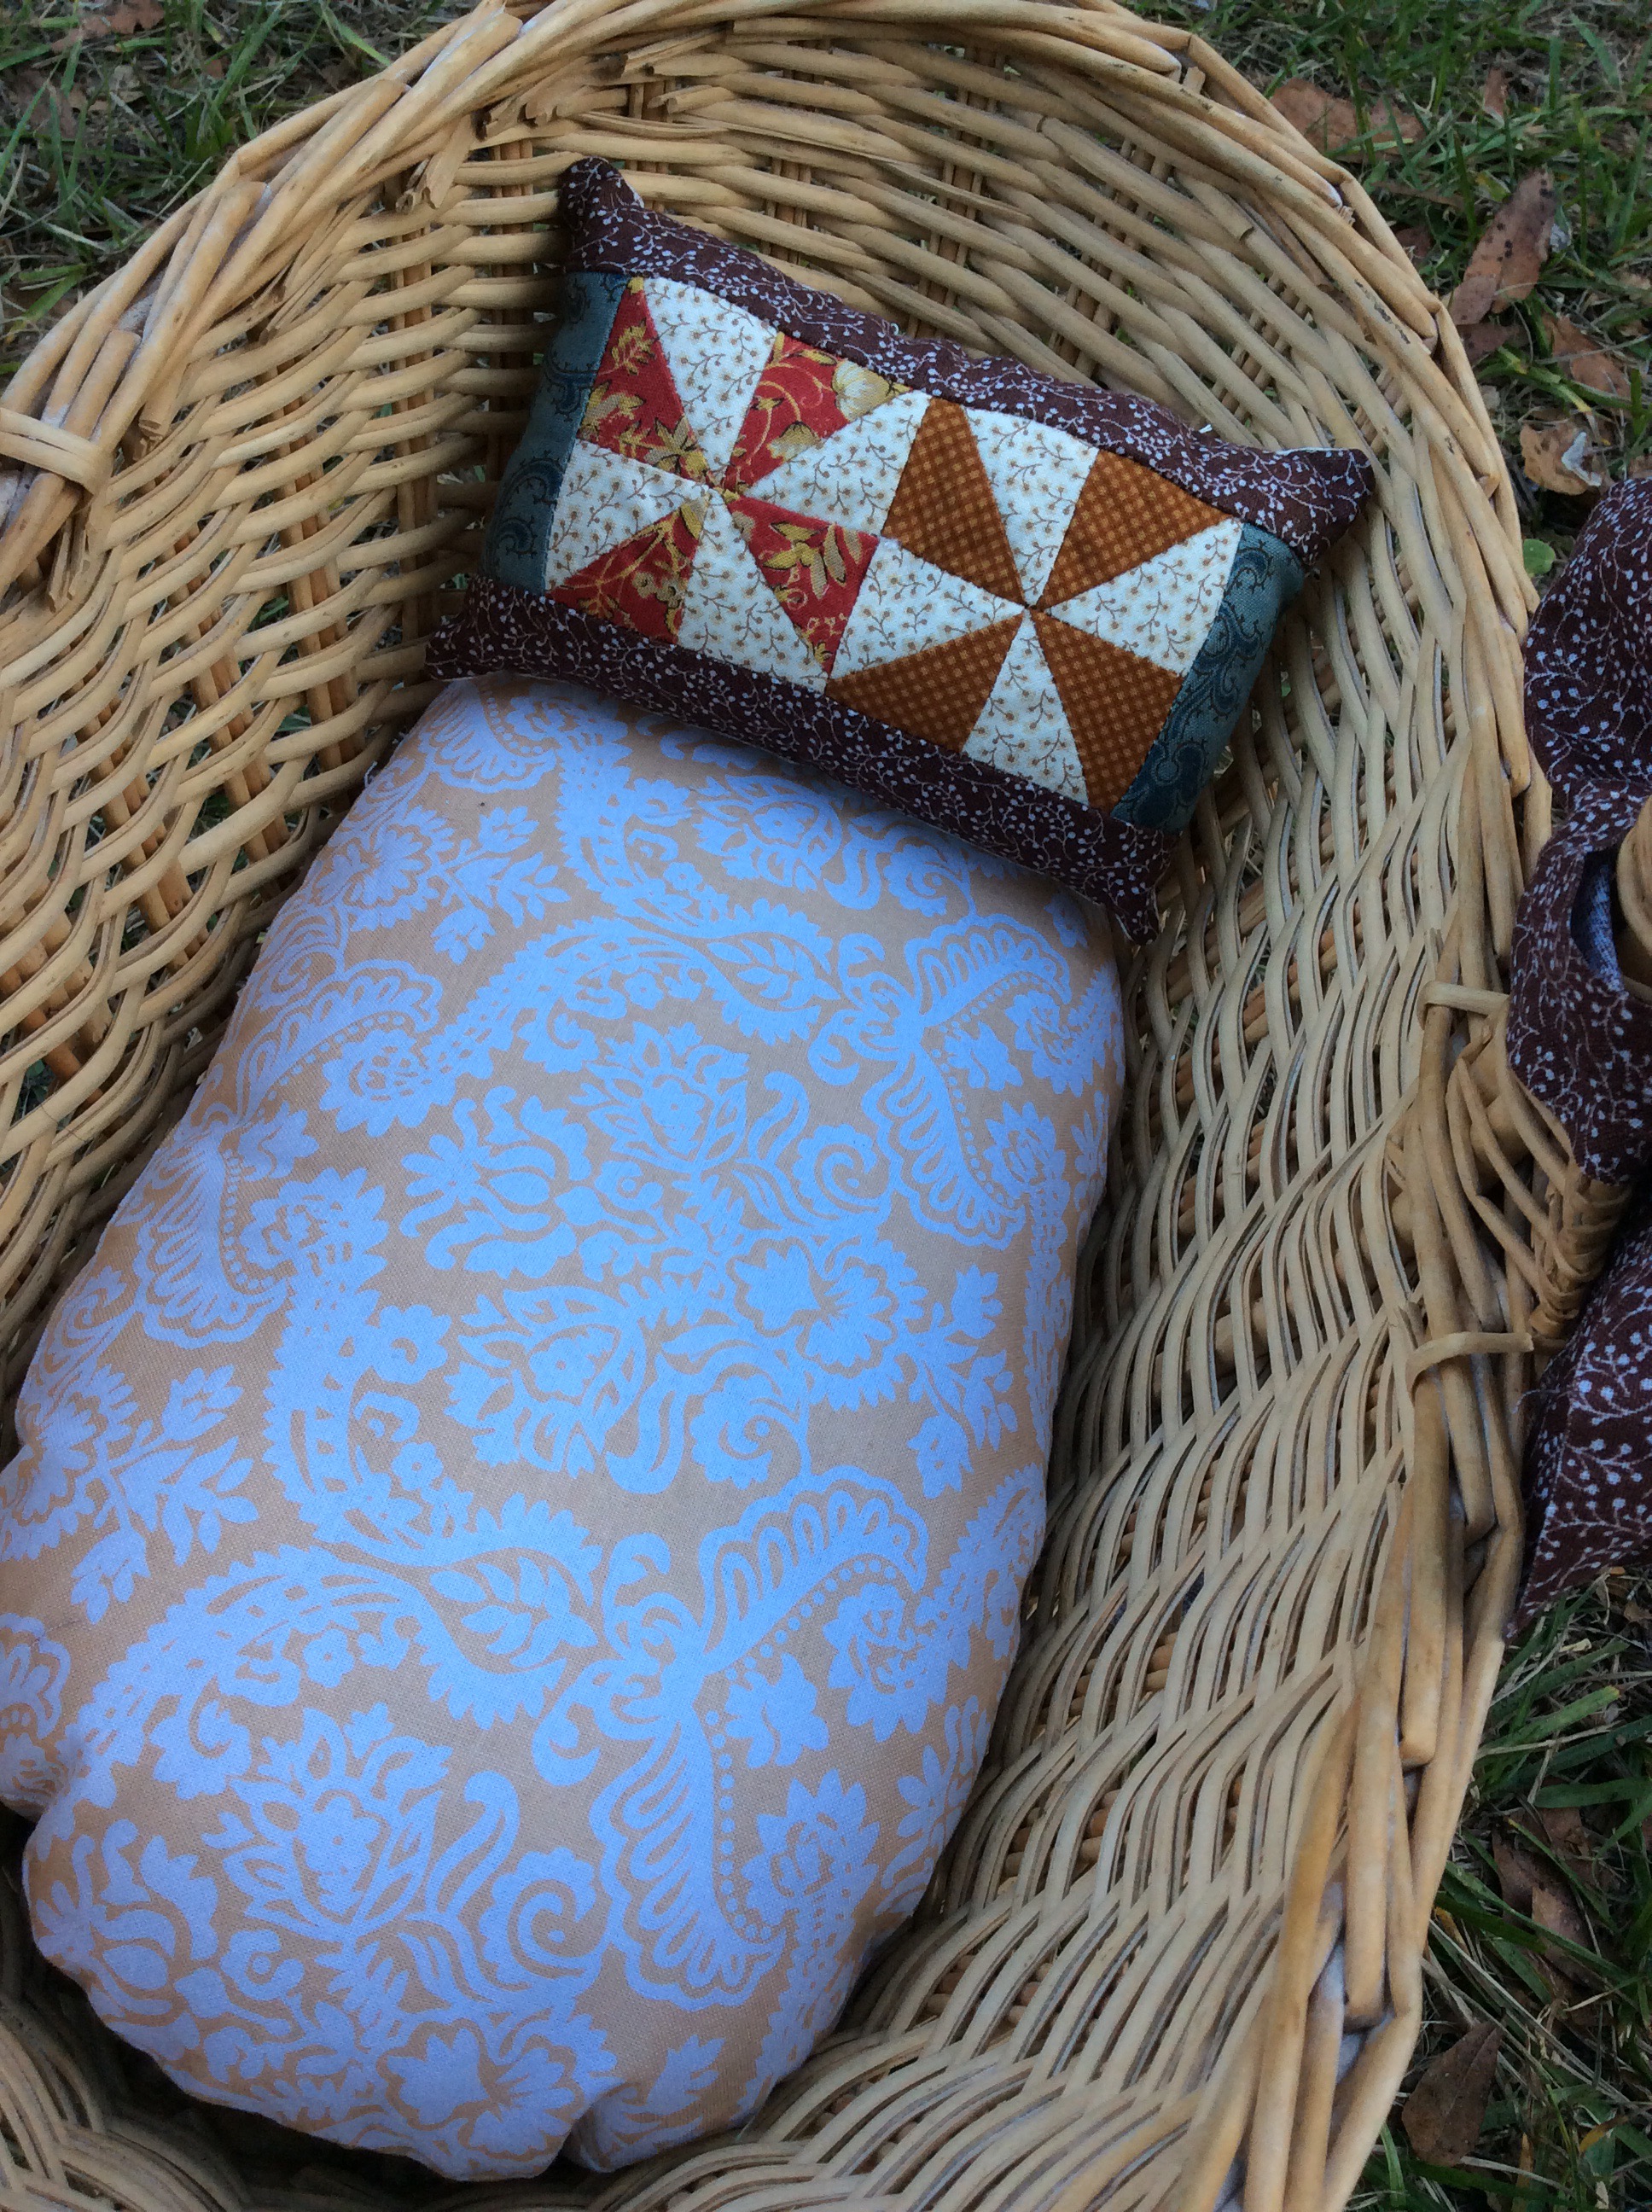
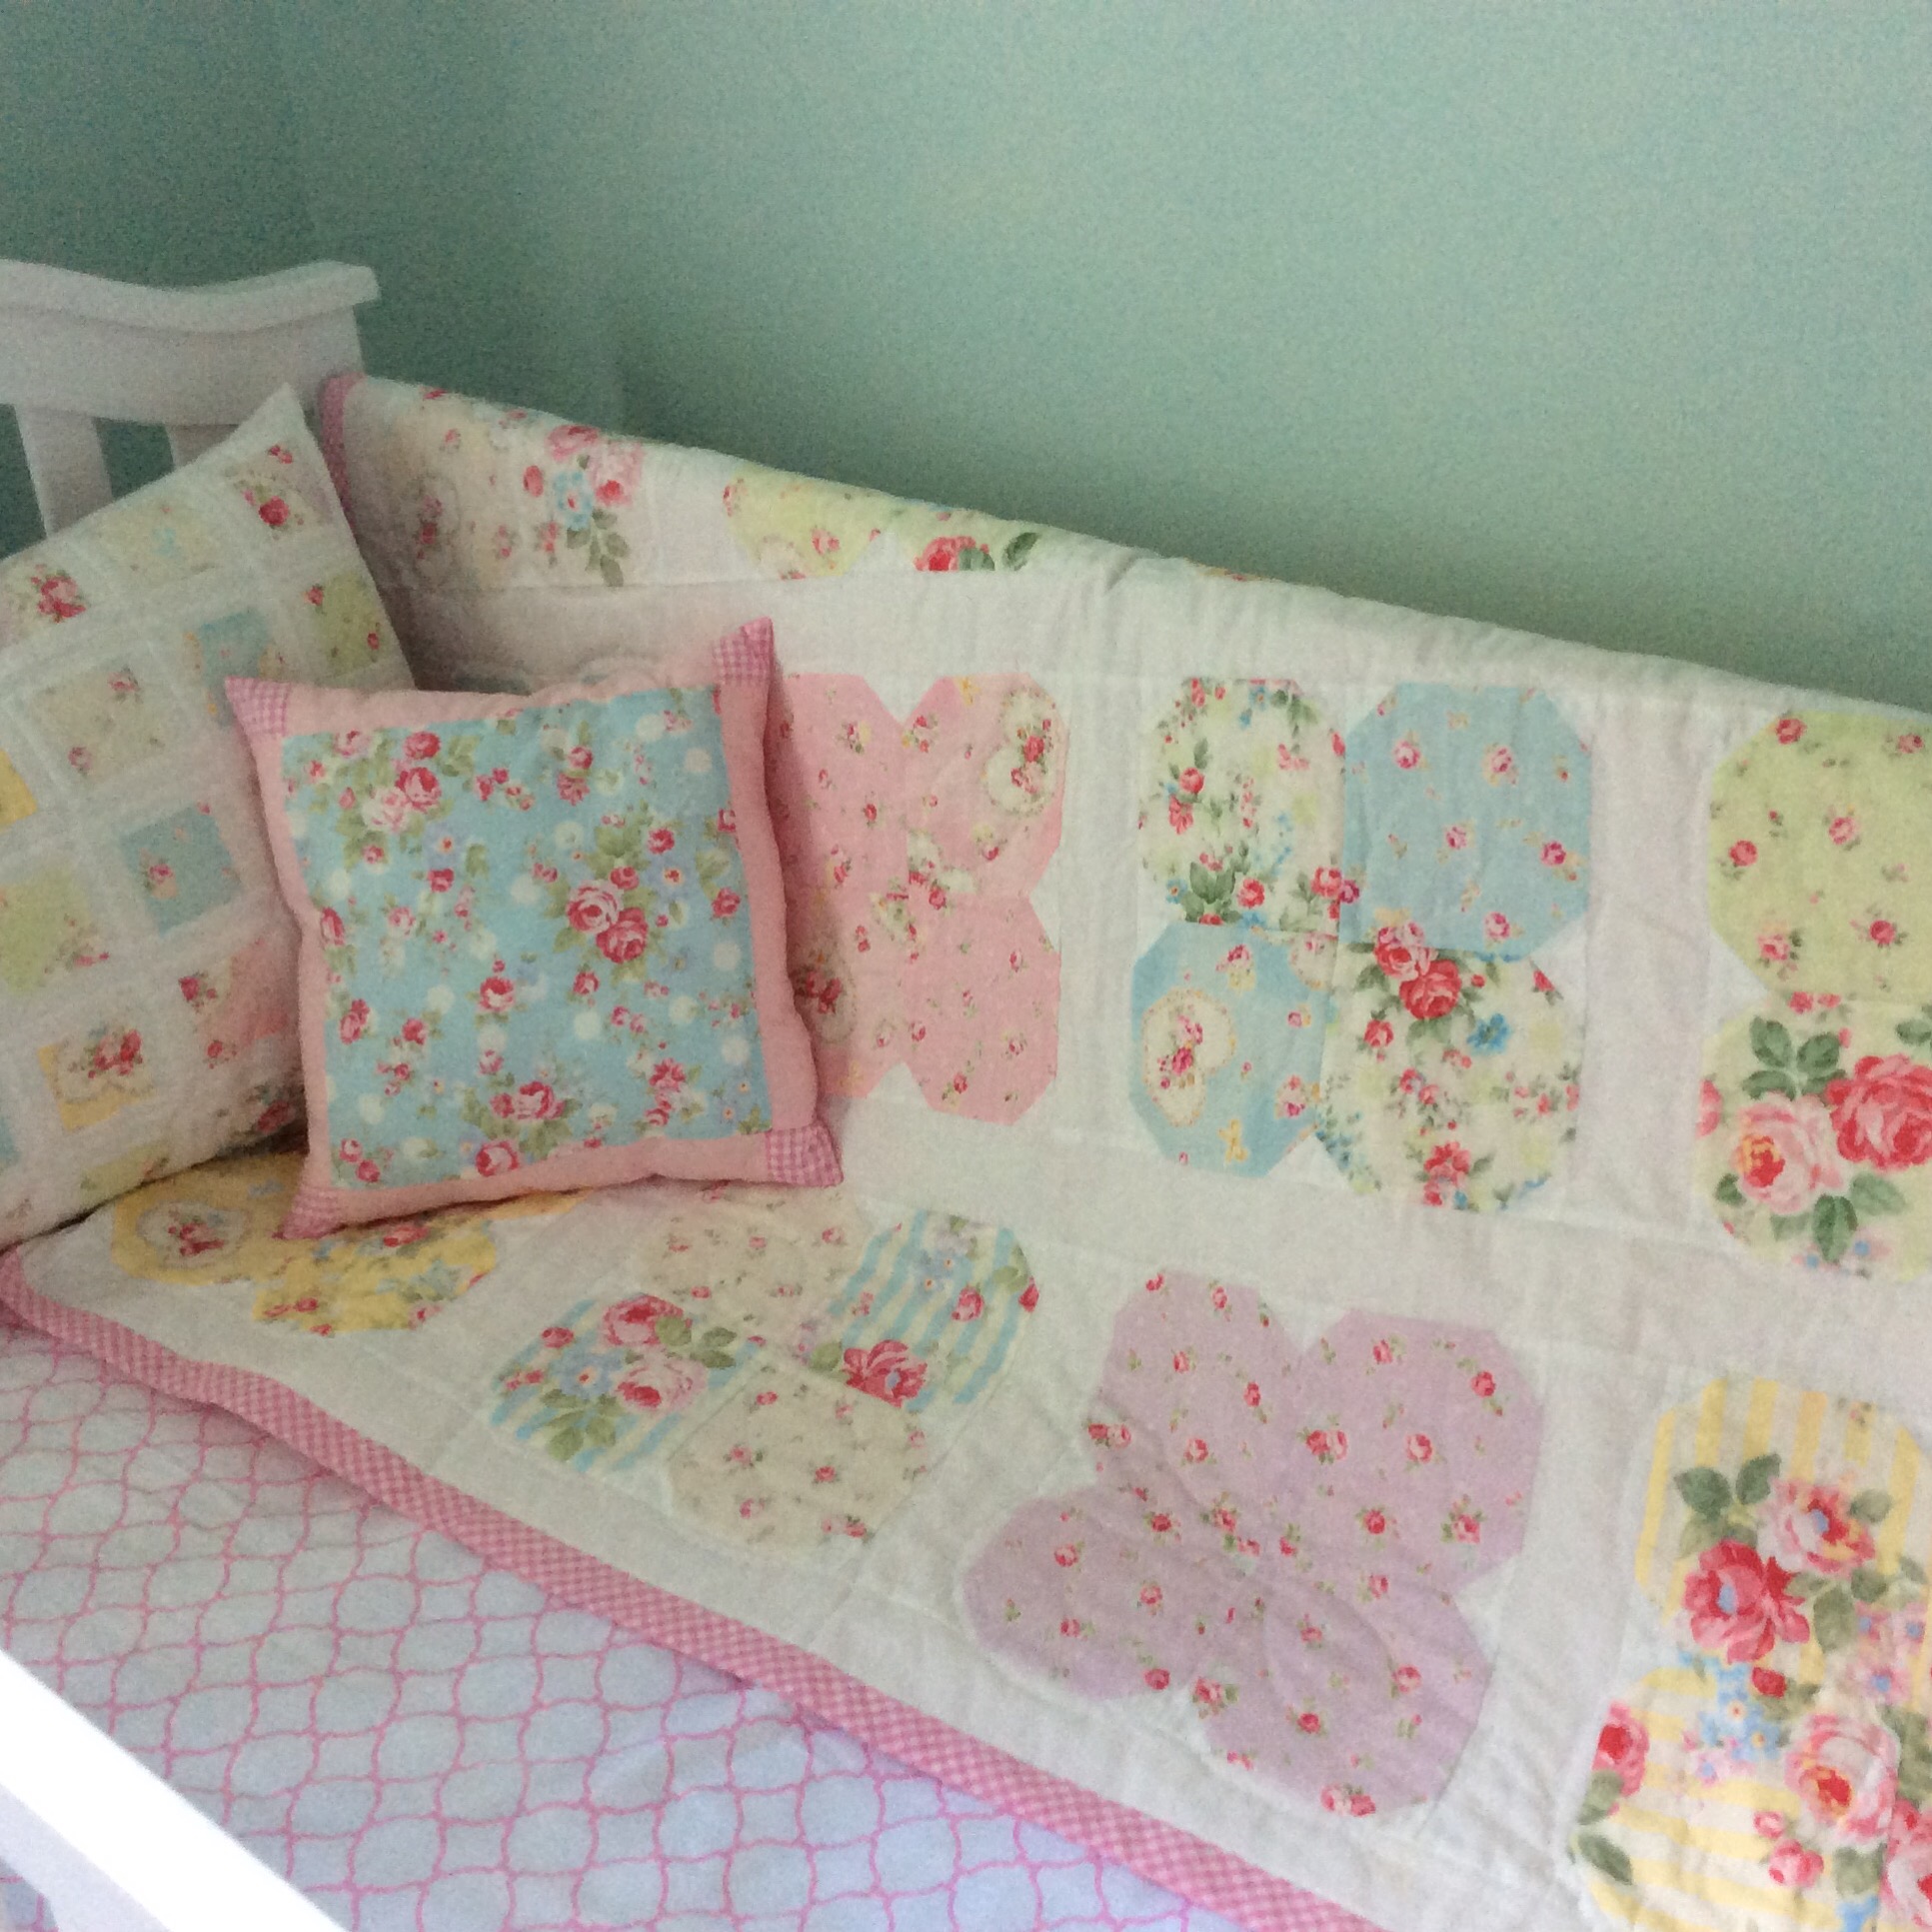
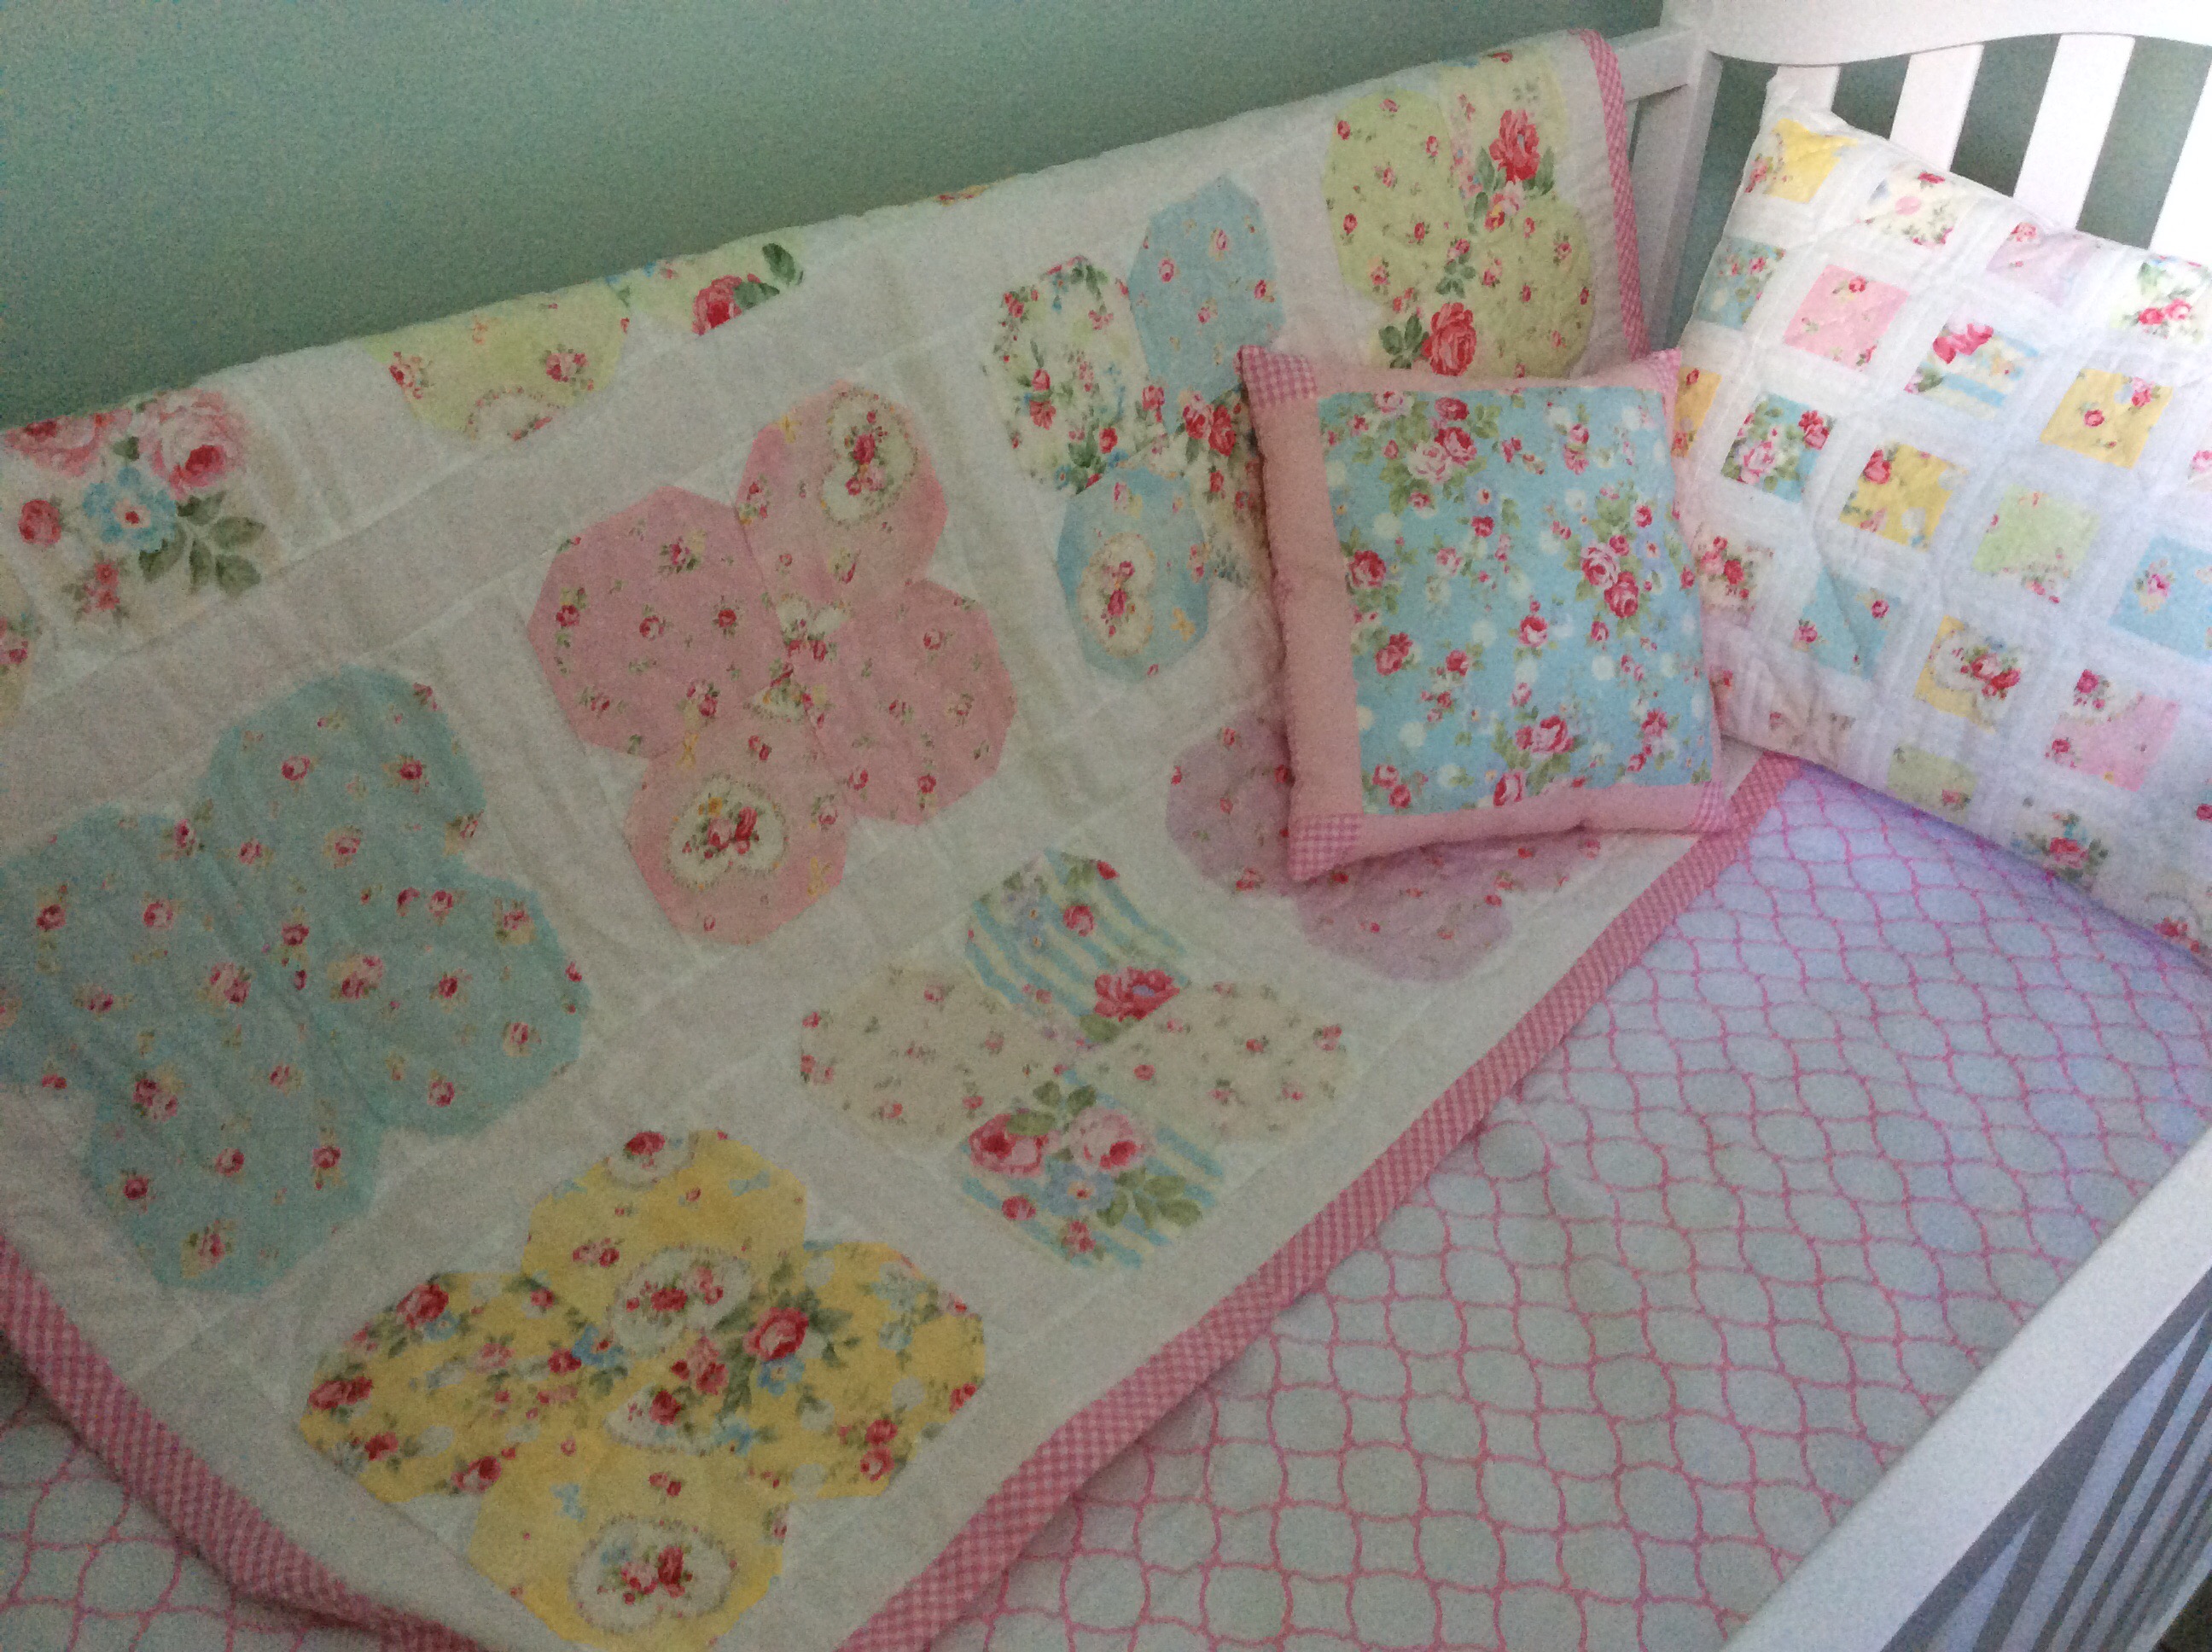
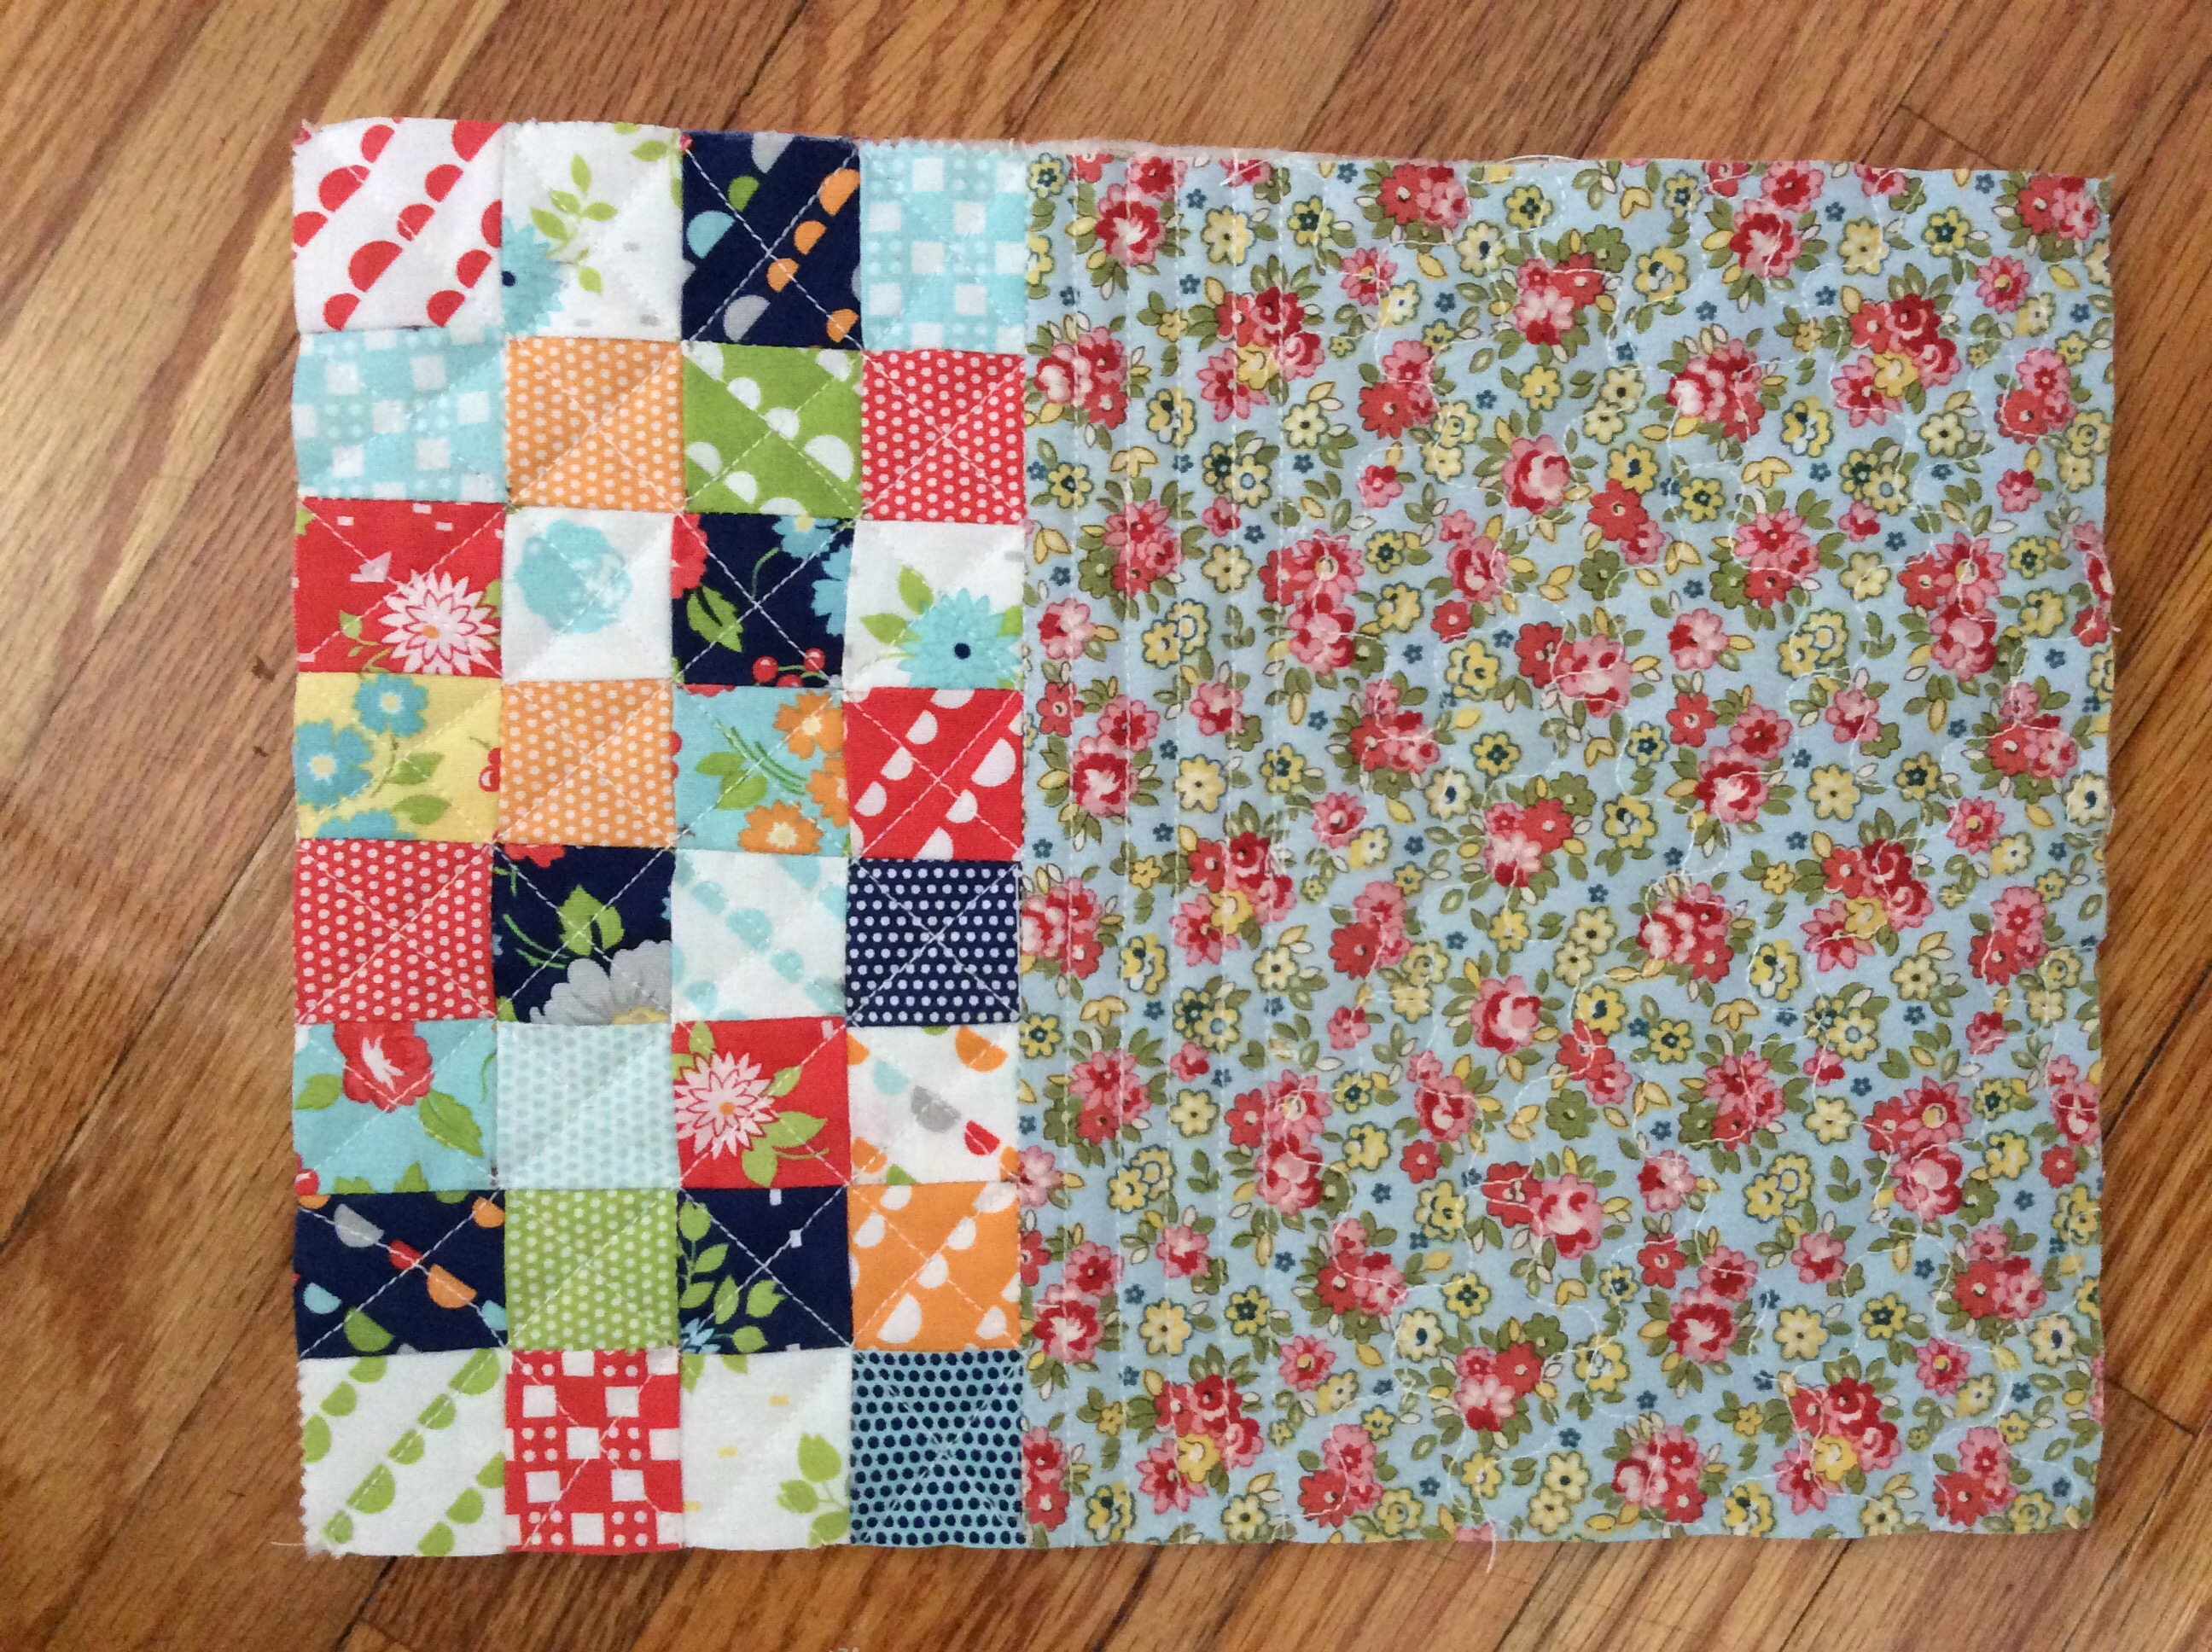
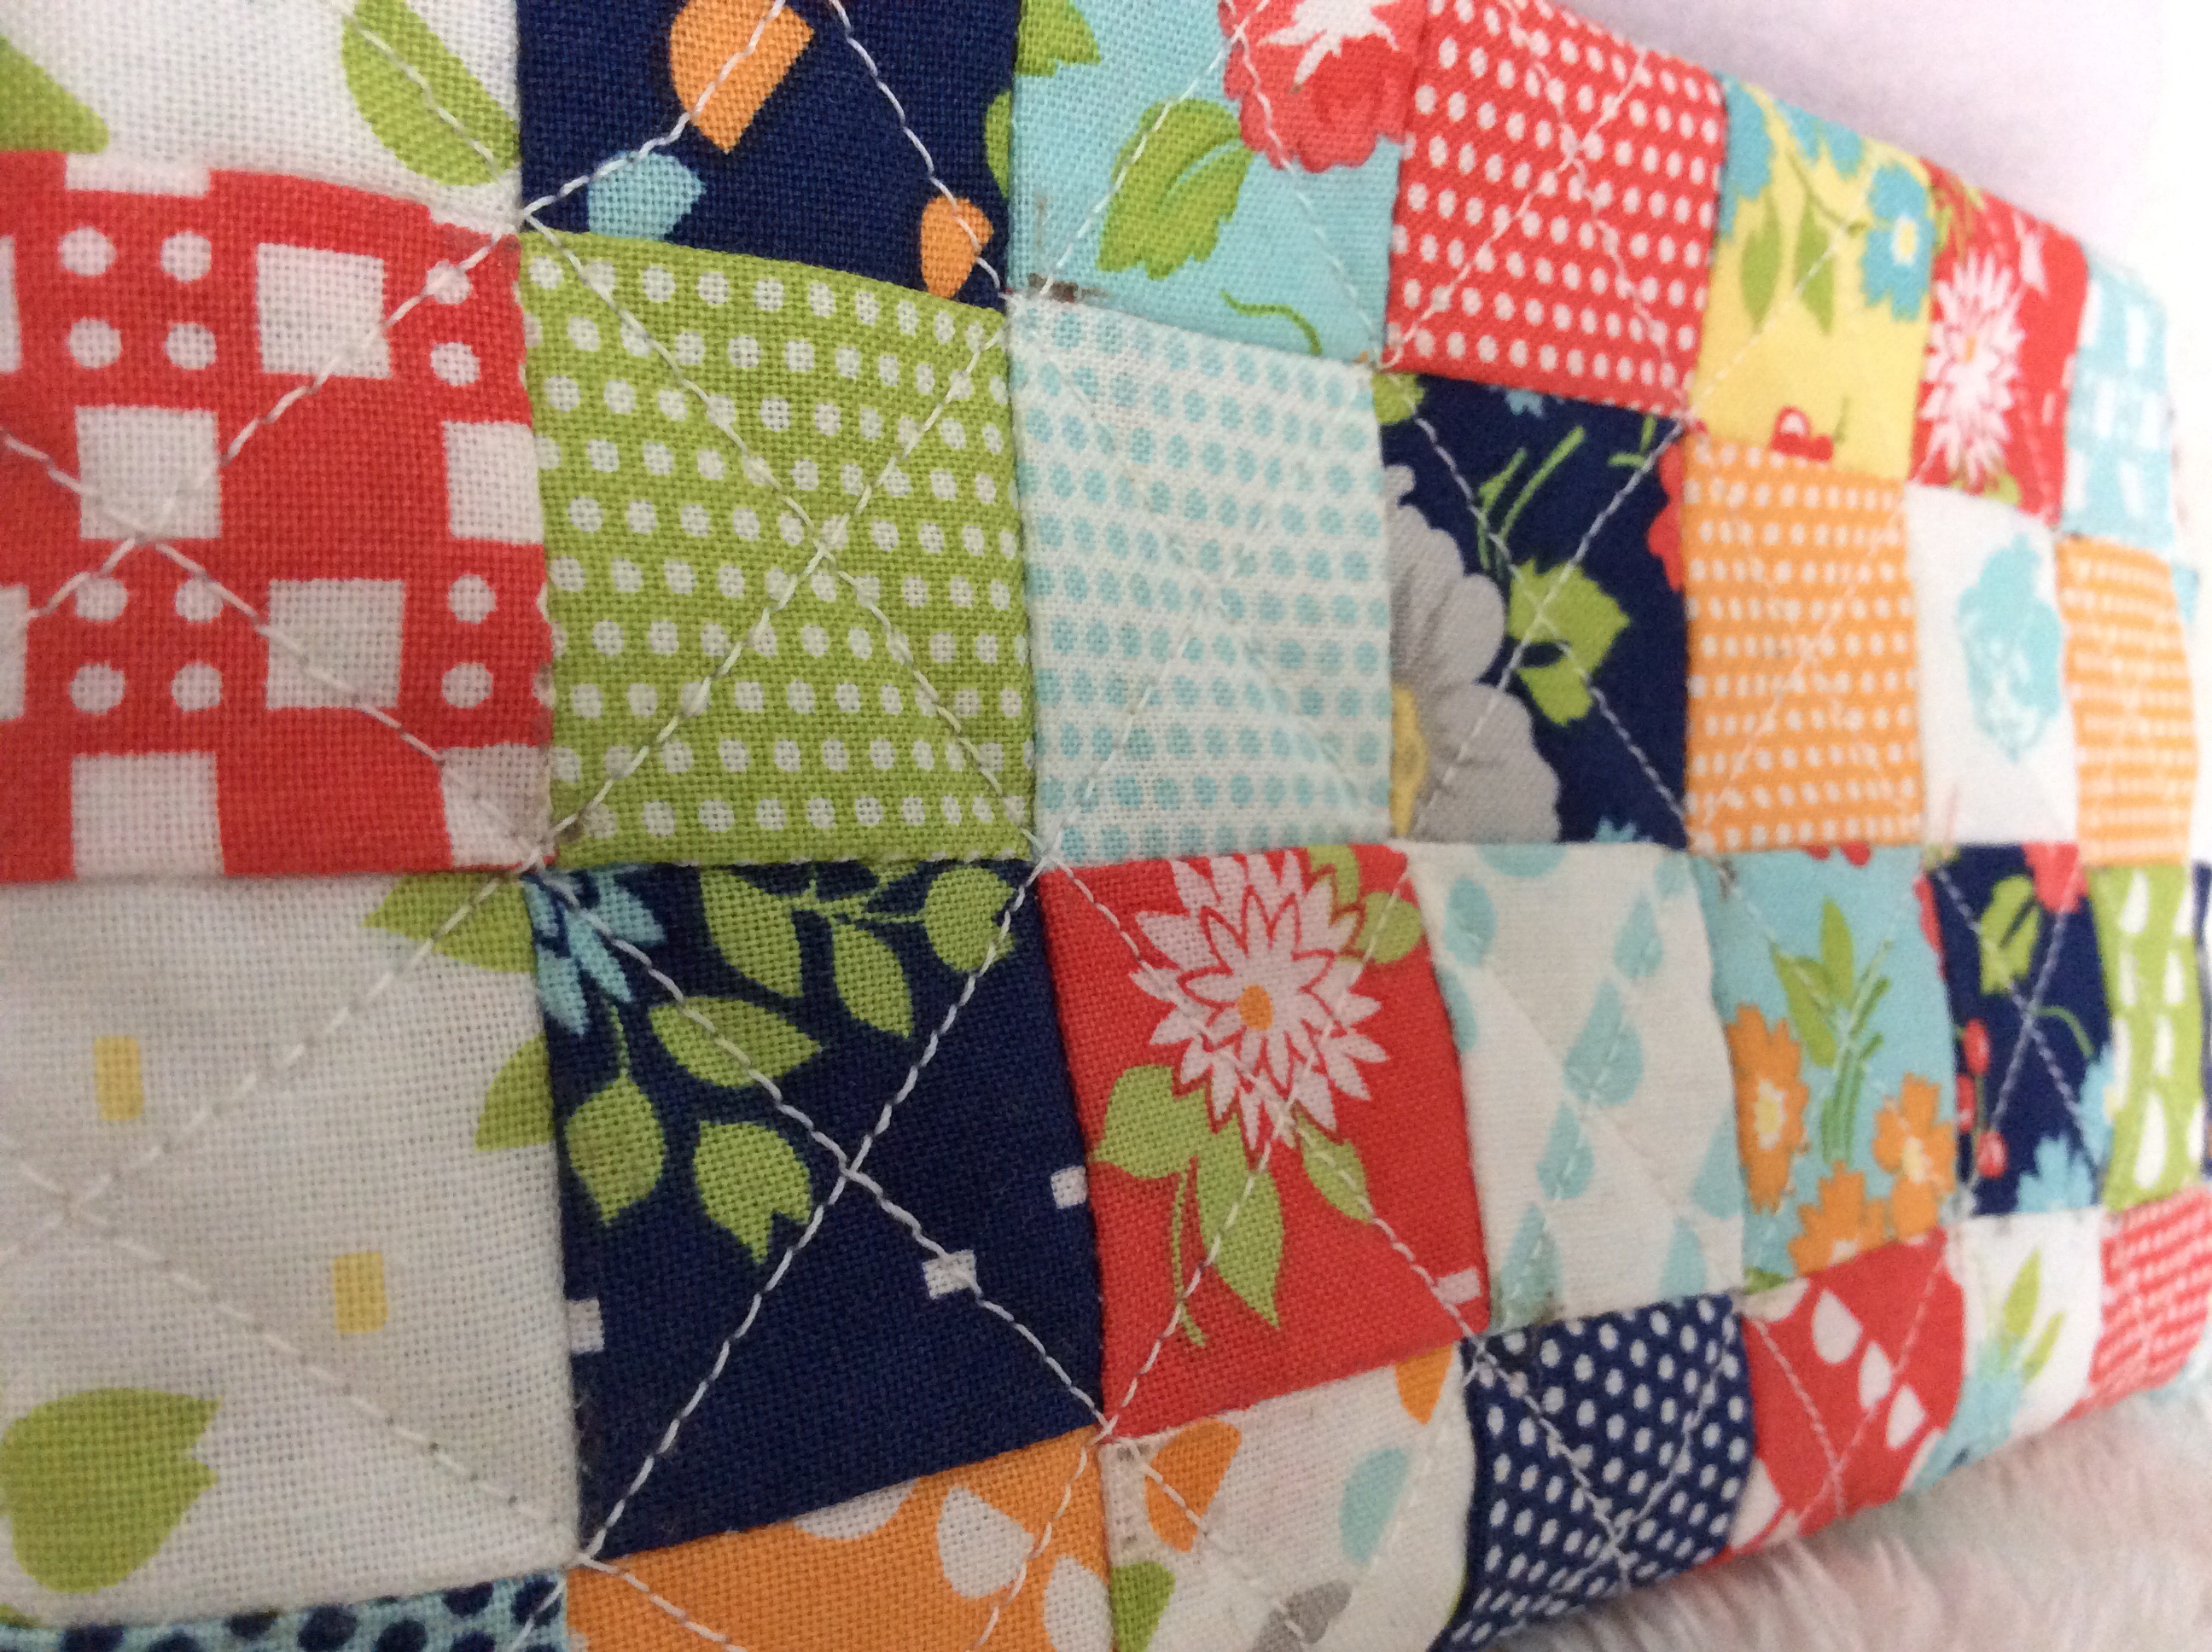
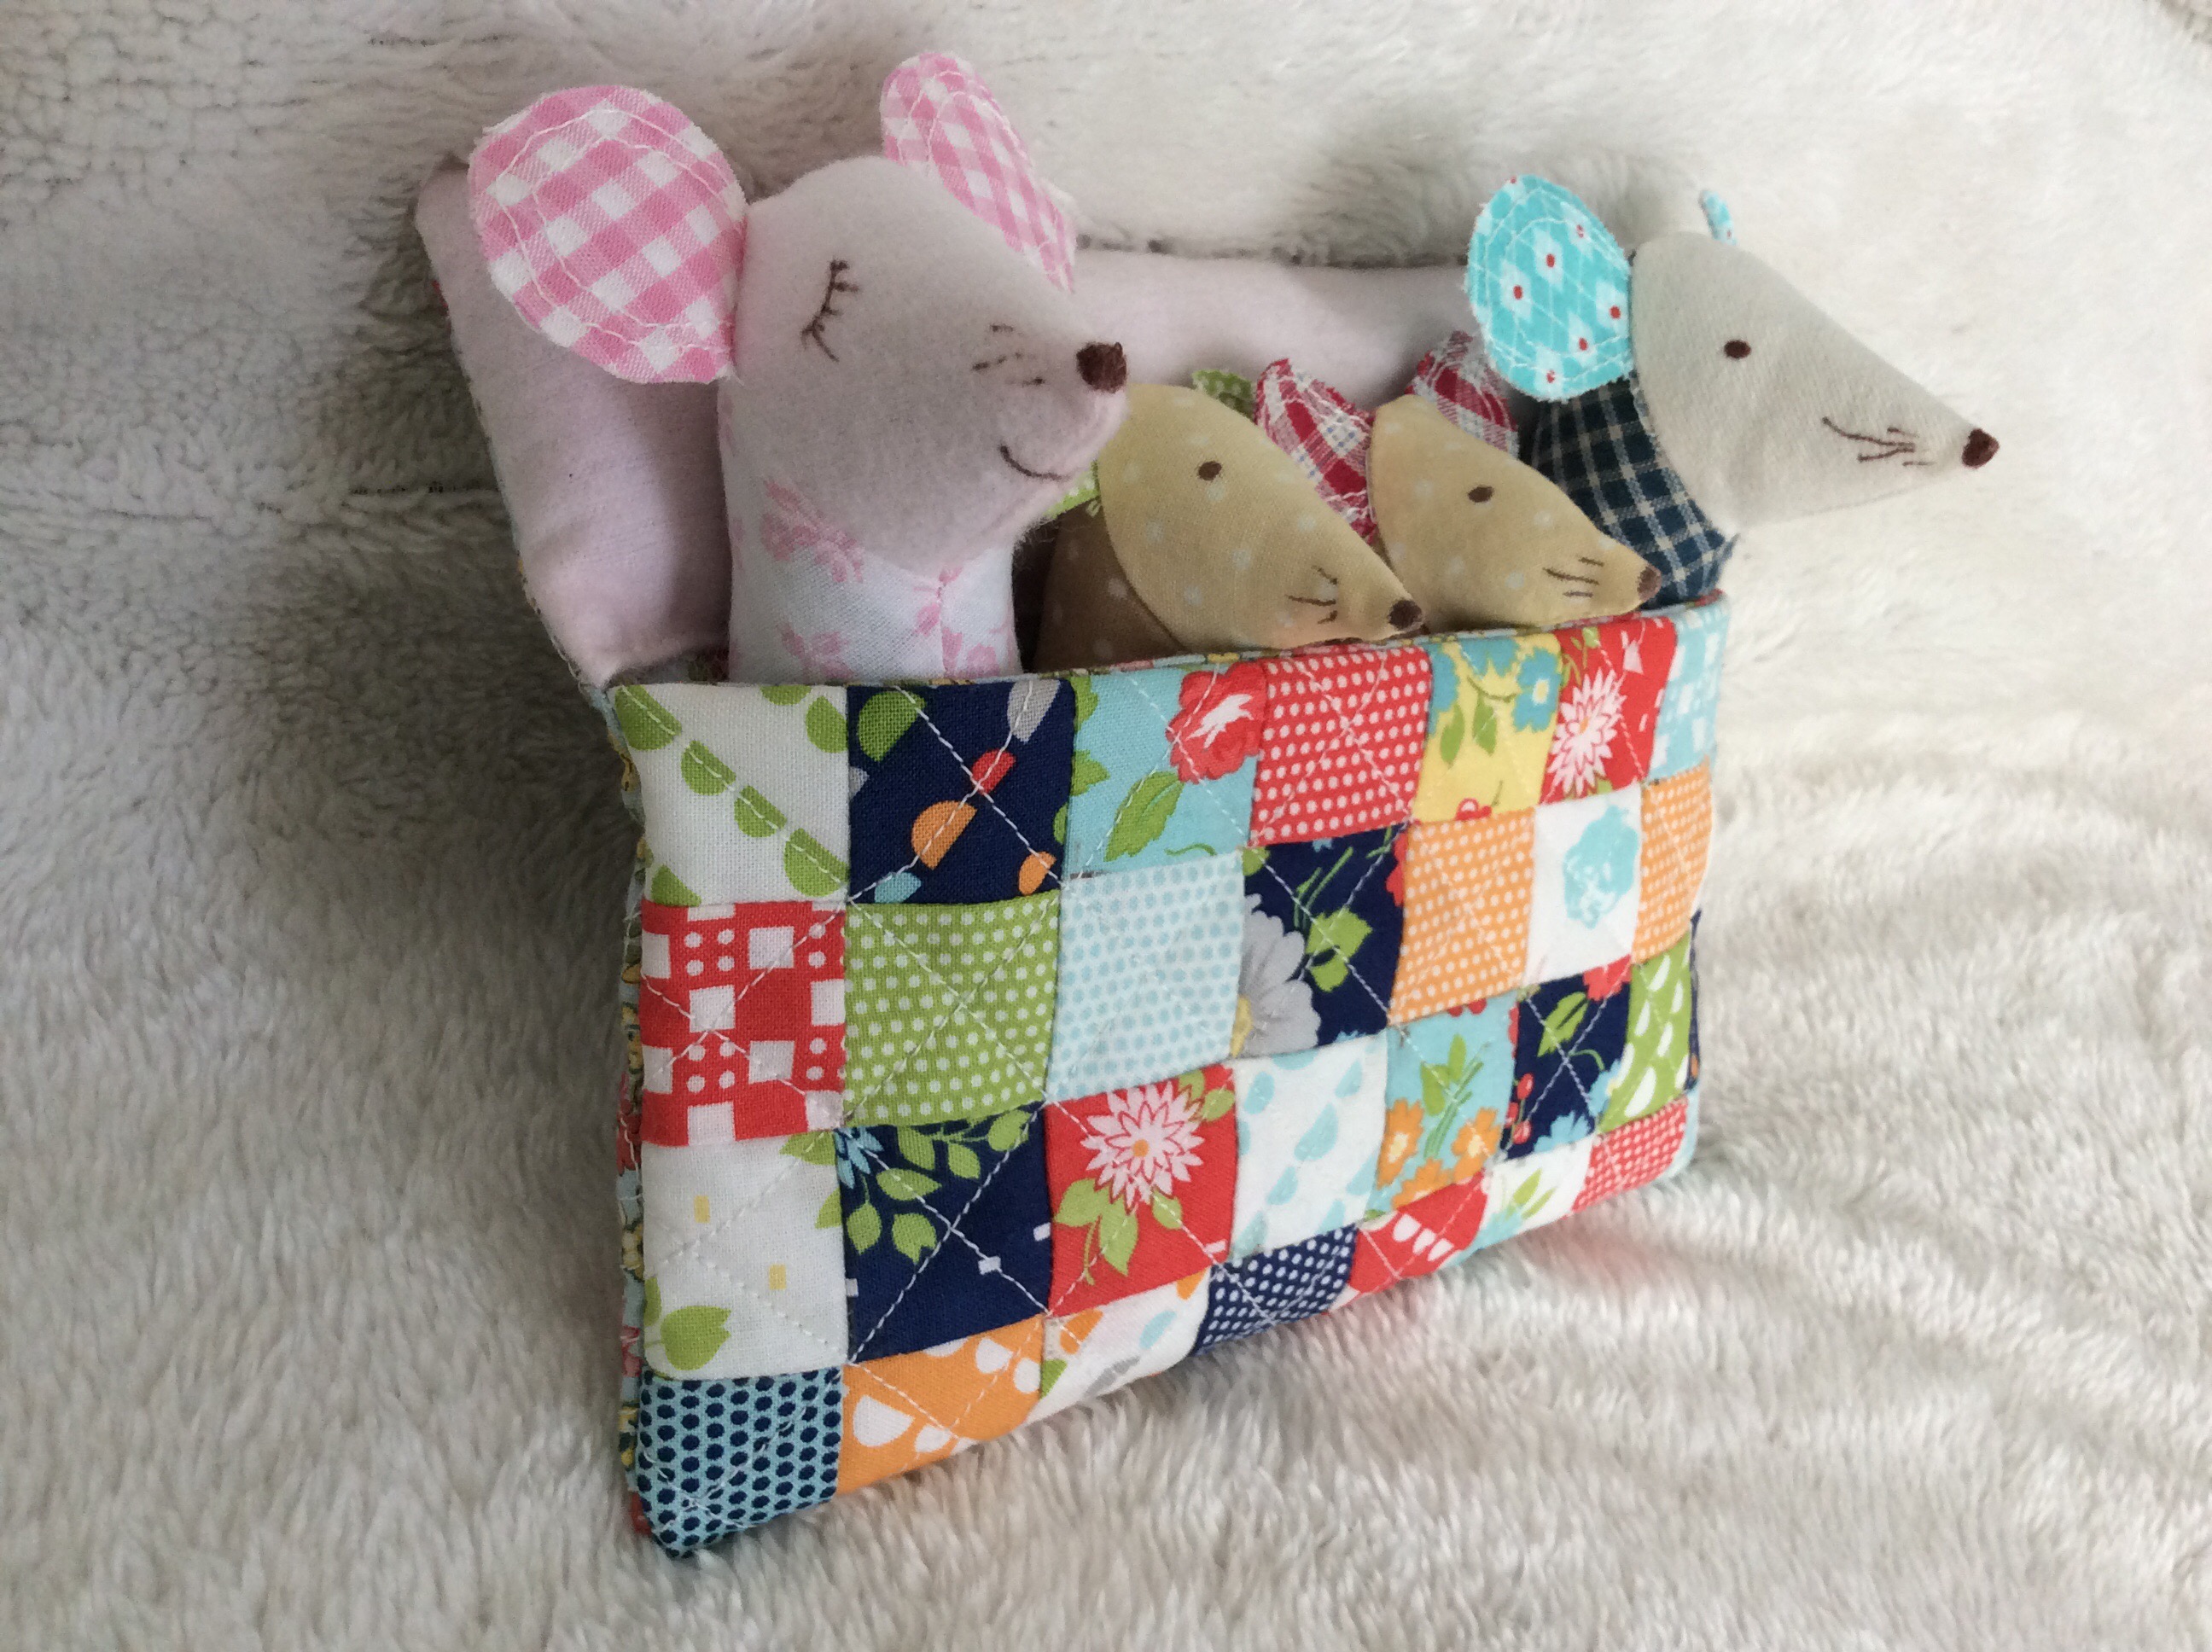
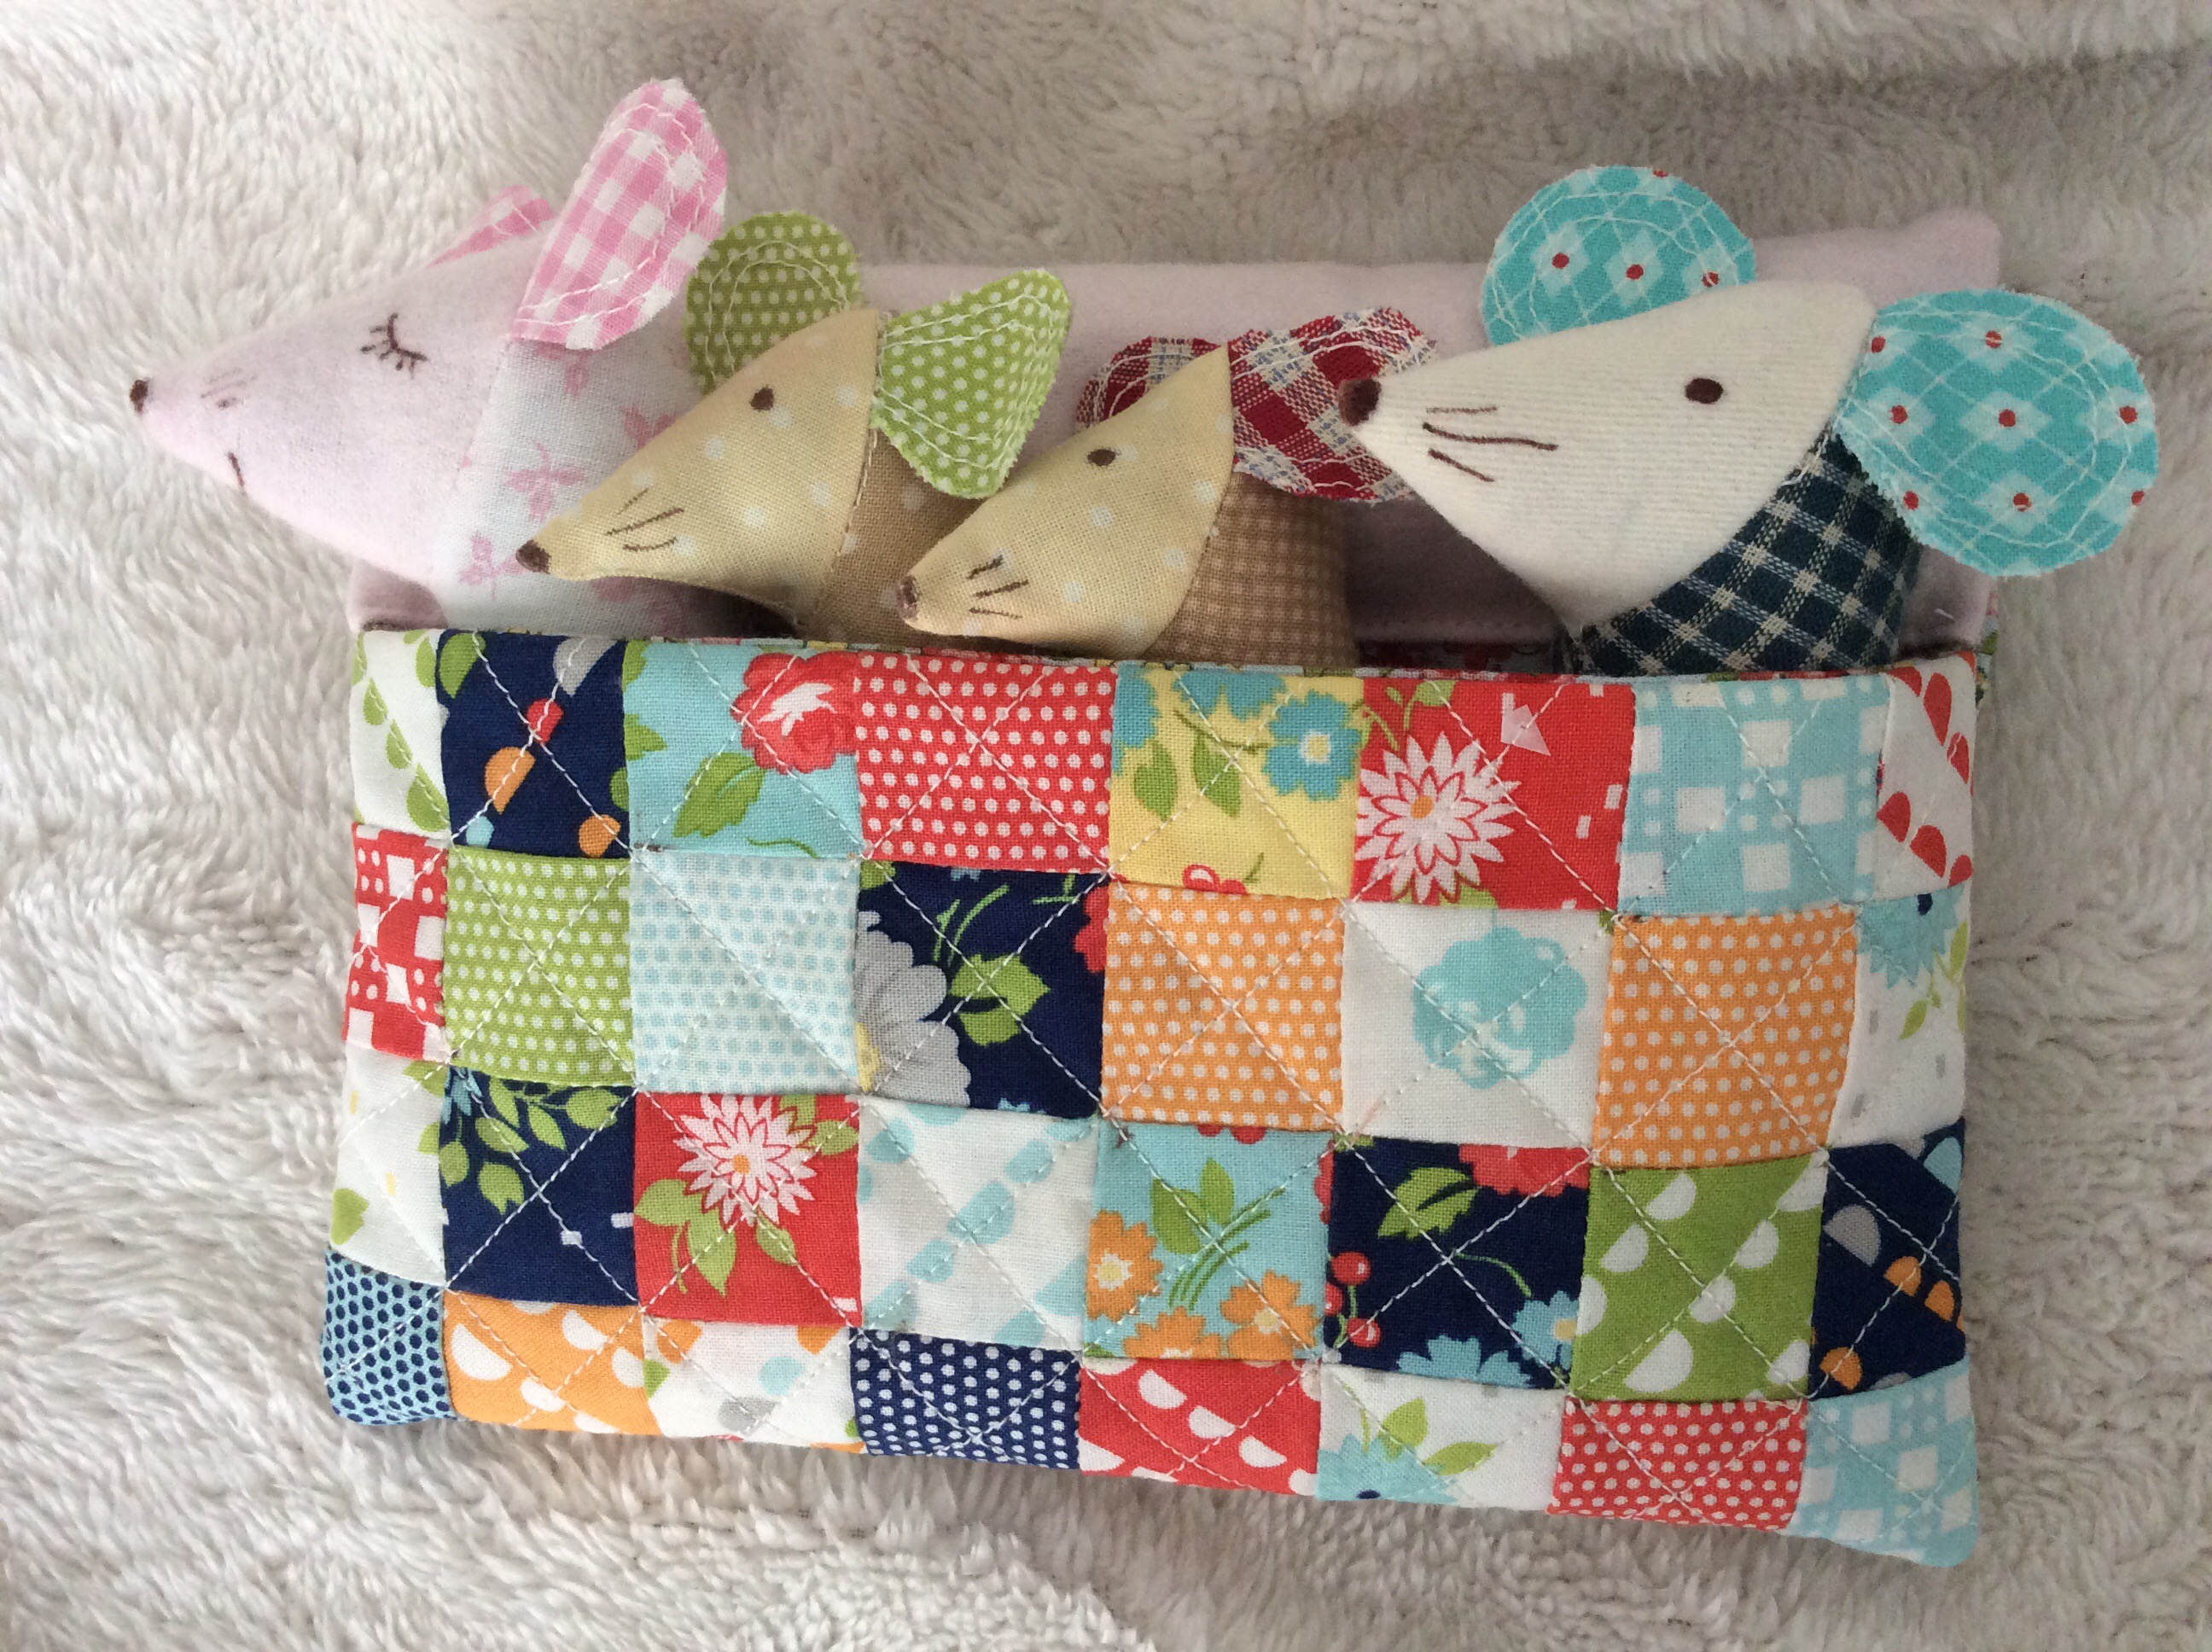
The instructions are easy to understand and follow.  I must confess that as I pieced the bed, I wondered how this “rectangle” would become a bed, but as I went along, following the pattern, it all made sense and worked perfectly.

.

.

.

.

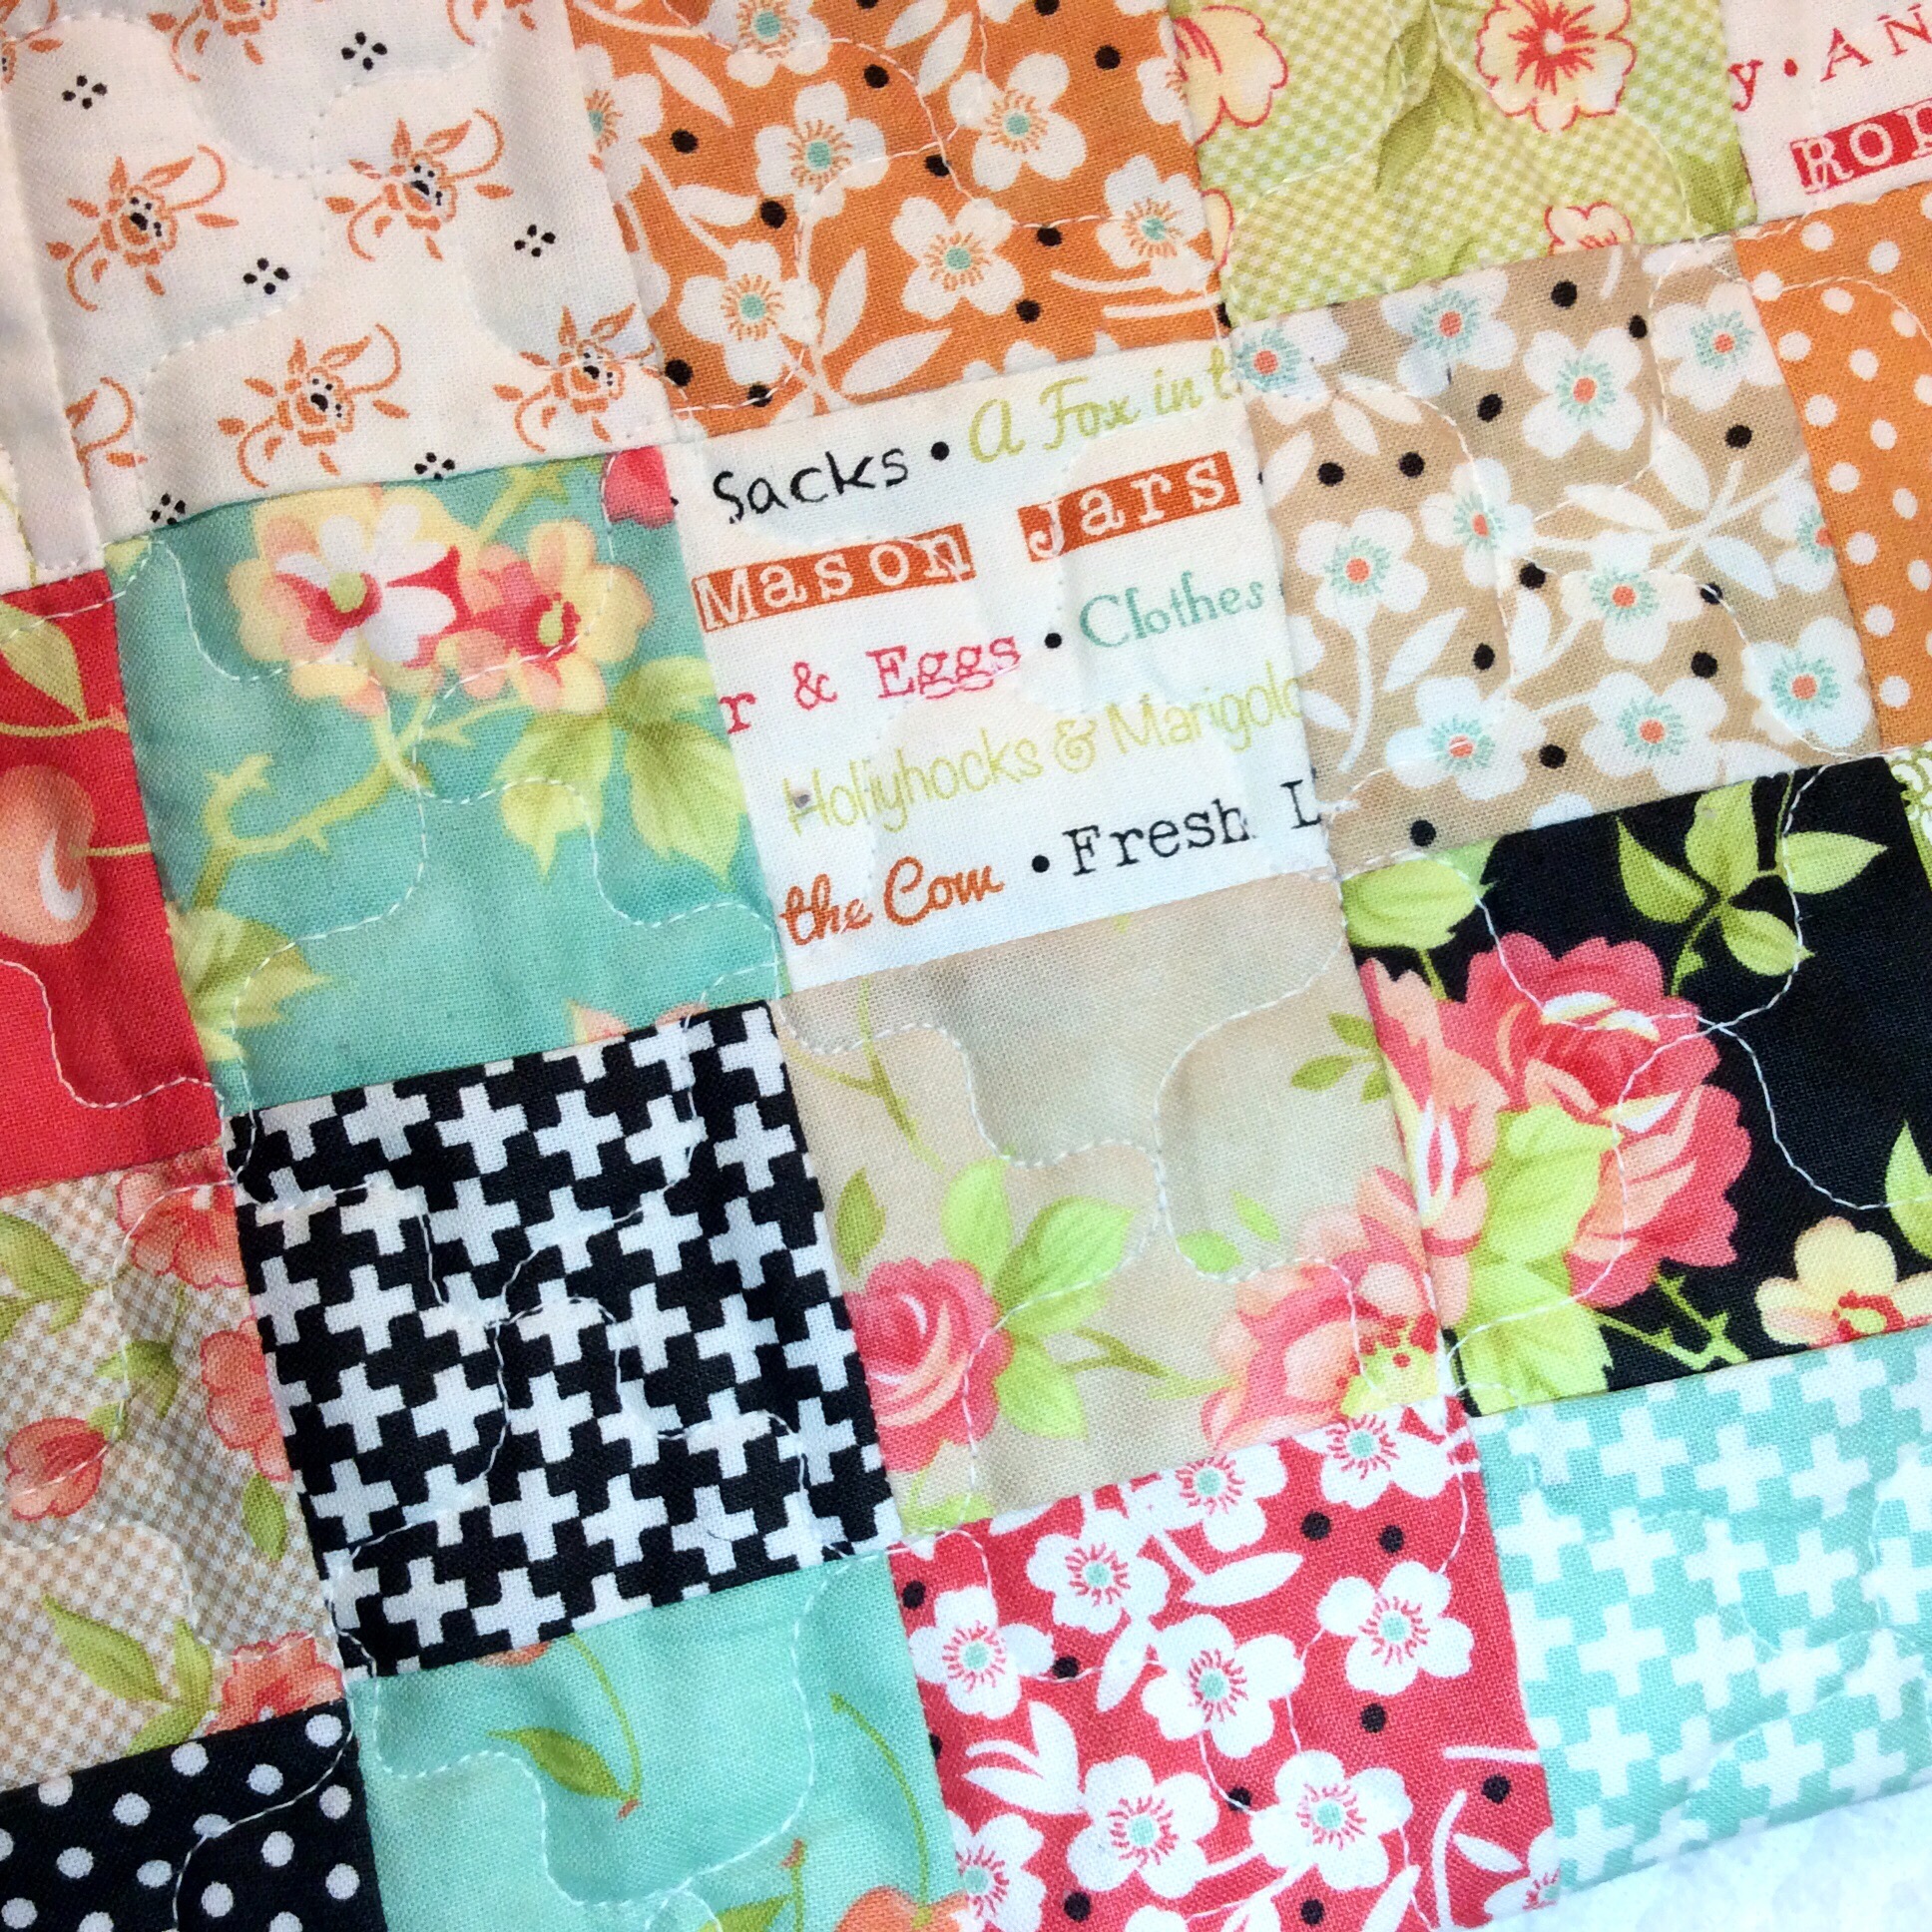
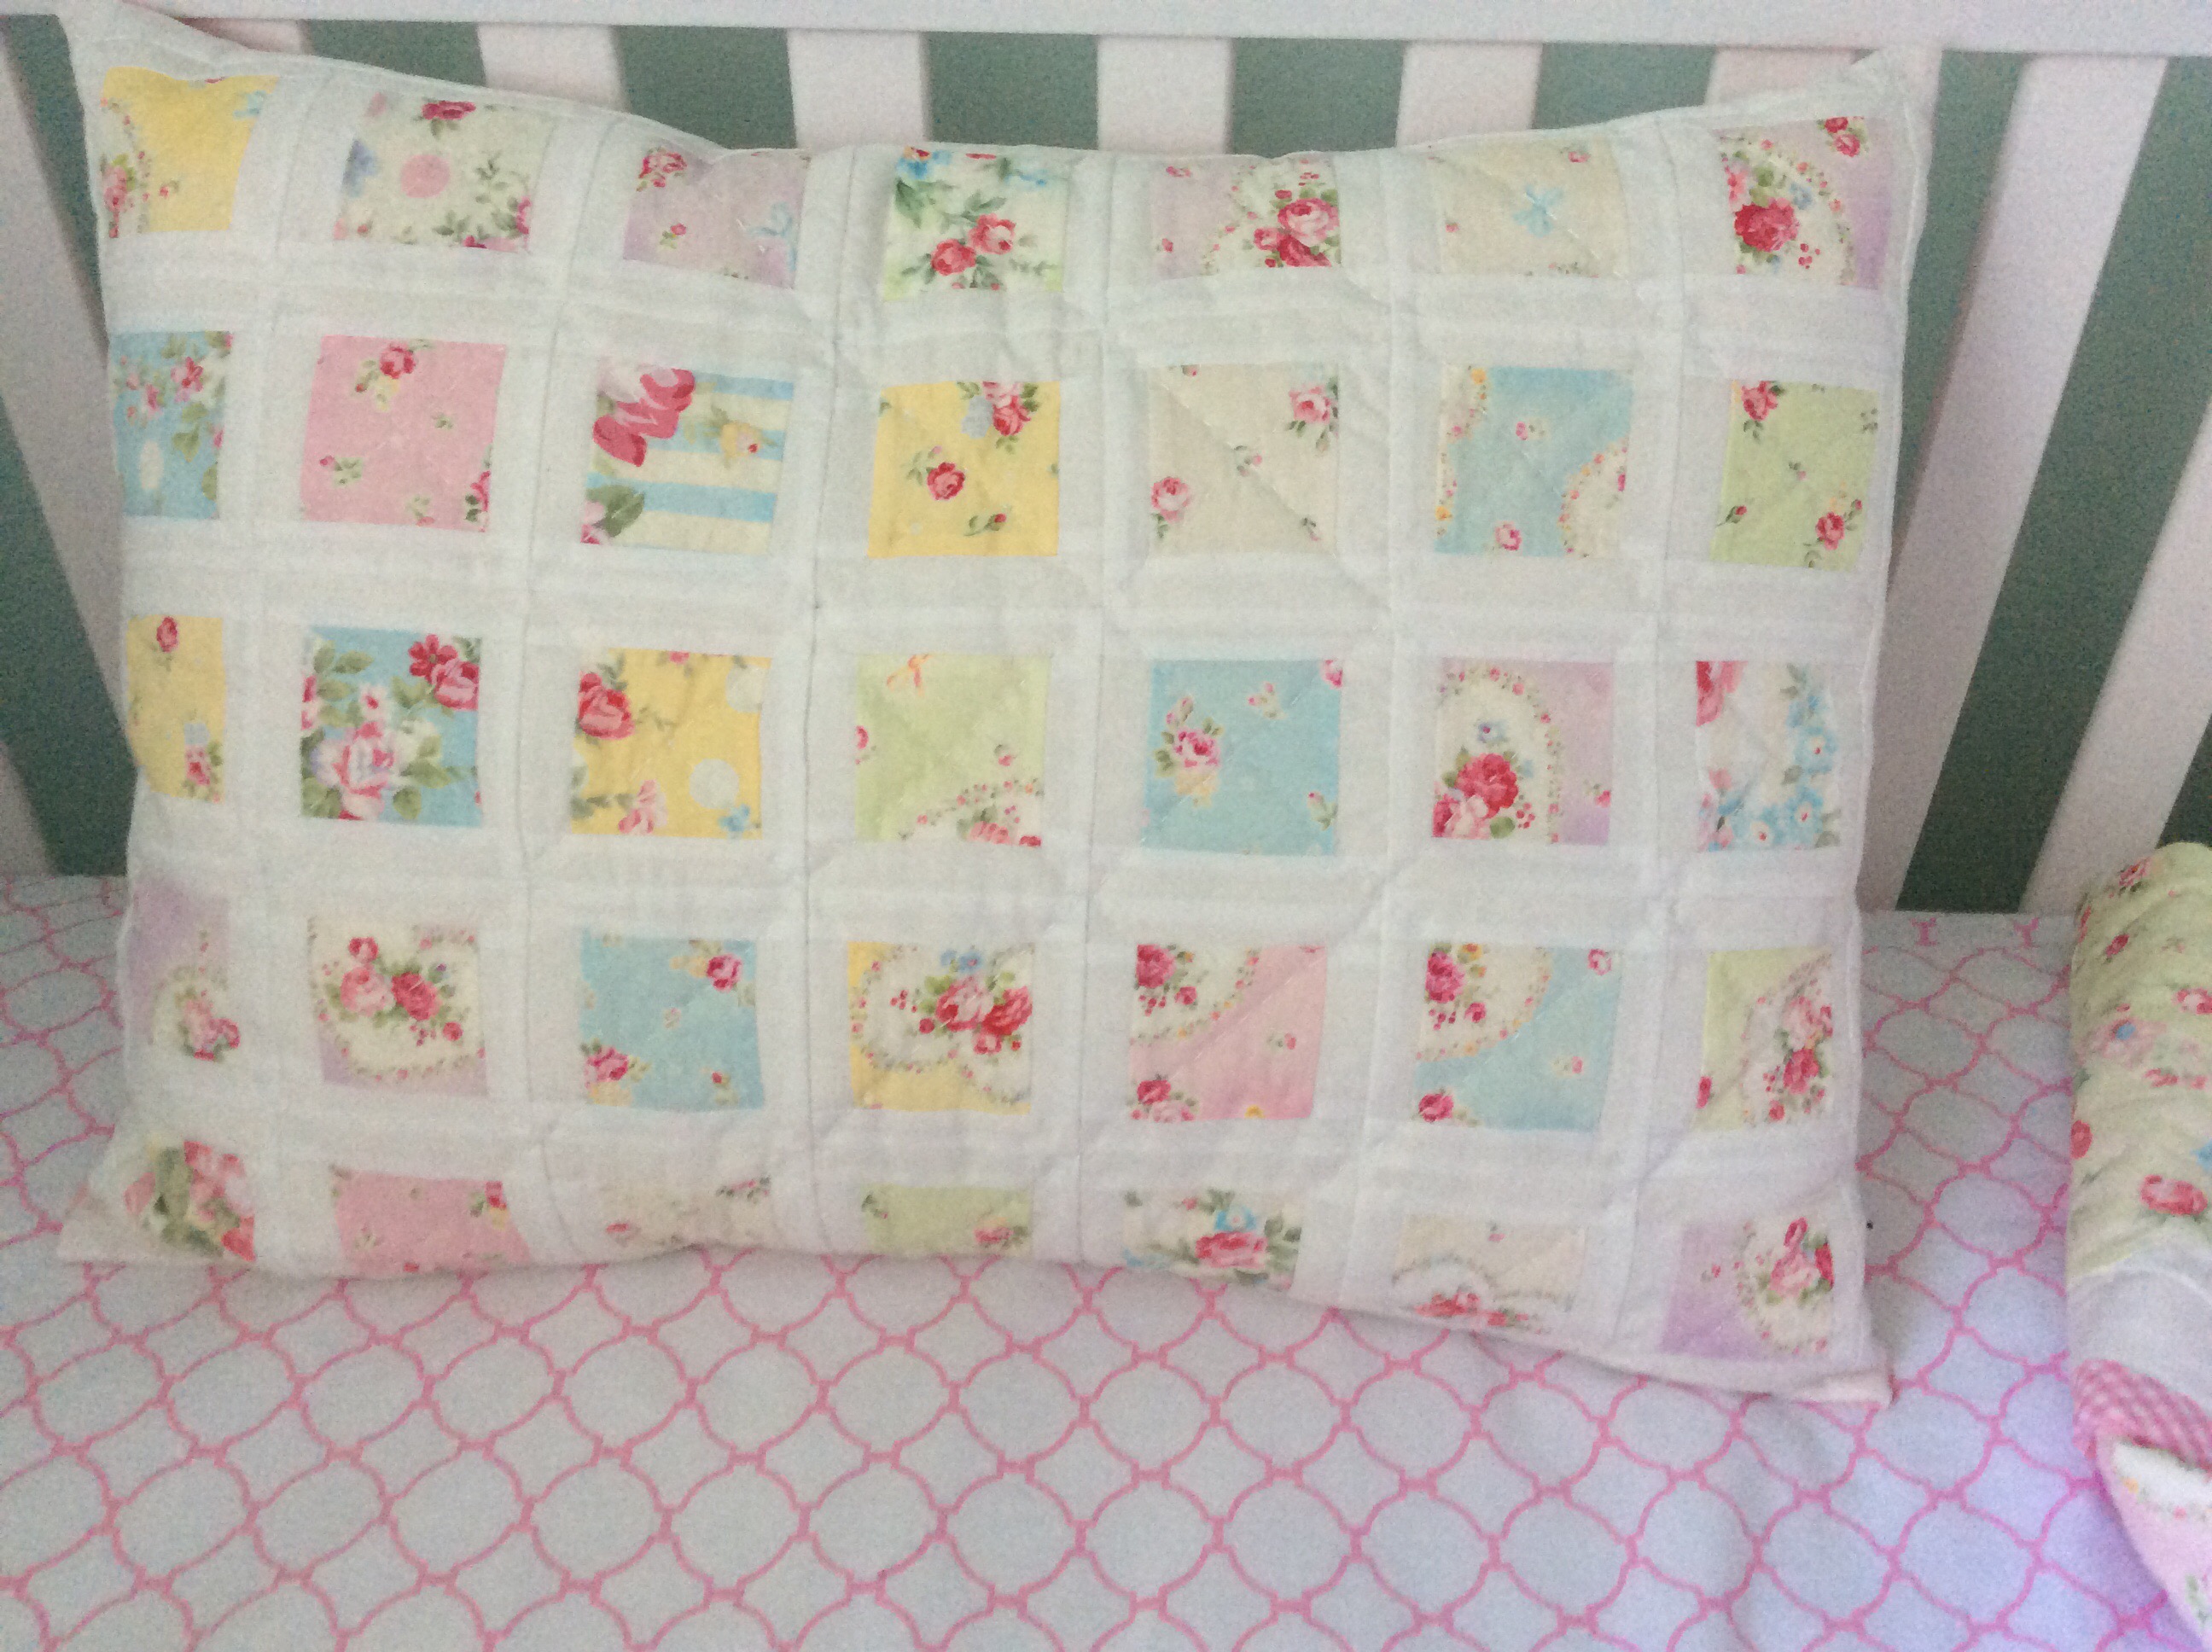
I love patchwork quilts, don’t you?

.


.

.

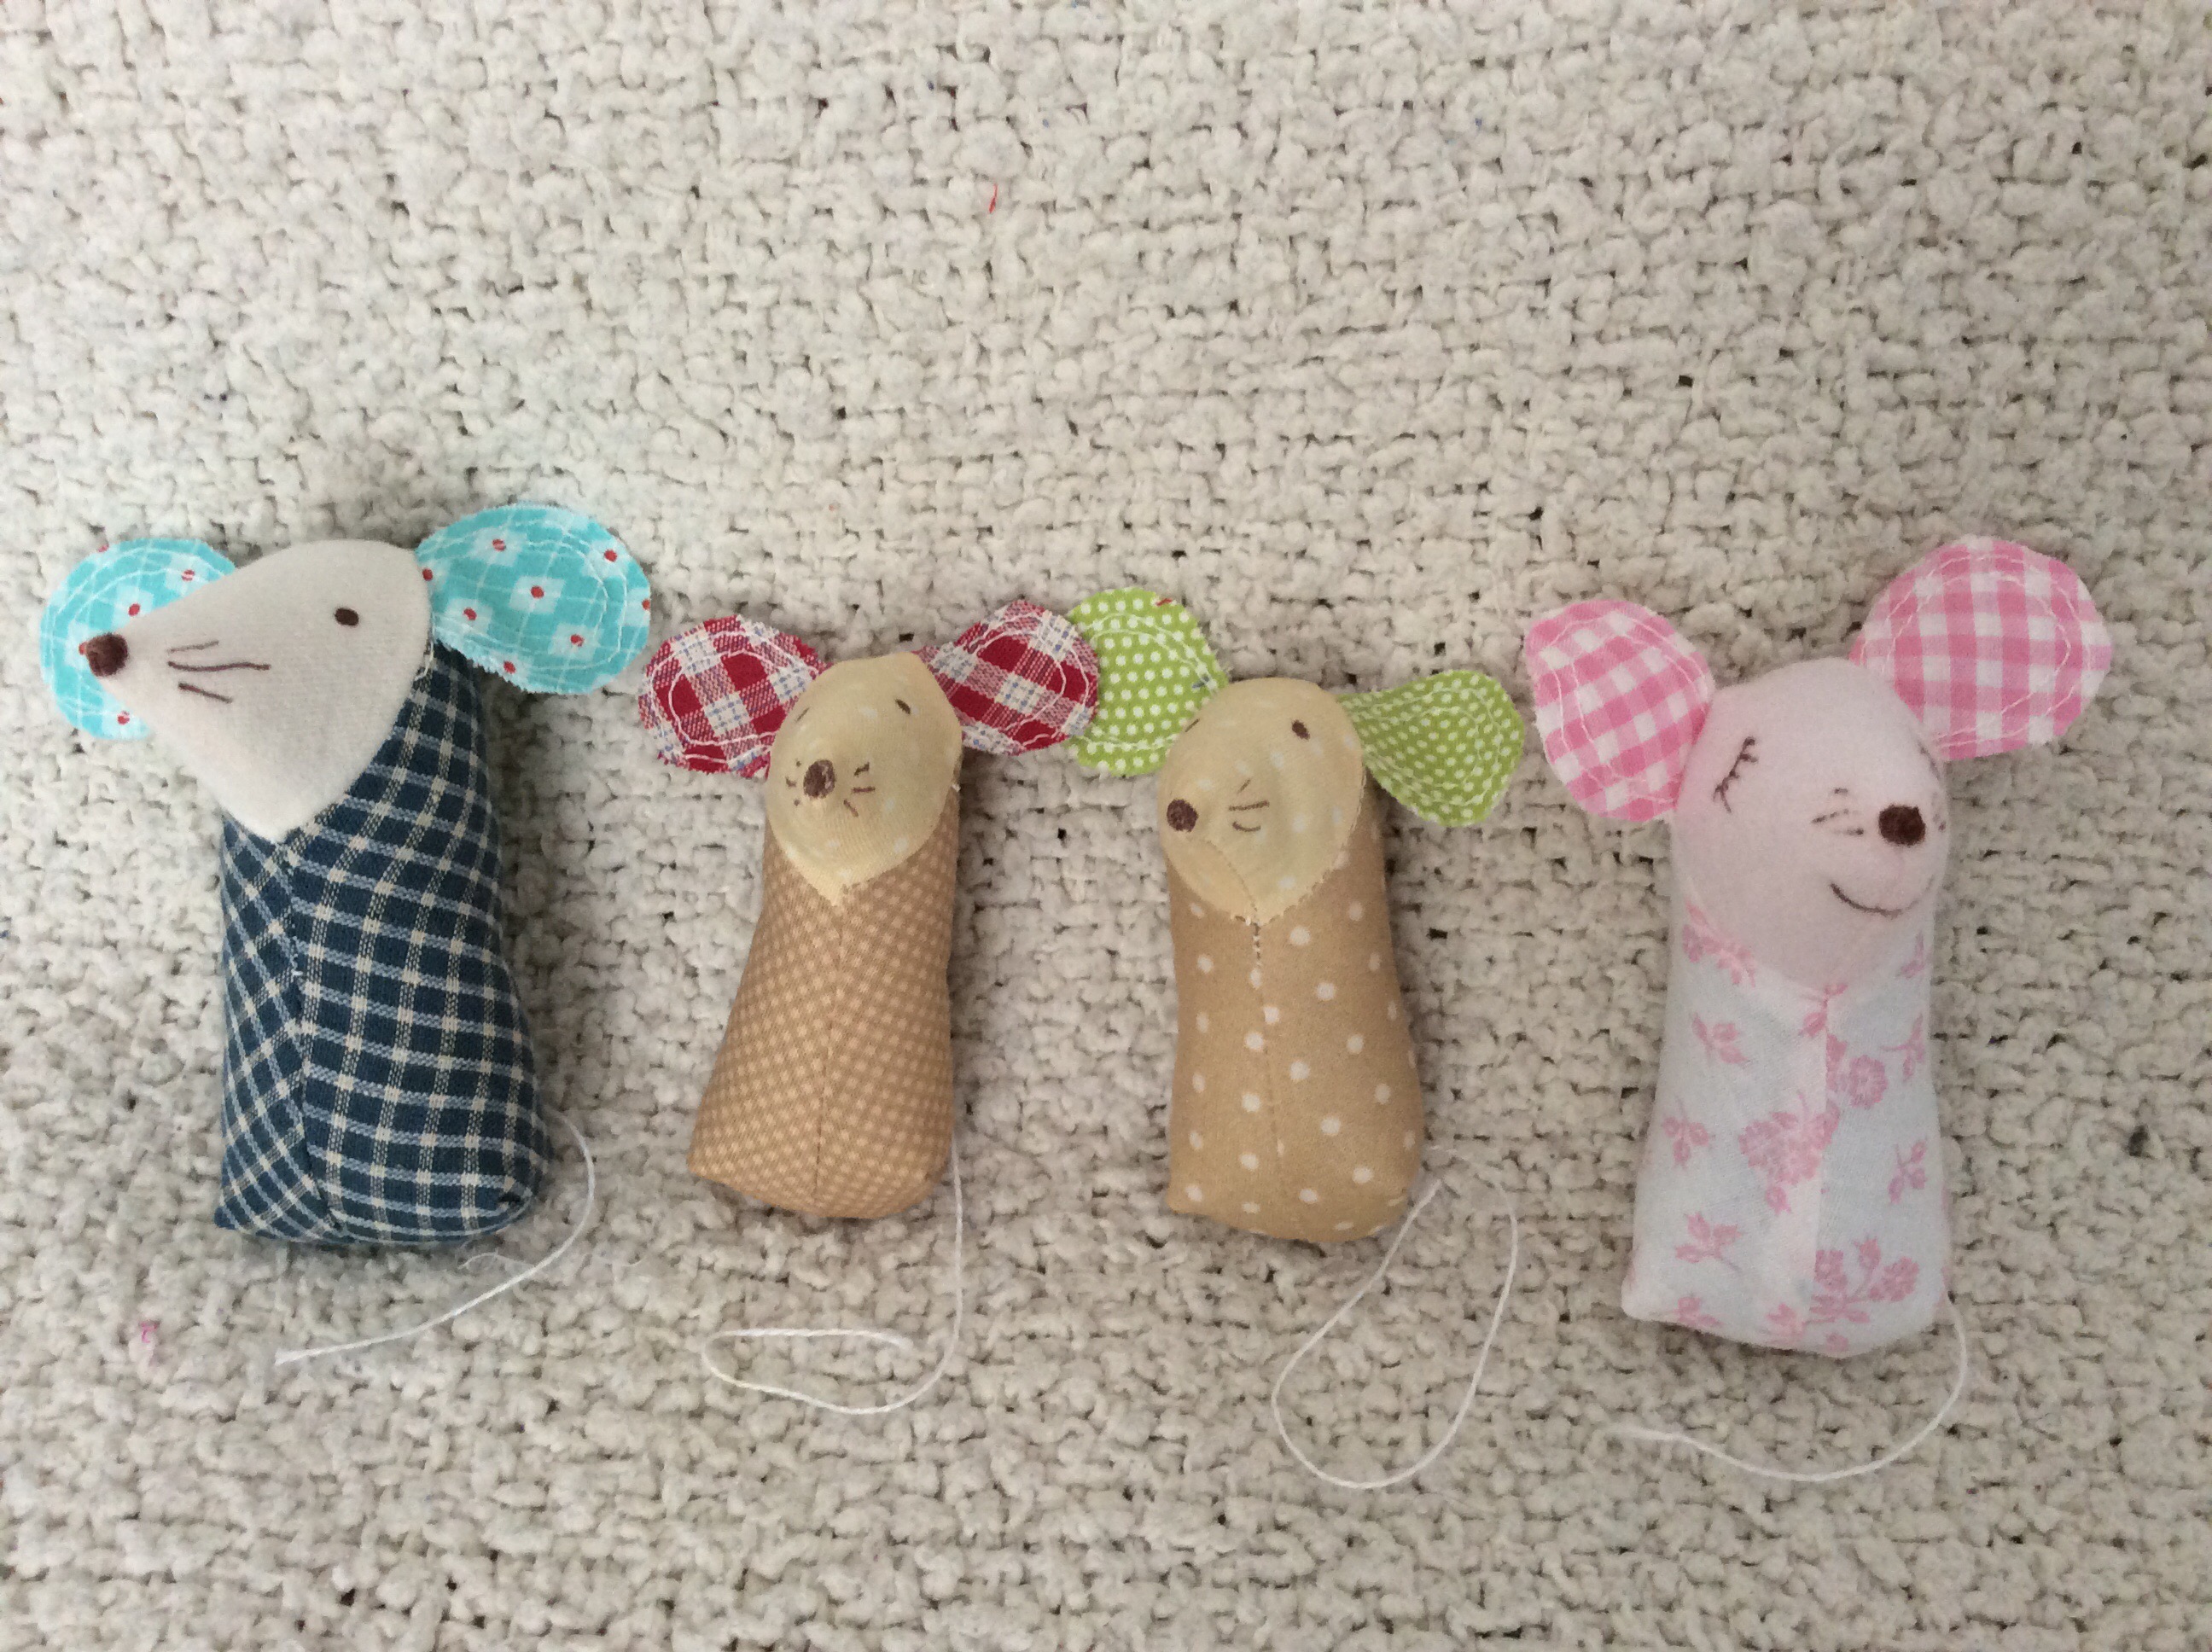
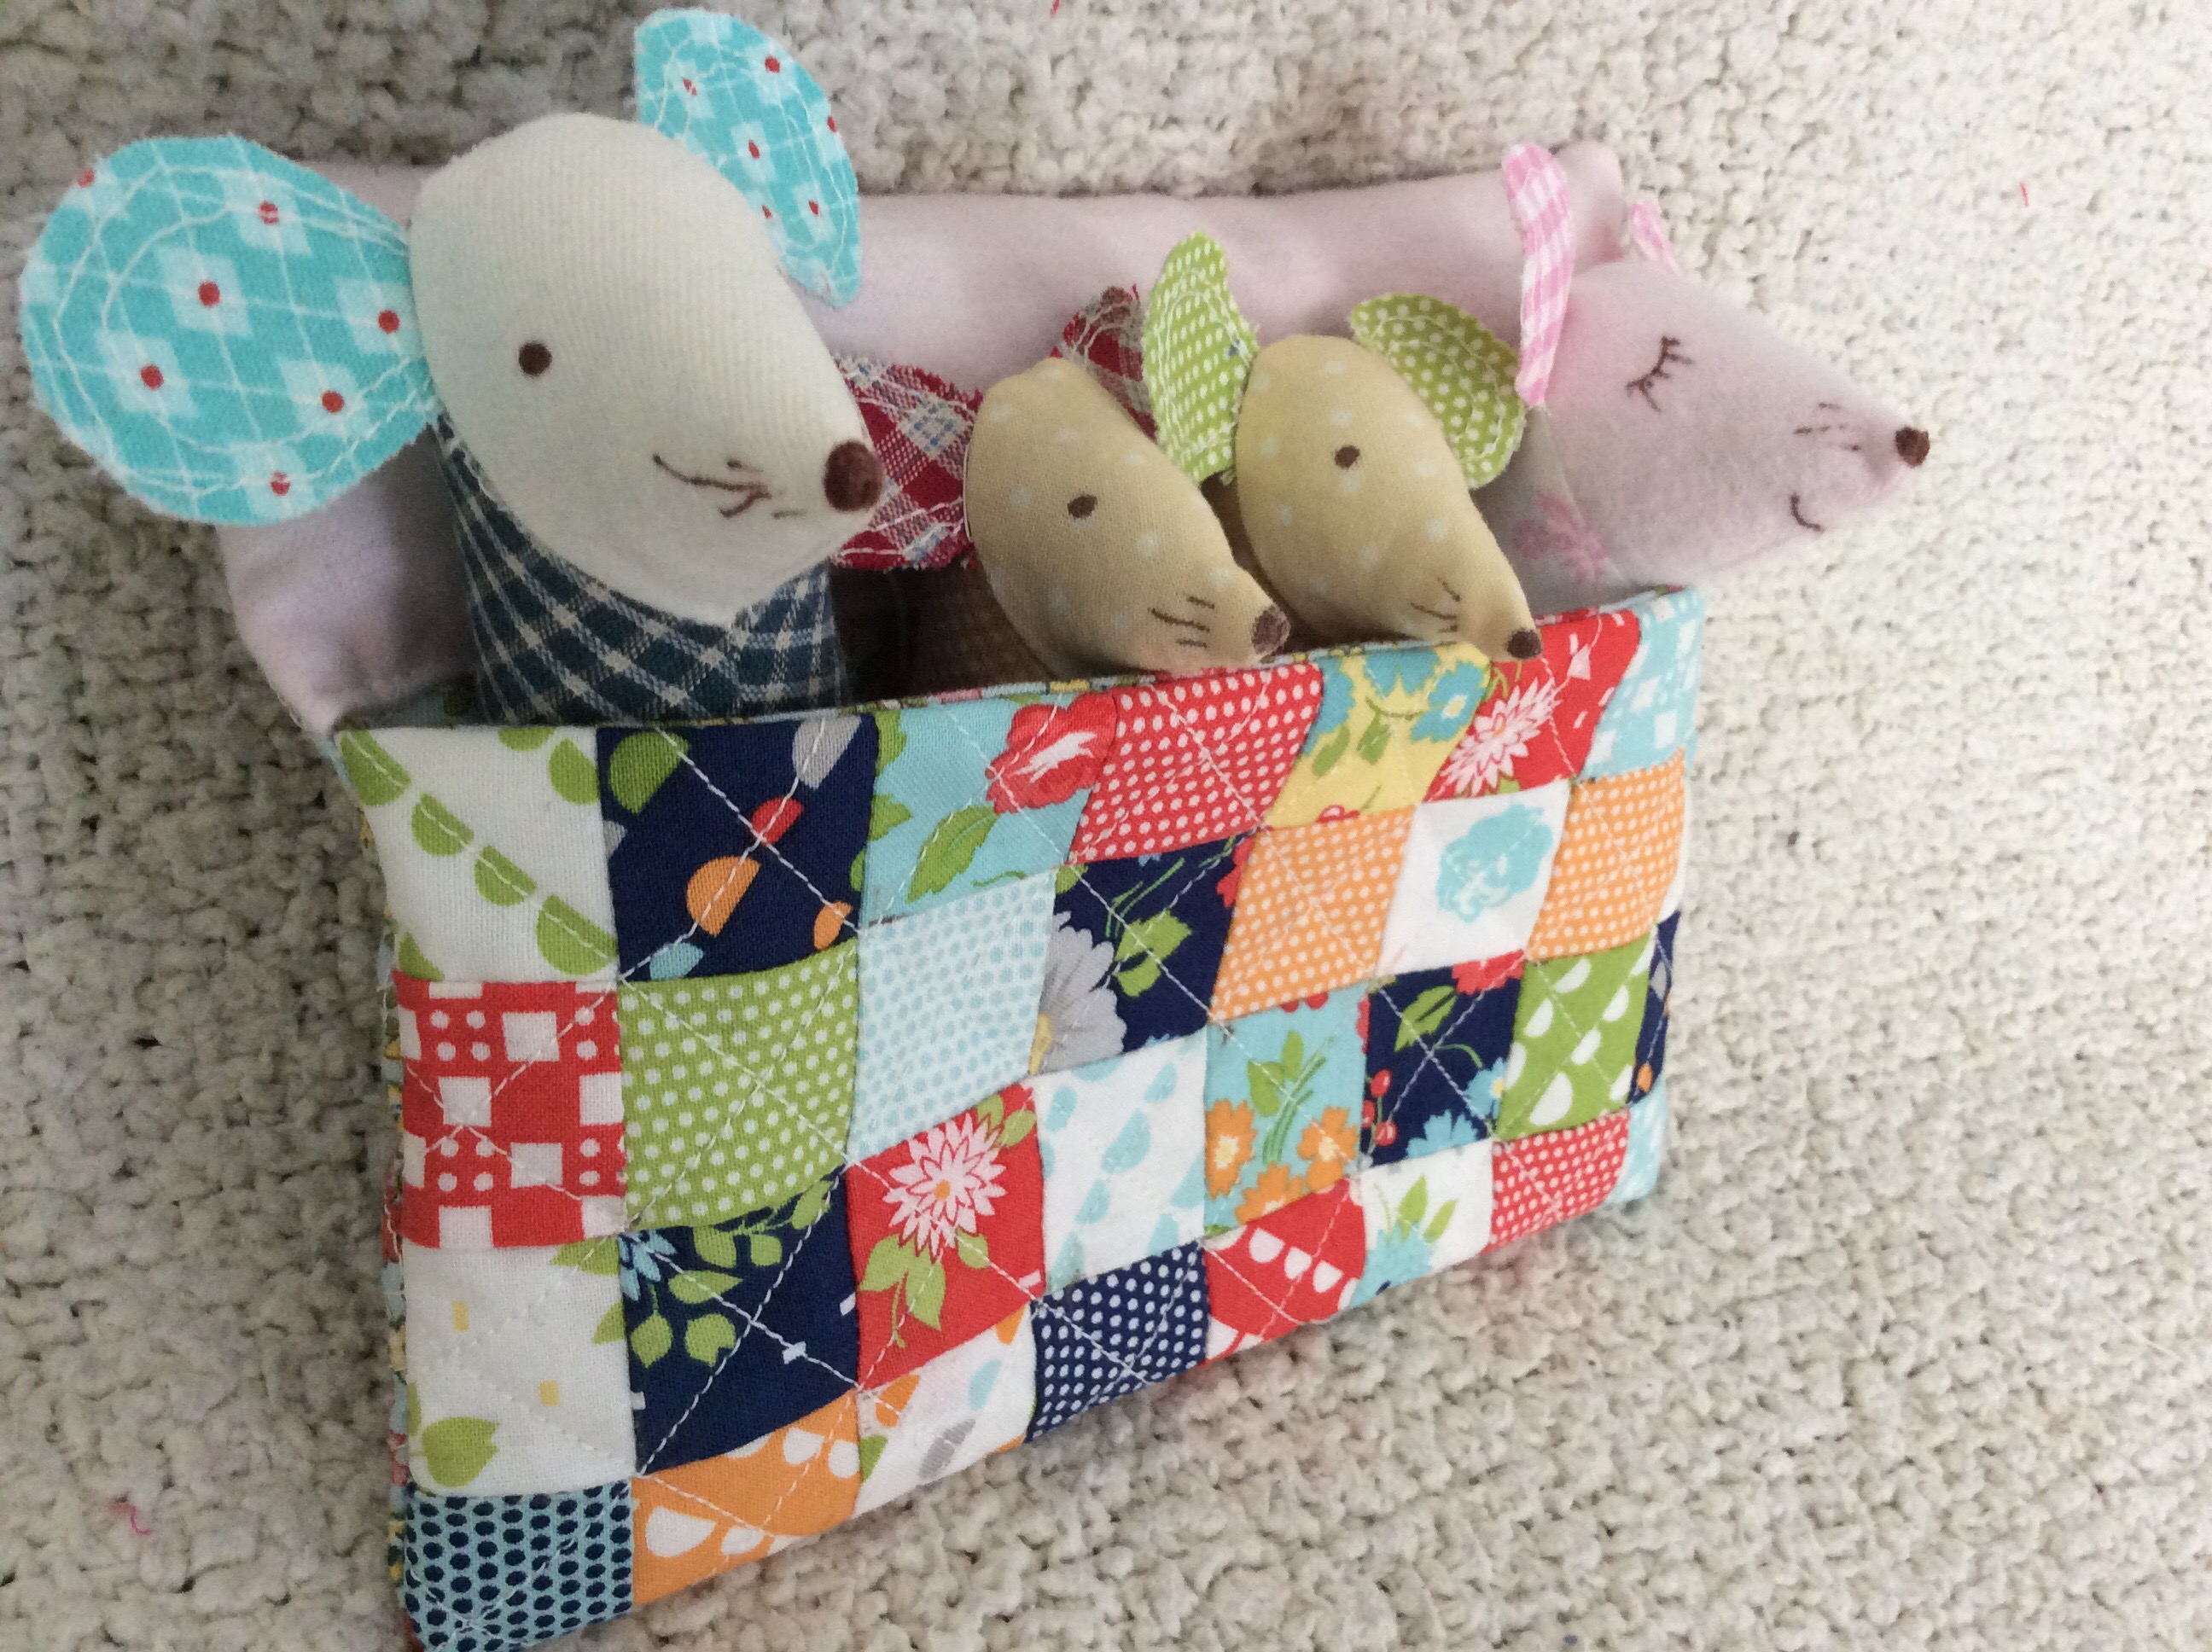
For the mice, I decided to use print instead of solid fabric.  


.

.

It was fun sewing on the tails and working on their faces.  As you can tell, I decided to use a fine-tip permanent marker (instead of embroidery) on the faces.  I was short on time… I had to get this in the mail in time for a birthday surprise!


.

.


.

If you’ve got any projects or magazine clippings filed under “someday”. . .  Choose one and get started!

It’ll be fun!

Happy sewing and a great weekend to you!

Daisy

Advertisement

Read Full Post »

There are so many cute things we can make with just a bunch of little pieces of fabric sewn together.  

 .

This is a little patchwork cover I made for my daughter to keep her hand-lettering sketch book in.

.

.

.

I sewed a little piece of elastic ribbon to the back so that it could wrap around the button on the front and form a closure.

.

.

.

Here’s a view of the whole thing.

All I did was sew together 2 1/2 inch squares (a mini charm pack), from the Farmhouse collection by Figtree & Co, for Moda. There’s 42 squares in each pack so I had some leftover squares for another little project.

I bought the fabric from Missouri Star Quilt Co, where I buy most of my pre-cuts.  If you enjoy quilting or sewing, you should definitely check out their daily deal!  It’s a great bargain and sometimes they have a special sale where they offer multiple “daily deals”.  Their website is Missouri Quilt Co.  

.

.

.

I like this group of fabrics!  They are so cheerful and colorful.

For the quilting, I used one of the stitches on my machine – it’s curvy and adds a little more interest than just straight stitching.  It’s also easier for me, since I’m not too practiced with machine quilting.

.

.

On the inside, I put pockets on each side so she could keep her rulers, pens, and markers in there.  I wanted a little more color in there so I added two squares on each side.

.

.

.

After I sewed the elastic ribbon onto the back, I went ahead and sewed a tiny button on top so it would look pretty and the stitches wouldn’t show.

.

.

.

For the closure, a shiny button with pretty “diamond” stones.

.

.

.
I love projects like these that I can finish in one day.  

Working with these fabrics is fun and it made me smile seeing the pretty prints and words.

What projects have you been working on lately?  Can you believe we are already at the end of April??  I’m thinking I better plan ahead for Christmas gifts now if I want to finish them in time.  

.

Have a great weekend and happy sewing!

.

Daisy

Read Full Post »

I got to sew some pretty little things for my granddaughter who turned two recently…

And one of them was this cute little back pack.

.

.

The pattern is Simplicity #5284.  It’s a mini version of a full-size, or adult, back pack.  

I used 2 fat quarters (18″x21″ piece of fabric), and some left-over fabric from a little blouse I’d made her.

.

.

I used some lace instead of ribbon for the bow and added a bling button for a touch of fun… I thought she would like it, especially when she gets a little older (like 3).  🙂

I sewed these on by hand so it wouldn’t show up on the under side of the flap.  I also wanted to make sure it was on securely so that it wouldn’t come off after much use.  

.

.
The pattern called for elastic at the top, which I thought was genius.  Everything stays inside, yet it’s easier to access than if it had a tie.  (Why don’t back packs for grown-ups have this feature??! 🙂 

I sewed on a piece of hook & loop tape for the closure – small enough that she can easily open it without a lot of effort, but big enough to keep it closed when she’s wearing it.  

The pocket is large enough to hold a small box of crayons, or pencils, or a little dolly… whatever she likes.  🙂

.

.
I used the wrong kind of interfacing… the pattern suggested light-weight and I knew that wouldn’t be enough, so I used heavy-weight; but it was really hard to sew. – even with a heavy-duty needle.  Next time, I will definitely use medium!  Lesson learned.  

However, it did feel like a “real, store-bought” back pack.  So, maybe the heavier interfacing was the right choice after all?  

The pattern was easy to understand and the straps went on without a problem.  I had never made a back pack before, so some of the placements (such as the tabs to pull the straps through) didn’t really make sense until everything was turned right-side-out.  So the lesson here is… follow the step-by-step instructions and in the end it’ll all make perfect sense.     Maybe, Kind of like life?… But I digress…

.

.
It was so much fun for me to make this, especially since it was for my granddaughter!  

Using the three fabrics was different and gave it a whole other look to it.  Maybe next time I’ll just use one… maybe.

I can hardly wait to sew another one!

.


.

Looking forward to sharing with you a pic of her wearing or using her little back pack.  I get to see her soon again!  🙂

More projects to share in the coming days.  Yay!

Have a blessed week,

Daisy

Read Full Post »

A little dress

I like to sew.  

But sewing tiny things…

That’s just a whole other level of fun for me…


.

And sewing for my granddaughters….

Just keeps me smiling the entire time.

.

.

I got this fabric on sale at Joanns.  It feels soft like cotton, but has the look of linen.

I thought it would be perfect for a little girl’s dress.

.

.
It was an easy pattern and I just made a few changes to it (Butterick 4176).

.

.
I also added a tiny little ruffle to the hem…

It’s a bit time-consuming, but I think they always look so cute,

It’s well worth the effort!

.

.
I can hardly wait to see how it looks on her! 

Have fun sewing!

Daisy

Read Full Post »

It’s so much fun making little things for my granddaughters!

.

.

I made each of my granddaughters a soft doll, with a mini quilt and a little pillow.

.

.

.

I have to tell you, I kept smiling while I was making these!

.

..

I still smile when I see the little doll’s face!

And her hair!

.

.

.

The pantaloons were easy, quick, and fun!

.

.

.

.

.

I wanted the doll quilt to look like an 1800s quilt.

I used scraps from two different fabric lines – Buggy Barn/Henry Glass and Bon Voyage by French General/Moda Fabrics.

The borders I chose from my fabric stash.

The doll quilt measures about 12 inches long.  Perfect size for the doll 🙂

.

.

I made a “mattress” for the basket bottom, and a little pillow to go with the quilt.

.

.

.

.

..

For the doll’s hair, I used strips of scrap fabric cut with pinking shears, strips of lace, ribbon, twine, muslin, whatever I could find …

I wanted them to stay secure, so instead of gluing them, I sewed them on.

..

I wasn’t sure how each granddaughter would react (they’re still very young and haven’t really been playing with dolls yet).

One of them was here, visiting us for Christmas, and the other granddaughter was on FaceTime.  Modern times.  I’m so thankful we can talk everyday and see them and our kids!!!

I handed the gift bag to the granddaughter here and when she pulled the basket out with the doll, she looked at it, took everything out, put it back in the basket, and walked around the living room doing the same thing over and over.  It was so funny!  She didn’t want to open any other gifts, she just wanted to keep playing with her little doll.  Then she came up to me and gave me a big kiss!  It’s as if she was saying, “I know how much time and love you put into this for me!  Thank you!  I love you!”

Well, that certainly made it all worth it!  Sewing all the tiny half-inch squares, hand stitching the dress, bow, button, hair… it was worth it!!  🙂

.

img_1374

.

Have a blessed week-after-Christmas-before-New-Years!

.

Daisy

Read Full Post »

Every year I tell myself I’m going to start early on Christmas gifts next year.
And I do.
I really do.
I start.
But somewhere along March or April…
other things begin to crowd out the unfinished gifts list…

Sooooooo………..

I’ve been working hard on Christmas gifts for friends and family…

Some I’ve made using photography, some are sewn, some are quilted, and some are beaded…I can only post a few pics from the ones that have already opened their gifts, but I can’t wait to show you in the coming weeks, all the different fun projects.

For now, here are a few beaded gifts I had fun making…

.

.

This green and gold set was for a friend.  I just loved her reaction when she opened her little gift box.  That’s really what makes it all worth the time and effort – knowing they liked it and will enjoy wearing it.

.

.

.

..

.

..

This pink & silver & clear set was fun to make, too.

I use glass beads because I like the feel of them.

..

I tie them together with some ribbon and tulle.

.

..

These blues feel great…they’re a nice heavy glass and have the look of stone.

.

I’ve made some others, but those will have to wait because they won’t be opened until Christmas day, along with other sewn handmade gifts which I can’t wait to show you as soon as their recipients have opened them!  🙂

The rest of this week I won’t be working on crafts or gifts any more… Now it’s time to stop and enjoy the friends and family that come to visit, and to cherish the FaceTime calls with precious ones that live in other places.  I’m so thankful that we can see them even if it’s on the computer screen.  Their dear faces, smiling at us.  We’ll soon see them, too, in the next few weeks and months.

Take time to enjoy your loved ones this week.  Time is the greatest of gifts, anyway.

Happy Christmas week!

Daisy


Read Full Post »

I’ve been away from my blog for way too long… hurricane, working, traveling, . . .

All good reasons, but I must say… I miss you!

I finished the quilt for my youngest grand baby and wanted to share it with you.

I used Princess Rose fabric by Lecien.

And made the Flower Garden pattern in one of MSQC tutorial.

I made a standard-size pillow cover so she can use it when she gets into a bigger bed.

I just did it in my own square patten…it was actually a mistake, but when it was finished, I thought it looked nice.

The fabrics ar so soft and beautiful!  I loved the way they looked together!

I made a little pillow with one of the squares, so she could use it anywhere.

For the binding, I used a pink gingham…tiny squares….I love gingham of any color, but this one was just right for this baby girl quilt.

I hand-quilted it in a petal pattern.  I actually cut a piece of cardboard in a petal pattern and traced it inside each flower petal.  Then I quilted around each petal on the outside to echo the flowers.  I was really happy with the way it turned out.

As I quilted, each evening, I’d pray for my baby granddaughter.  She is a joy and a gift from God.

The pillow case has a zipper in the back so my daughter can just take it off and wash it whenever it needs it.

I just hand-quilted across each square…sometimes simple is best.


This is not a good picture, but it’s the only one I have of the whole quilt top.

And this is the back.  You can really see the quilted pattern here.


I think she liked it.

She loves to “read”!

I’m thrilled that I was able to give each of my granddaughters a quilt for their first birthday!

Now to work on Christmas goodies… 🙂

Have a wonderful weekend, everybody!

Daisy

Xoxo

Read Full Post »

Baking bread is just wonderful….


It’s therapeutic for me mixing, kneading, waiting for the dough to rise…


The house smells so good while the bread is baking…


And then you get to enjoy the bread – in my case, I’m giving it to a friend, along with jars of homemade preserves.

I have to say, I love giving homemade food gifts to friends – the look
on their faces,
I can just tell they appreciate it and I’ve brought some joy to their day.

That makes my day!


Here’s the recipe:

Italian Bread

In a bowl, stir:
1 cup warm water
1 Tb sugar
1 packet of active dry yeast
Let stand about five minutes, until it’s foamy.

In a large bowl, mix together:
2 cups bread flour
1/2 tsp salt
Add to the bowl:
the yeast mixture and
2 Tb olive oil
Stir with a wooden spoon
Add up to 1/2 cup of flour until it forms a dough.

Turn onto a floured surface and knead for about 10 minutes.
Shape dough into a ball, place in an oiled bowl and turn to coat.
Cover with plastic wrap and let dough rise for one hour, until doubled.

Head oven to 400 degrees F.
Lightly oil the surface of a baking sheet with olive oil.
On a lightly floured surface, punch down dough and begin to
shape dough, long and tapered as in photo above.
I finished shaping it on the baking sheet so it would be easier to move.
Cover with plastic wrap and let it rise for about 20 minutes.

Use a serrated knife to make three slits in the surface of the loaf,
about 1/4 inch deep each.
Bake 20 minutes until golden brown.

Cool for a bit.
If you like warm bread, slice it while it’s still warm,
spread some butter and honey, or jam,
and Enjoy!

Have fun today.

Bake some bread. 😊

Daisy

Read Full Post »


I went to the Farmers Market this week and found they had baskets of tomatoes for $1!

I bought three and went home excited about making tomato jam.

I had never tasted tomato jam until just last year, and I thought it was so delicious, I couldn’t believe I hadn’t seen it before, or that it wasn’t everywhere, in every super market, next to strawberry jam or blueberry jelly!  I felt deprived…

So when I saw those tomatoes, I immediately thought, “I could make some jam!  I mean, how hard could it be?


Five hours later, after peeling five pounds of tomatoes, simmering & stirring the pot, checking the consistency countless times, I wondered if this “soup” was ever going to turn into “jam”.

I decided to go sit down, after all, I’d been standing in the kitchen for hours (I already had met my 10,000 steps quota and it was only 5pm!).  While I was checking my emails and Instagram, I fell asleep…

Next thing I know I smelled a hint of something burning… I jumped out of the chair and ran to the kitchen, exclaiming, “no, no, no…!”

I stirred the pot and realized the bottom was starting to stick, but it wasn’t burned!  I tasted it quickly, hoping there was no burnt taste…

Oh, I have to tell you, I breathed a sigh and was so thankful that it tasted fine!  It was still really, REALLY hot from those red chile flakes, but it was delicious.

I grabbed the jars and filled three of them with about four tablespoons left over.  That’s it!  Three pints from FIVE pounds of tomatoes!  I had to laugh…


I was so proud of myself.

For years, (since I first got married and went to college in a rural area), I’d wanted to try canning and I finally did it.

It only took a couple decades.

Now, the jars sit it on my kitchen shelves and I can’t wait until next week when I can go to the Farmers Market, buy whatever is in season, and try canning again!

I can almost see it…my kitchen shelves stocked with colorful jars, filled with all kinds of good food.

Of course, what will really happen is that I’ll end up giving these jars away in pretty gift baskets…

…But I love to do that, too!

So it’s a win/win situation 😊

Enjoy summer bounty,

Daisy

Read Full Post »

I’ve been working on the baby quilt…

Here’s a little pillow case I made with leftover 2 1/2″ squares: 

It’s been so much fun working on this!

I just did a simple pattern, nothing fancy.
  Here’s a pic of the quilt before I started the hand quilting.

I’ve been working on that, too and I’ll post pictures when I finish both the pillow and the quilt.


On a side note, a few days ago I was able to get some quilting thread at bargain prices during a sale at both Joann’s and at Hobby Lobby!

I got some pretty colors for future projects I’ve been wanting to get done.

Happy sewing!

Daisy

Read Full Post »

« Newer Posts - Older Posts »