Feeds:
Posts
Comments

Posts Tagged ‘Gifts’

Colorful Blanket

This is a blanket I made for my daughter. . .

20130802-145854.jpg

It is basically a big granny square.

20130802-150024.jpg

It went pretty quick and it was fun!

20130802-150209.jpg

I chose this combination because my daughter really likes it.

20130802-150356.jpg

It was fun for me to work with these colors and this pattern is a good one for a beginner like me.

20130802-150915.jpg

This is the center of the blanket…

20130802-151143.jpg

I had planned to give it to my daughter for Christmas but I decided to give it to her now, since we got to visit her recently. I’m happy to say she really liked it. 🙂

Happy Friday everyone!
Daisy

Read Full Post »

Notebook Cover

I am in the midst of moving, so I have been away from the blogging world and I have missed it!

I won’t be finished with the moving process (packing, cleaning, unpacking, cleaning) until 2 weeks from now.

I thought I’d share a notebook cover I made not long ago.  It went very quickly and it was fun.
For more examples of notebook or journal covers, see HERE.


DSC_0168

I wanted something practical but also pretty…


DSC_0171

It’s great to have it with me whether I need to take notes or  to refer to notes.


Here’s what the front outside looks like.  I used three different fabrics, …really just pieces that I had left over from other projects.  I liked how they looked together.

DSC_0175

As you can see, I added some lace, a button, and an elastic closure.
Some of the lace I used was left-over from my daughter’s wedding dress. … Sigh….
It was a tiny piece but I wanted something special like that to give it some sentimental value.


This is the inside without the notebook in it.  I put in a red ribbon so I could find my place quickly.
I just hate when I can’t find my place, don’t you?

DSC_0172

I added a small long pocket on the inside front for a pen and a highlighter,
and in the back I added a cute, small pocket for little notebooks, bookmarks,
or some chocolate or gum.  That’s always a nice surprise.  🙂


Here’s the outside open so you can see the whole thing.

DSC_0174


It’s nice to have something personal, …it makes me want to write in it.
Sometimes I sit and write in the mornings, just jotting down my thoughts.

DSC_0169

It goes perfectly with a nice, hot cup of tea.

Happy Sewing!  ..Happy Writing!

Daisy

Read Full Post »

Quick Project and Gift

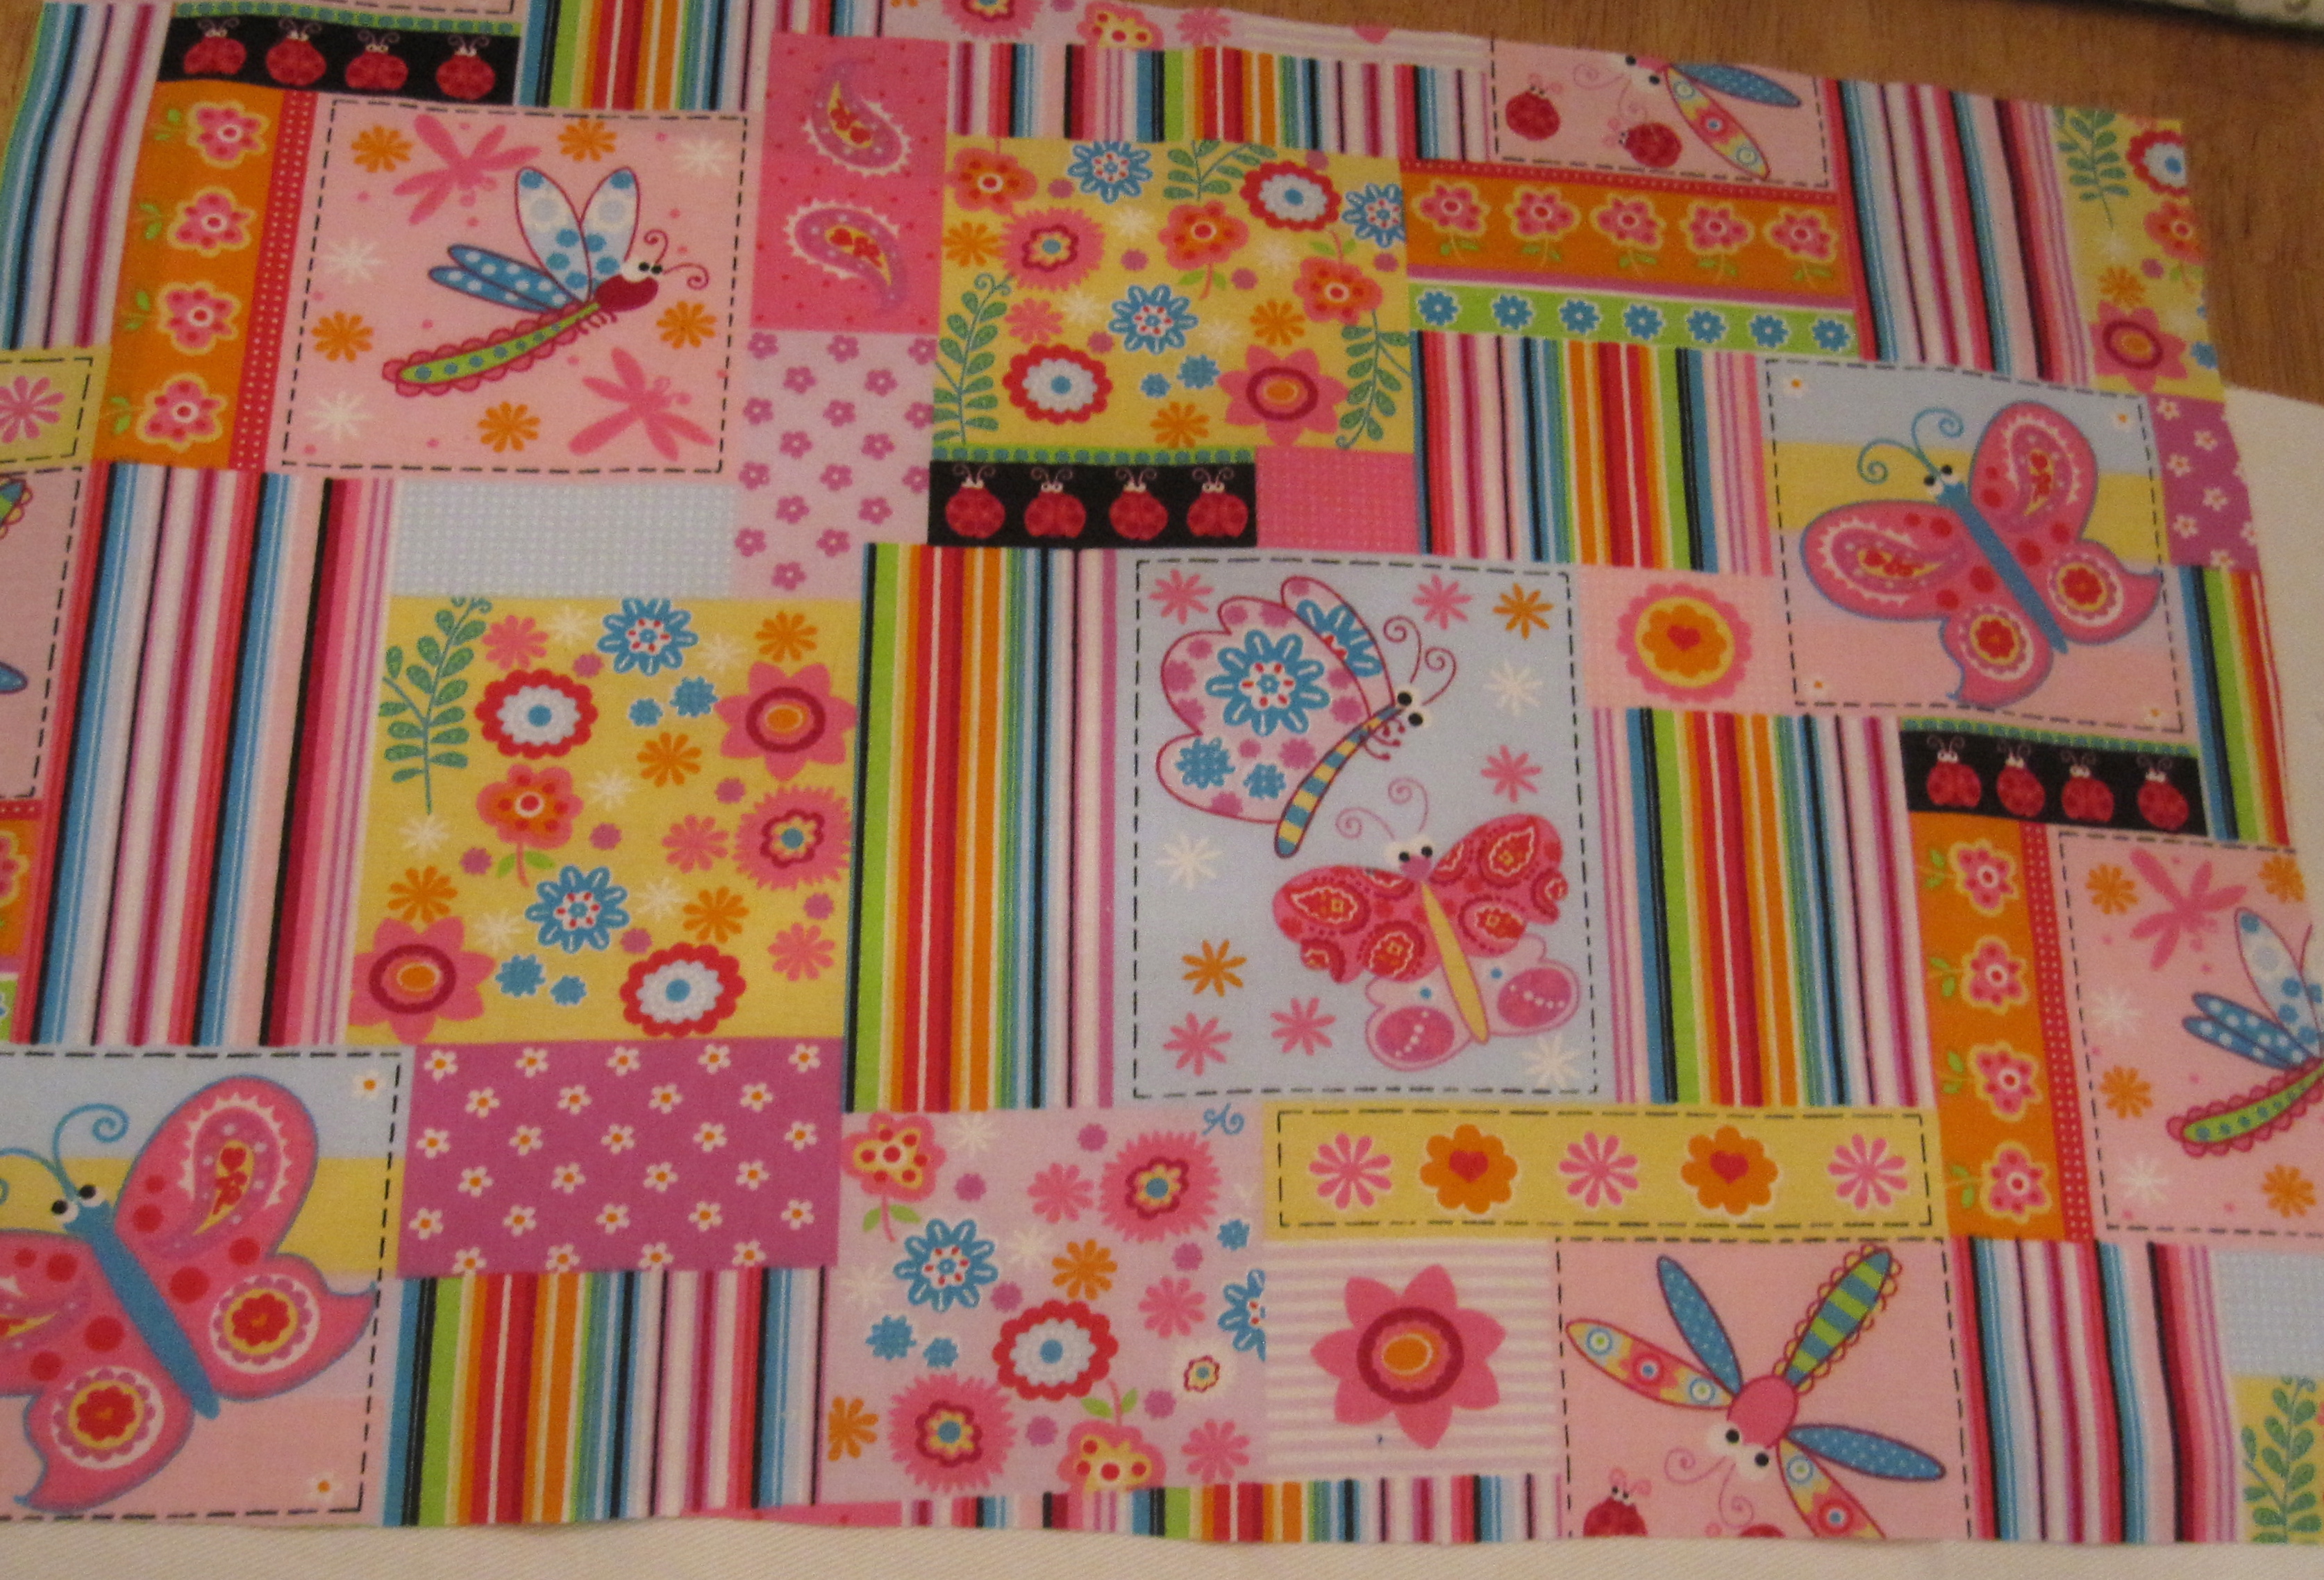
I needed a quick project for a gift I wanted to make for my friend’s little girl (she’s 8 yrs old)– (the little girl, …not my friend.)

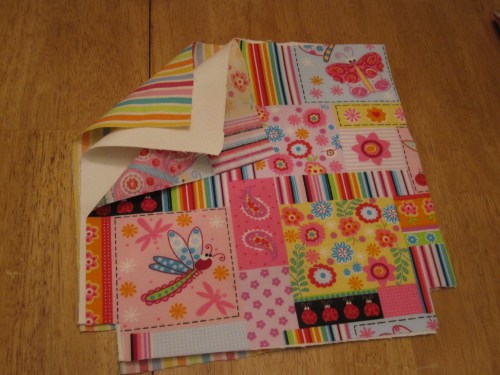
She likes bright, cheery colors, so when I found this fabric in my stash, I knew it was the one for her.

IMG_0608


Now… what to make for her?….   Hmmmm….

She loves to read and also color, write, paint… (she’s very creative)…

So I thought she’d enjoy a little tote bag of her own to carry these small items.


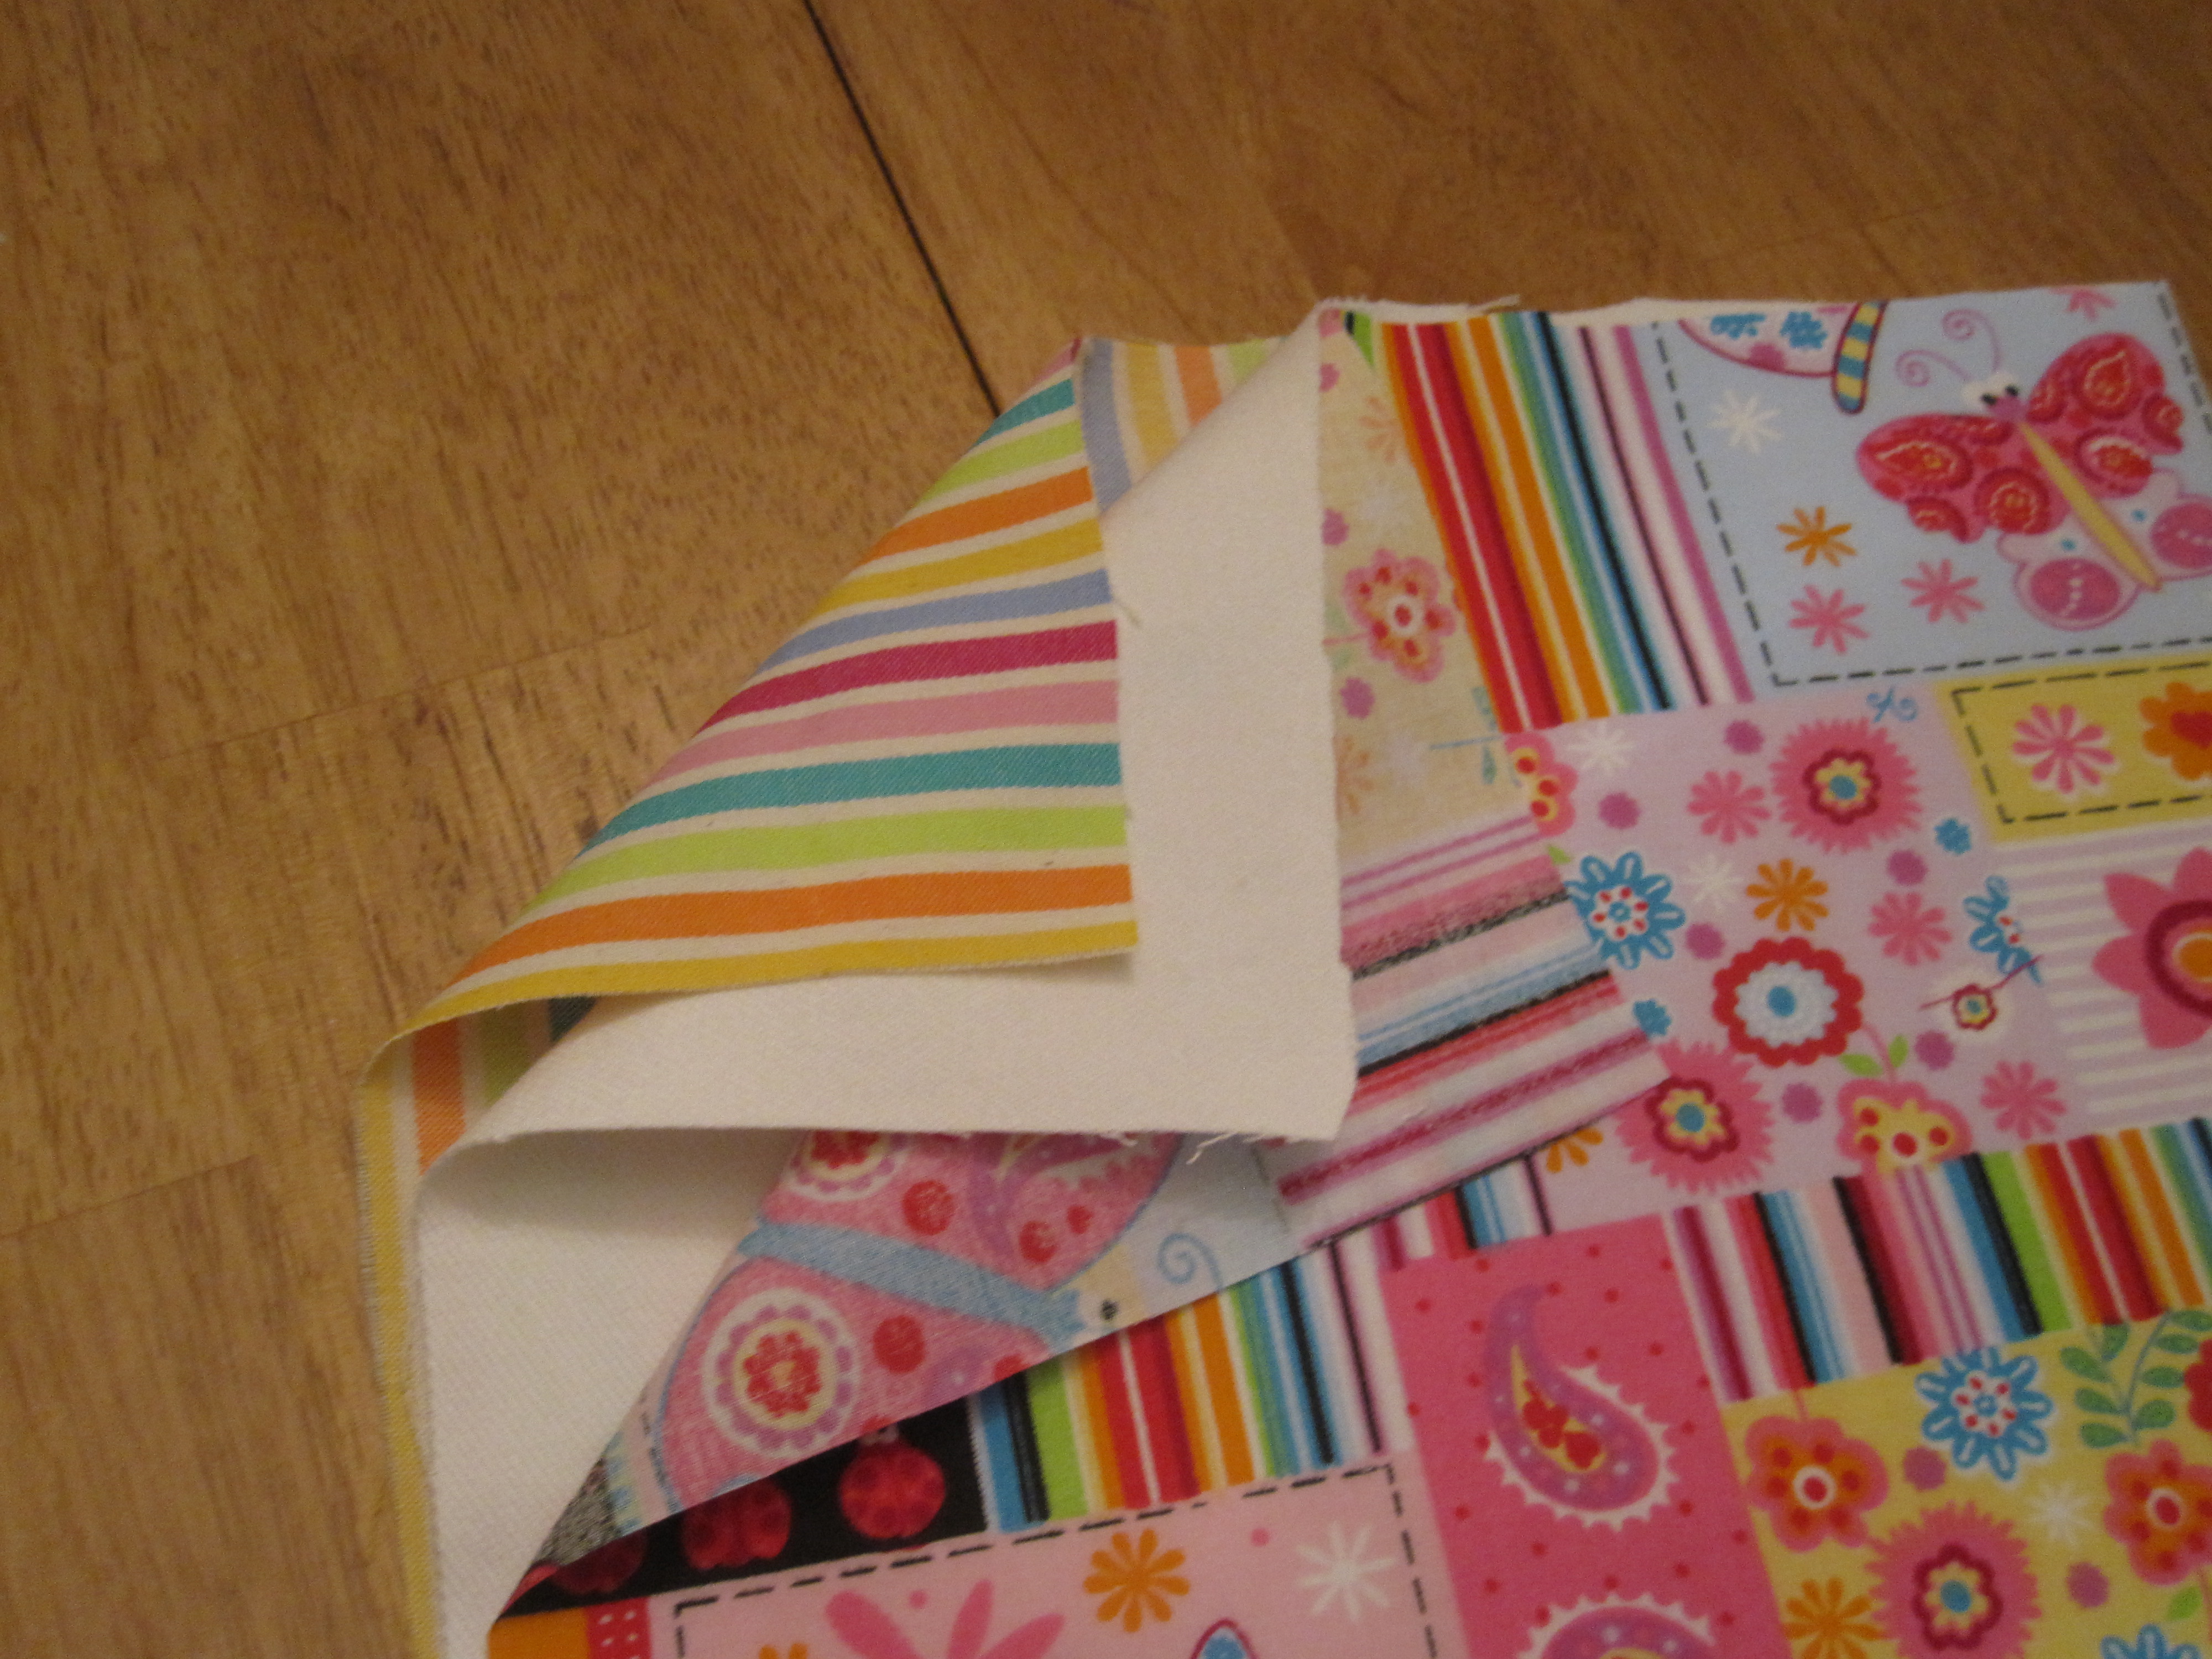
I didn’t have heavy weight interfacing, so I used canvas (my Dad’s an upholsterer so I get remnants for free!) as the lining.
It worked great and gave the tote bag a real store-bought feel because of the extra sturdiness.  Note: please use a heavy weight needle in your sewing machine (same you’d use for denim) in order to sew all these layers without a problem.

IMG_0612


I layered the lining, canvas, and outside fabric, then cut the same size “square” from each bottom corner
(you can tell my square is not “square”, but that’s ok, it still turned out fine.) 🙂
The important thing is that both corner cuts are the same.

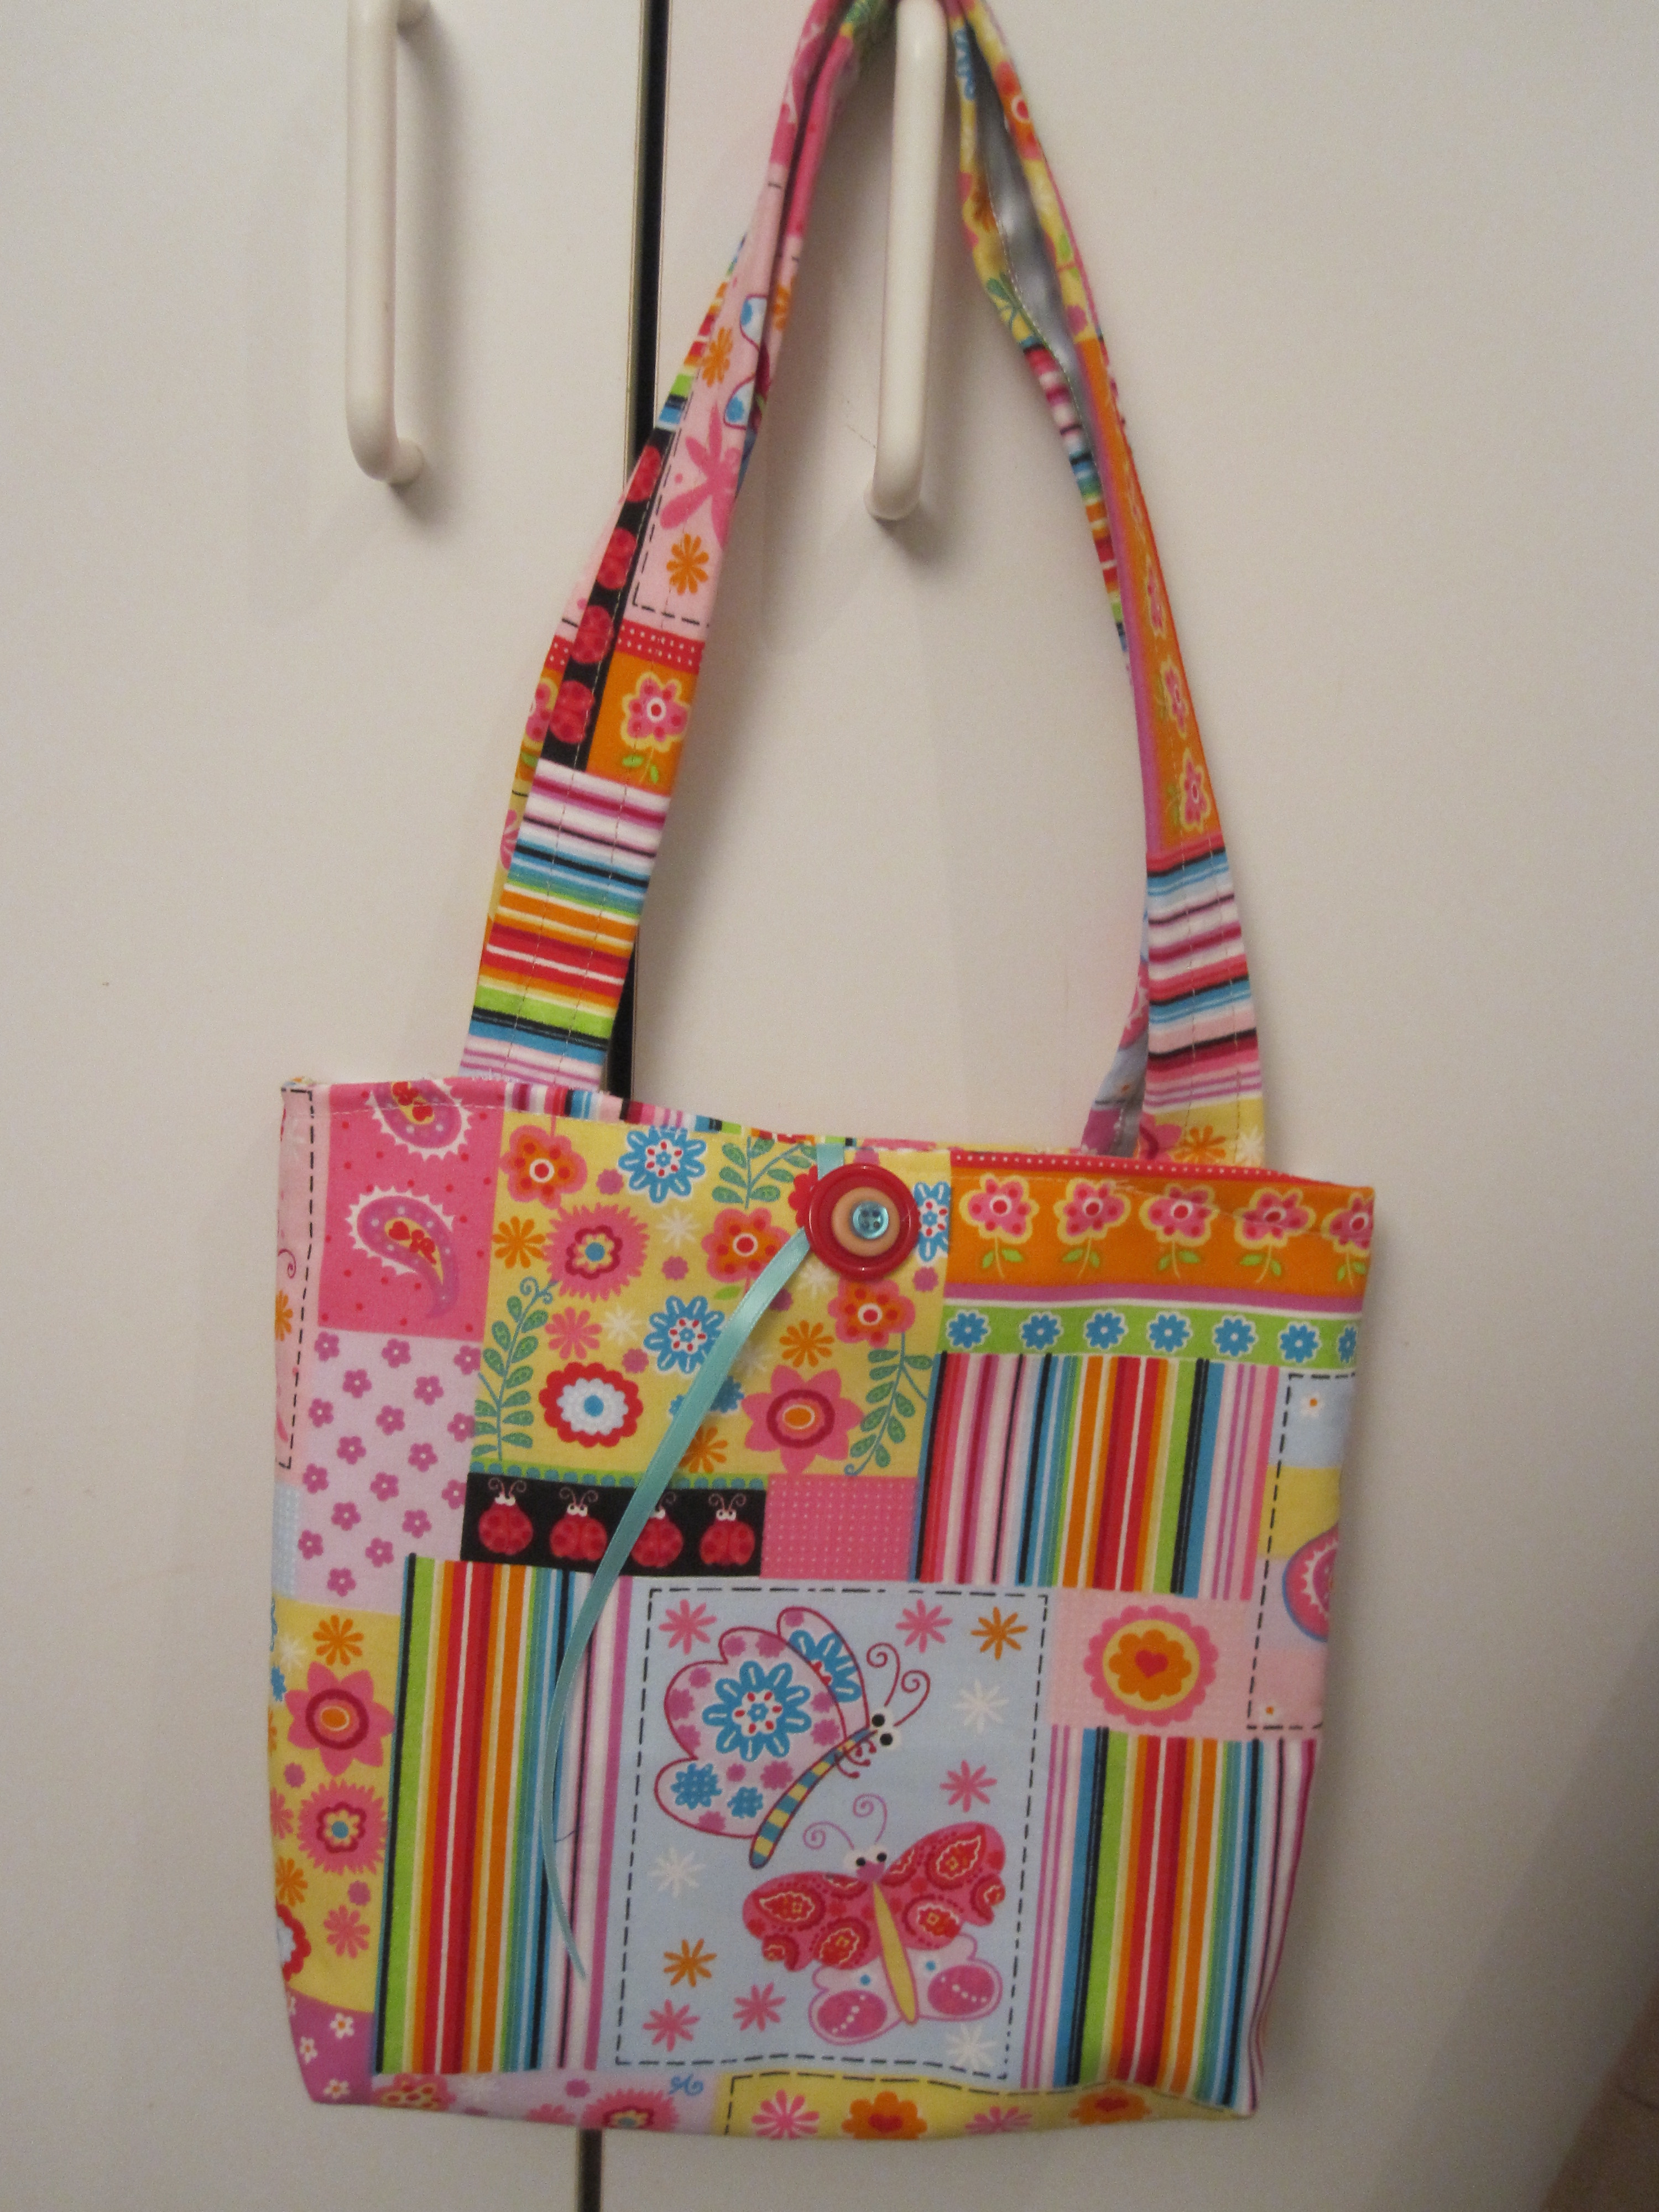
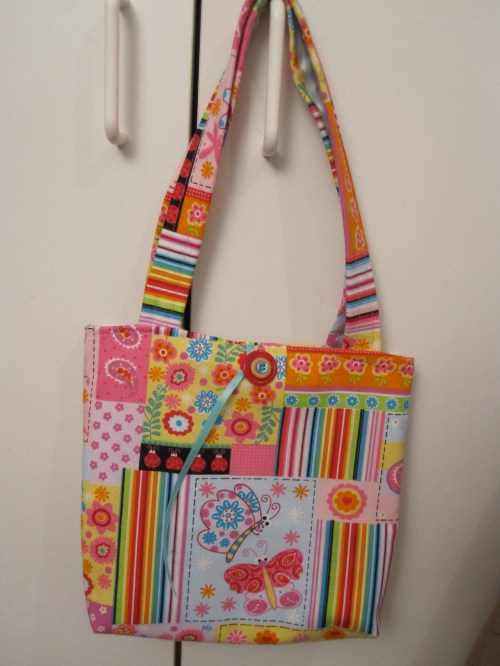
I made the tote bag about 10 inches long by 8 inches wide… just right for a little girl.

IMG_0613


I cut a pocket for the inside (to hold pencils, markers, little writing pads…

IMG_0614


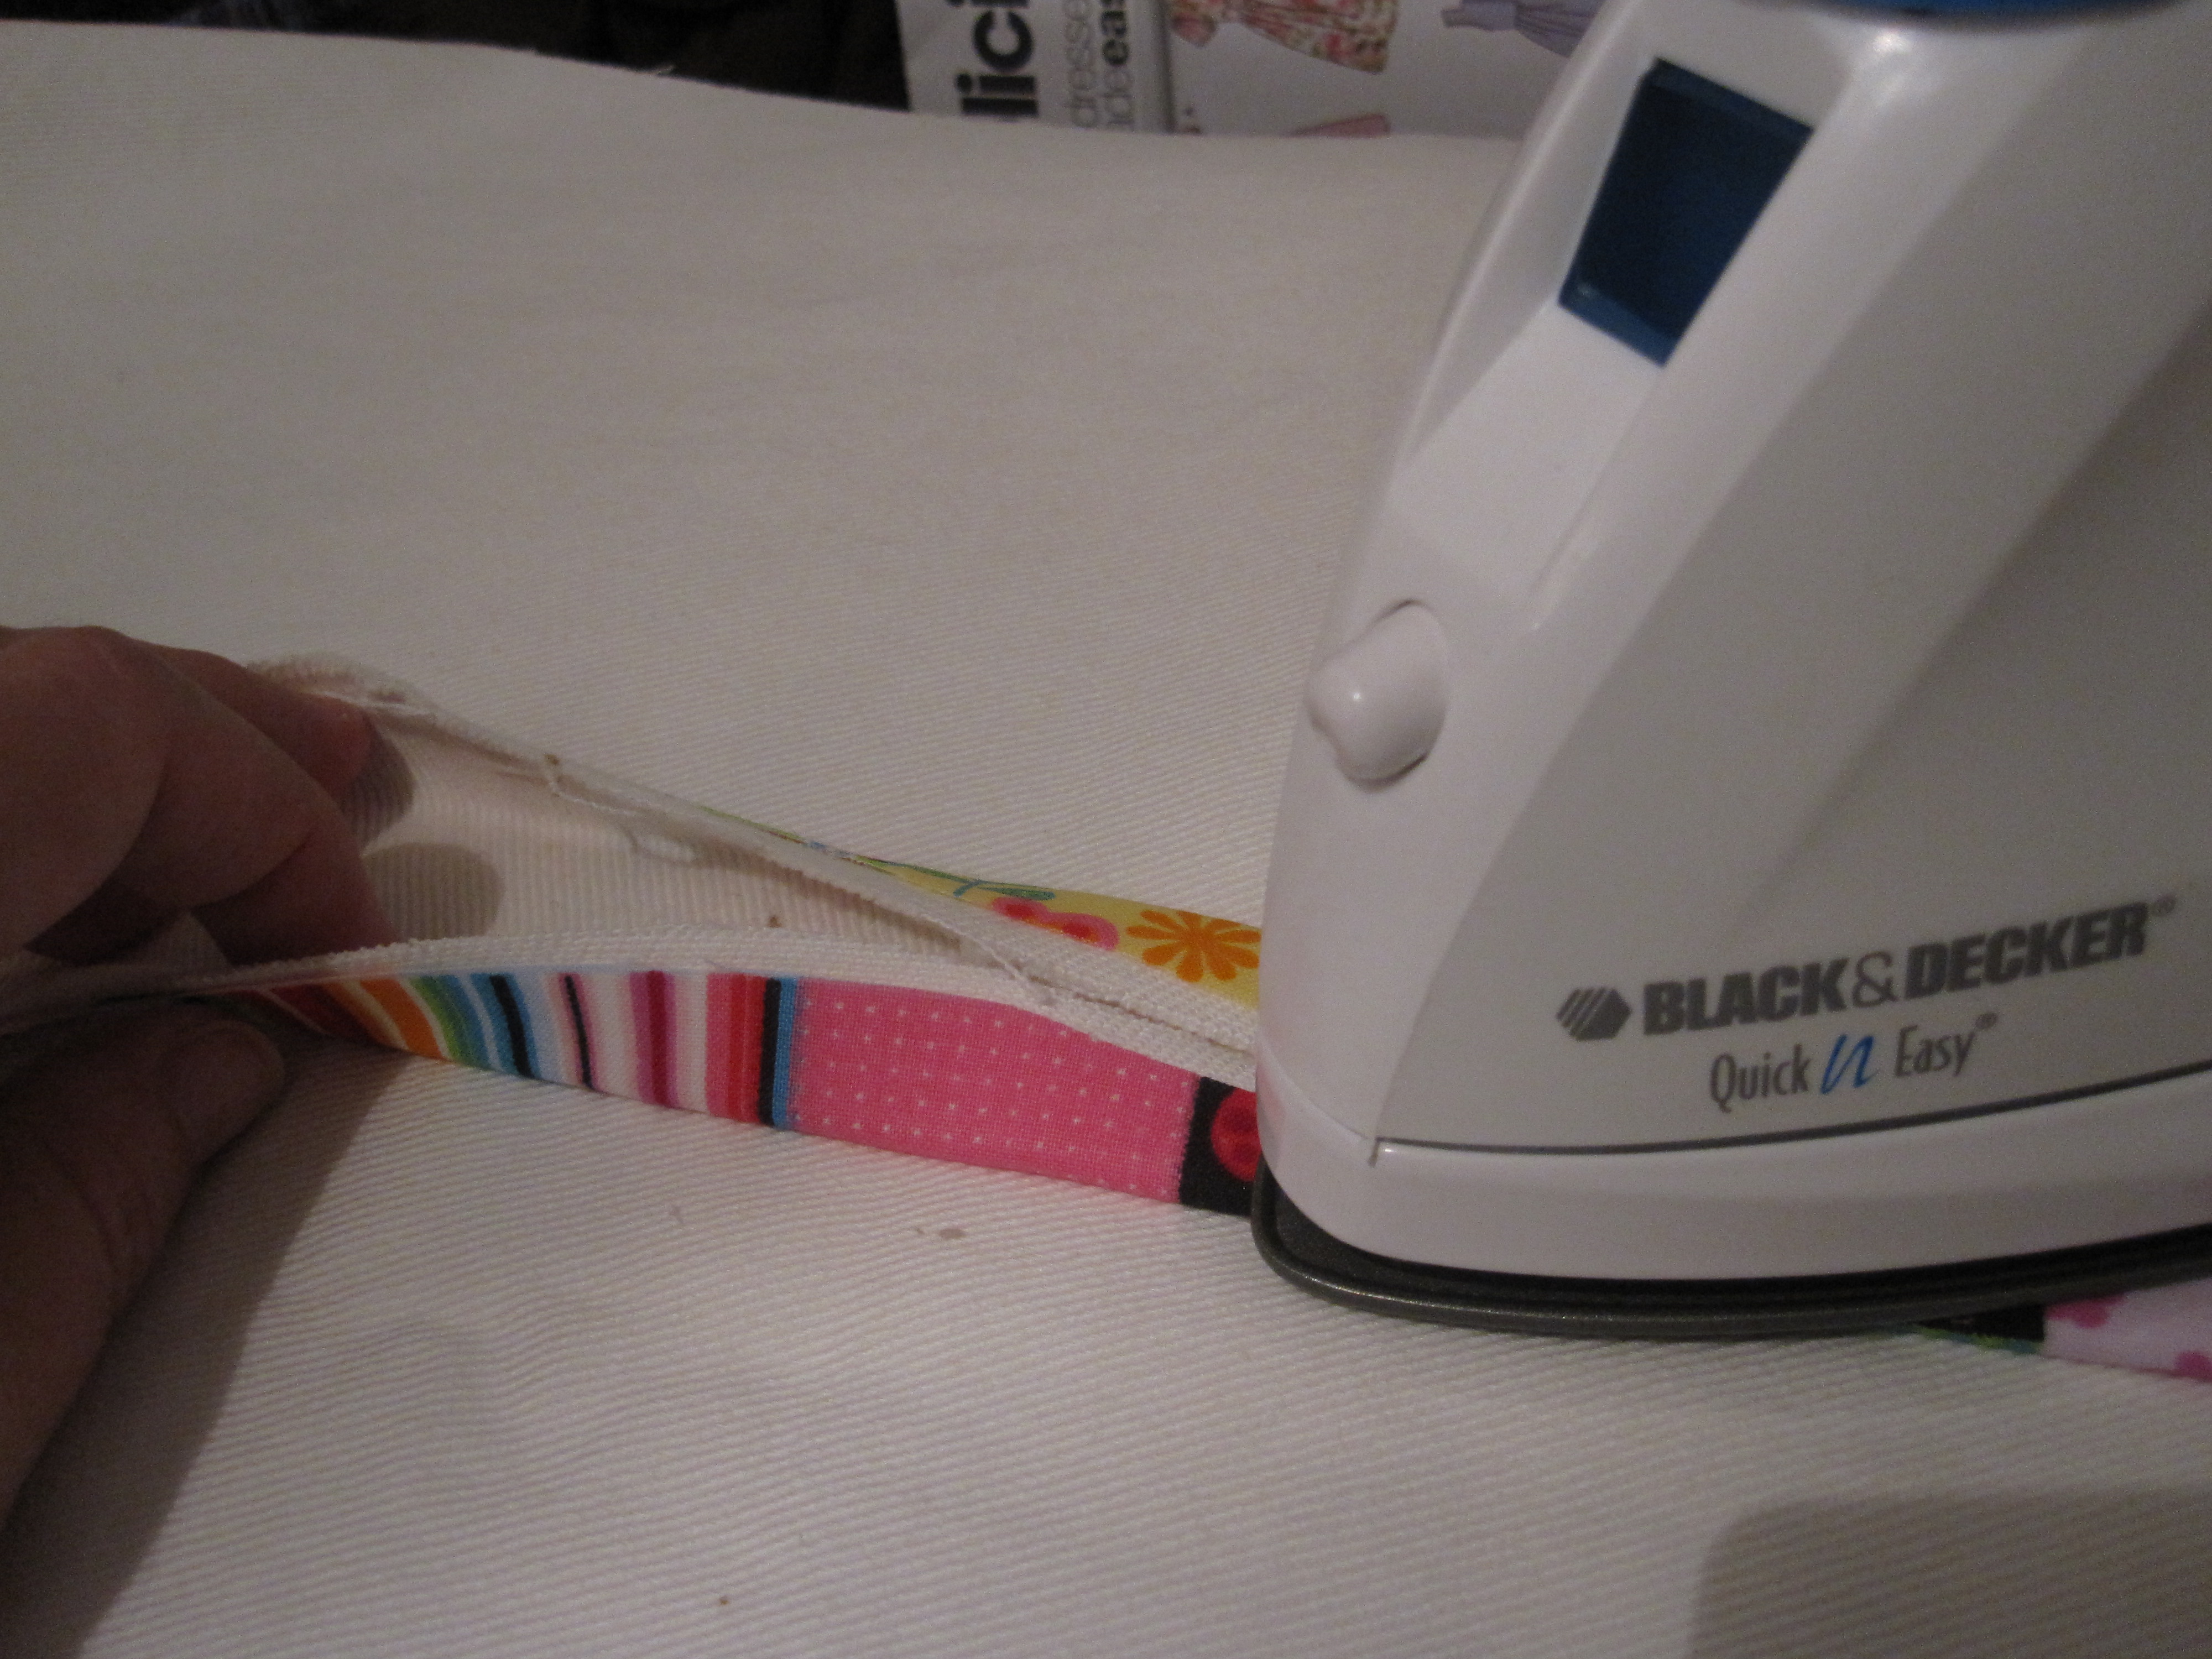
For the straps, I used the colorful fabric (and canvas inside for weight),  and a piece of satin ribbon…

IMG_0615


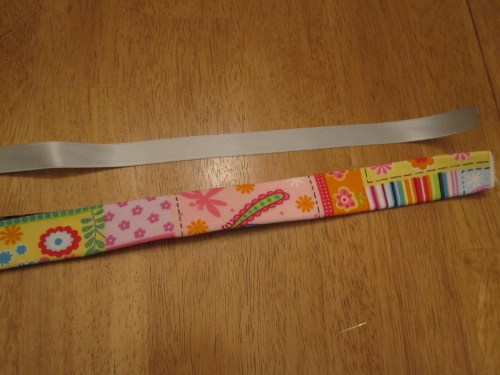
I ironed the straps so that it would be easy to sew…

IMG_0617


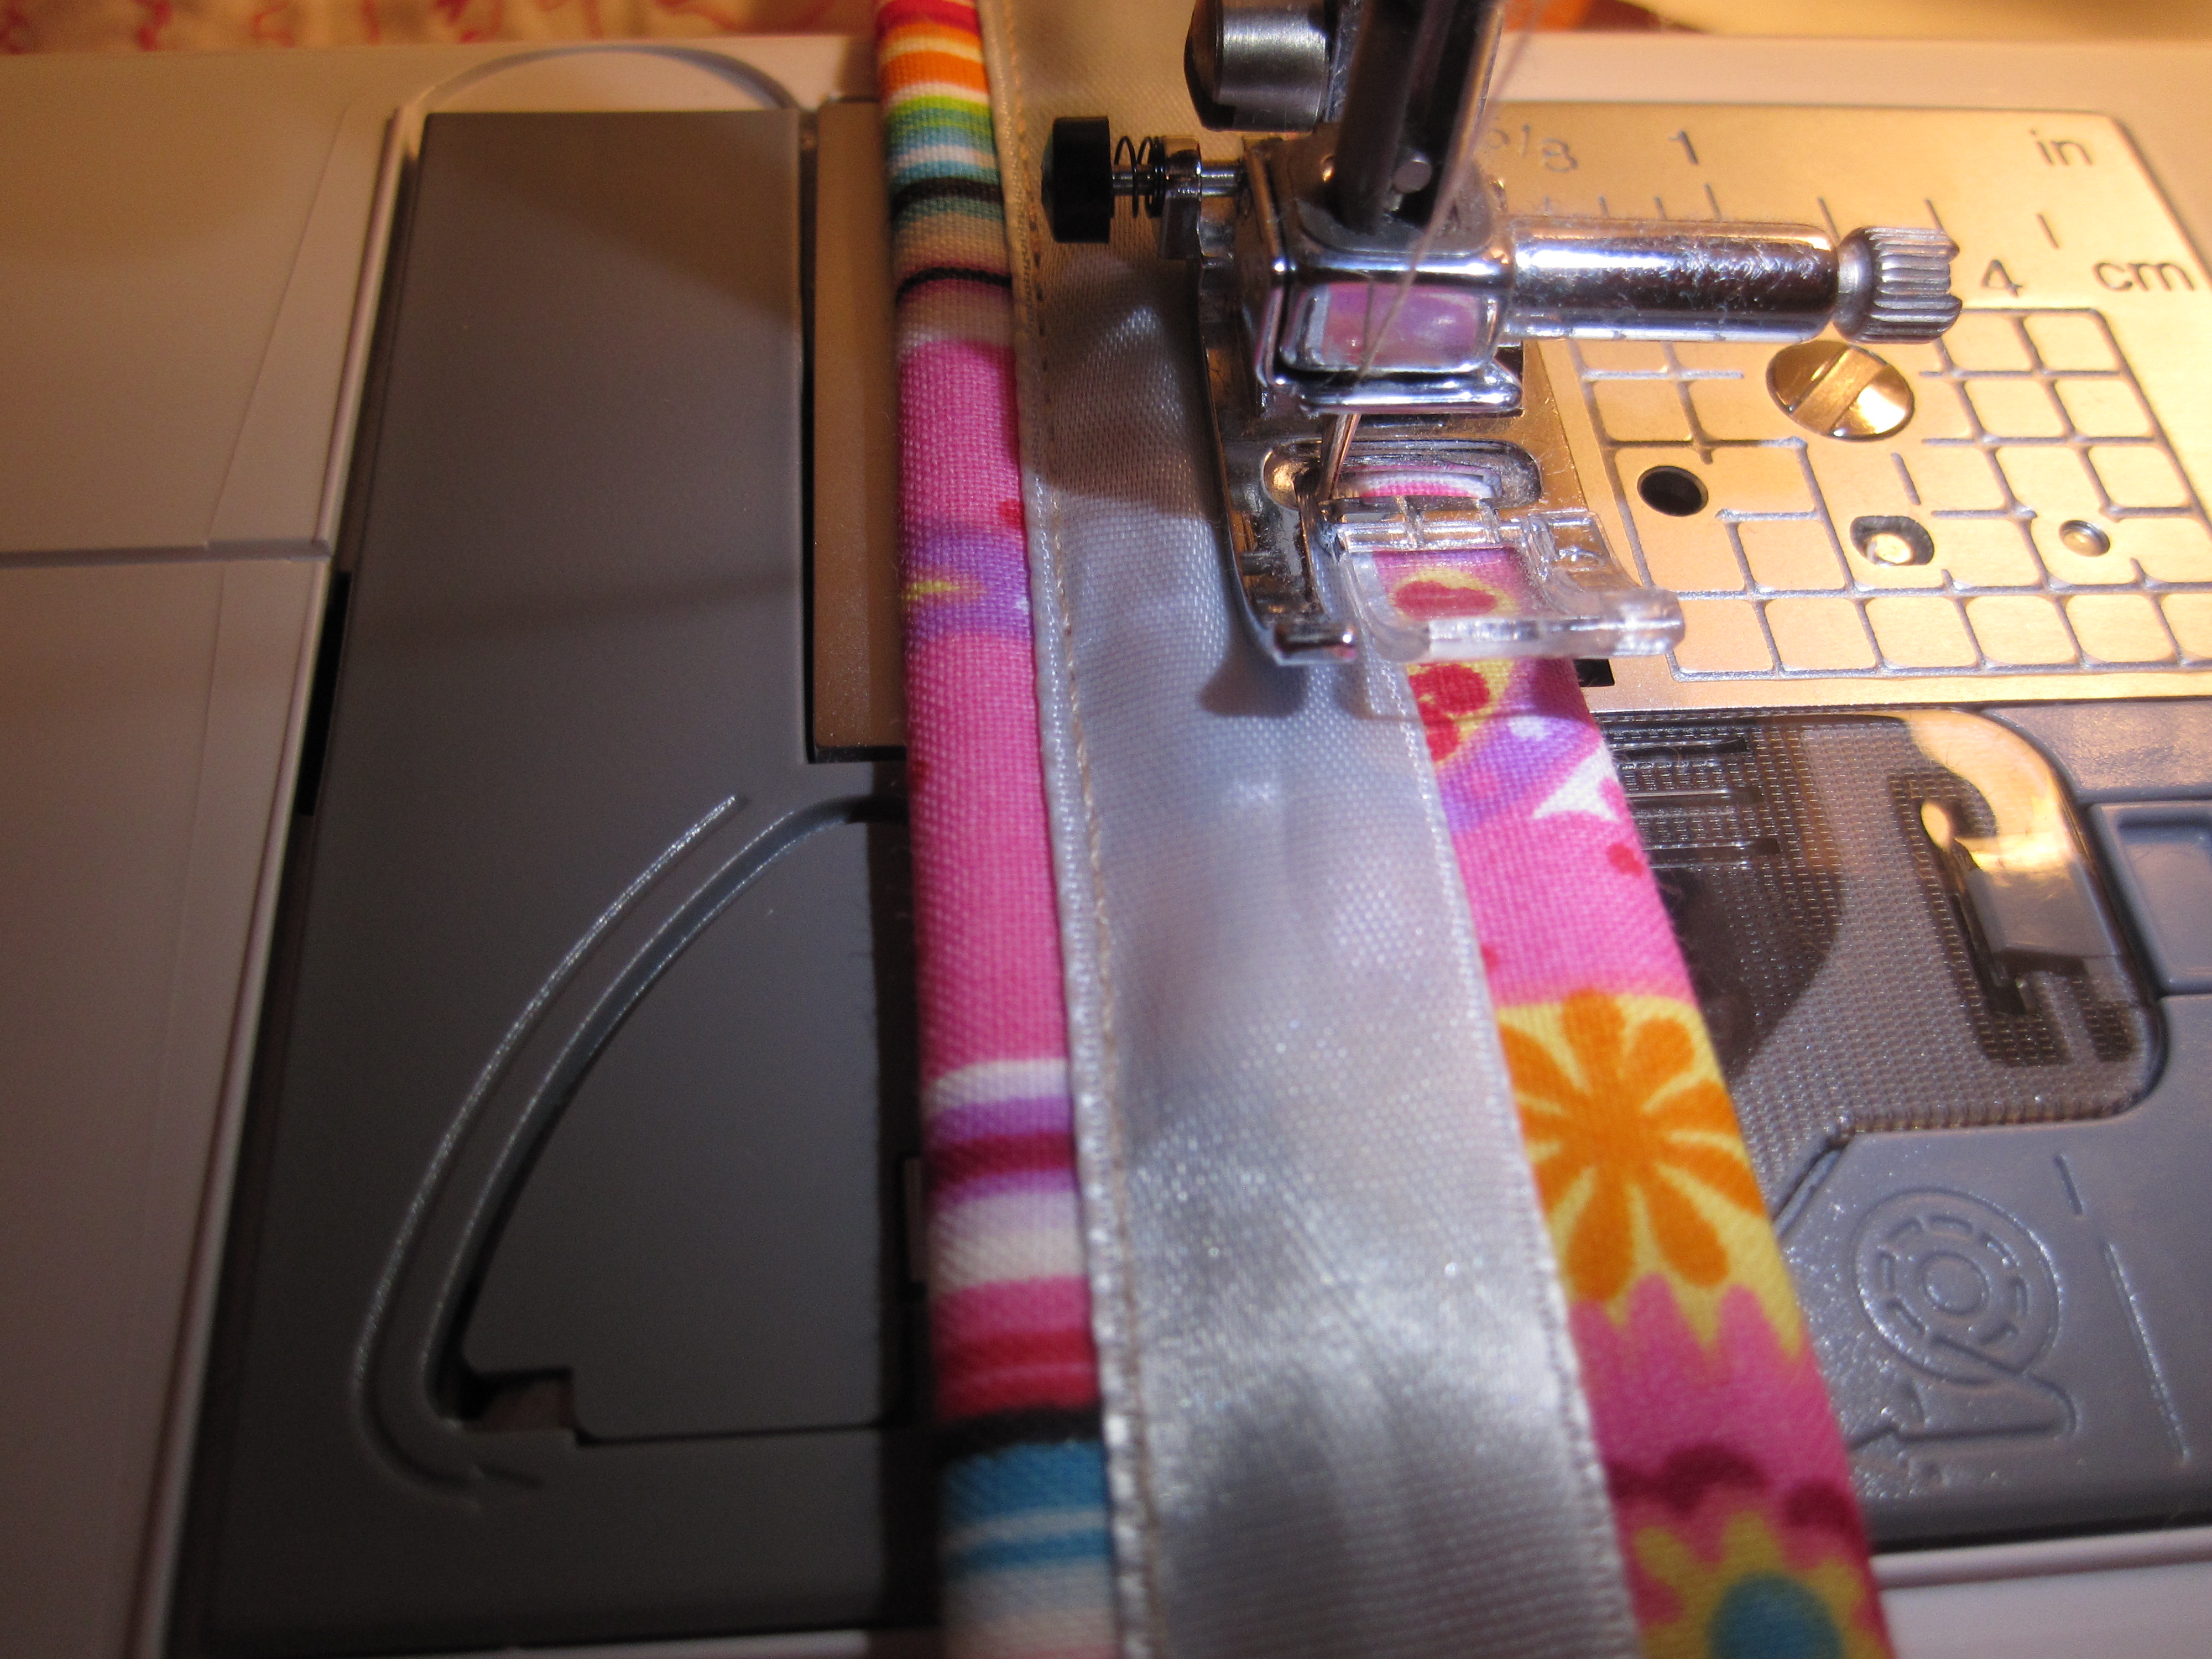
Then I sewed the satin ribbon as close to the edge of the ribbon as possible…

IMG_0618


It looked nice on the outside…

IMG_0619


For the closure, I hot-glued 3 buttons together (the large red, the orange, and the blue) to match the fabric.
I used a half-inch wide ribbon to wrap around the button and keep all the goodies inside the tote bag.

IMG_1582


Little Erika loved it!

IMG_1581


…and it was fun to make!

IMG_1582


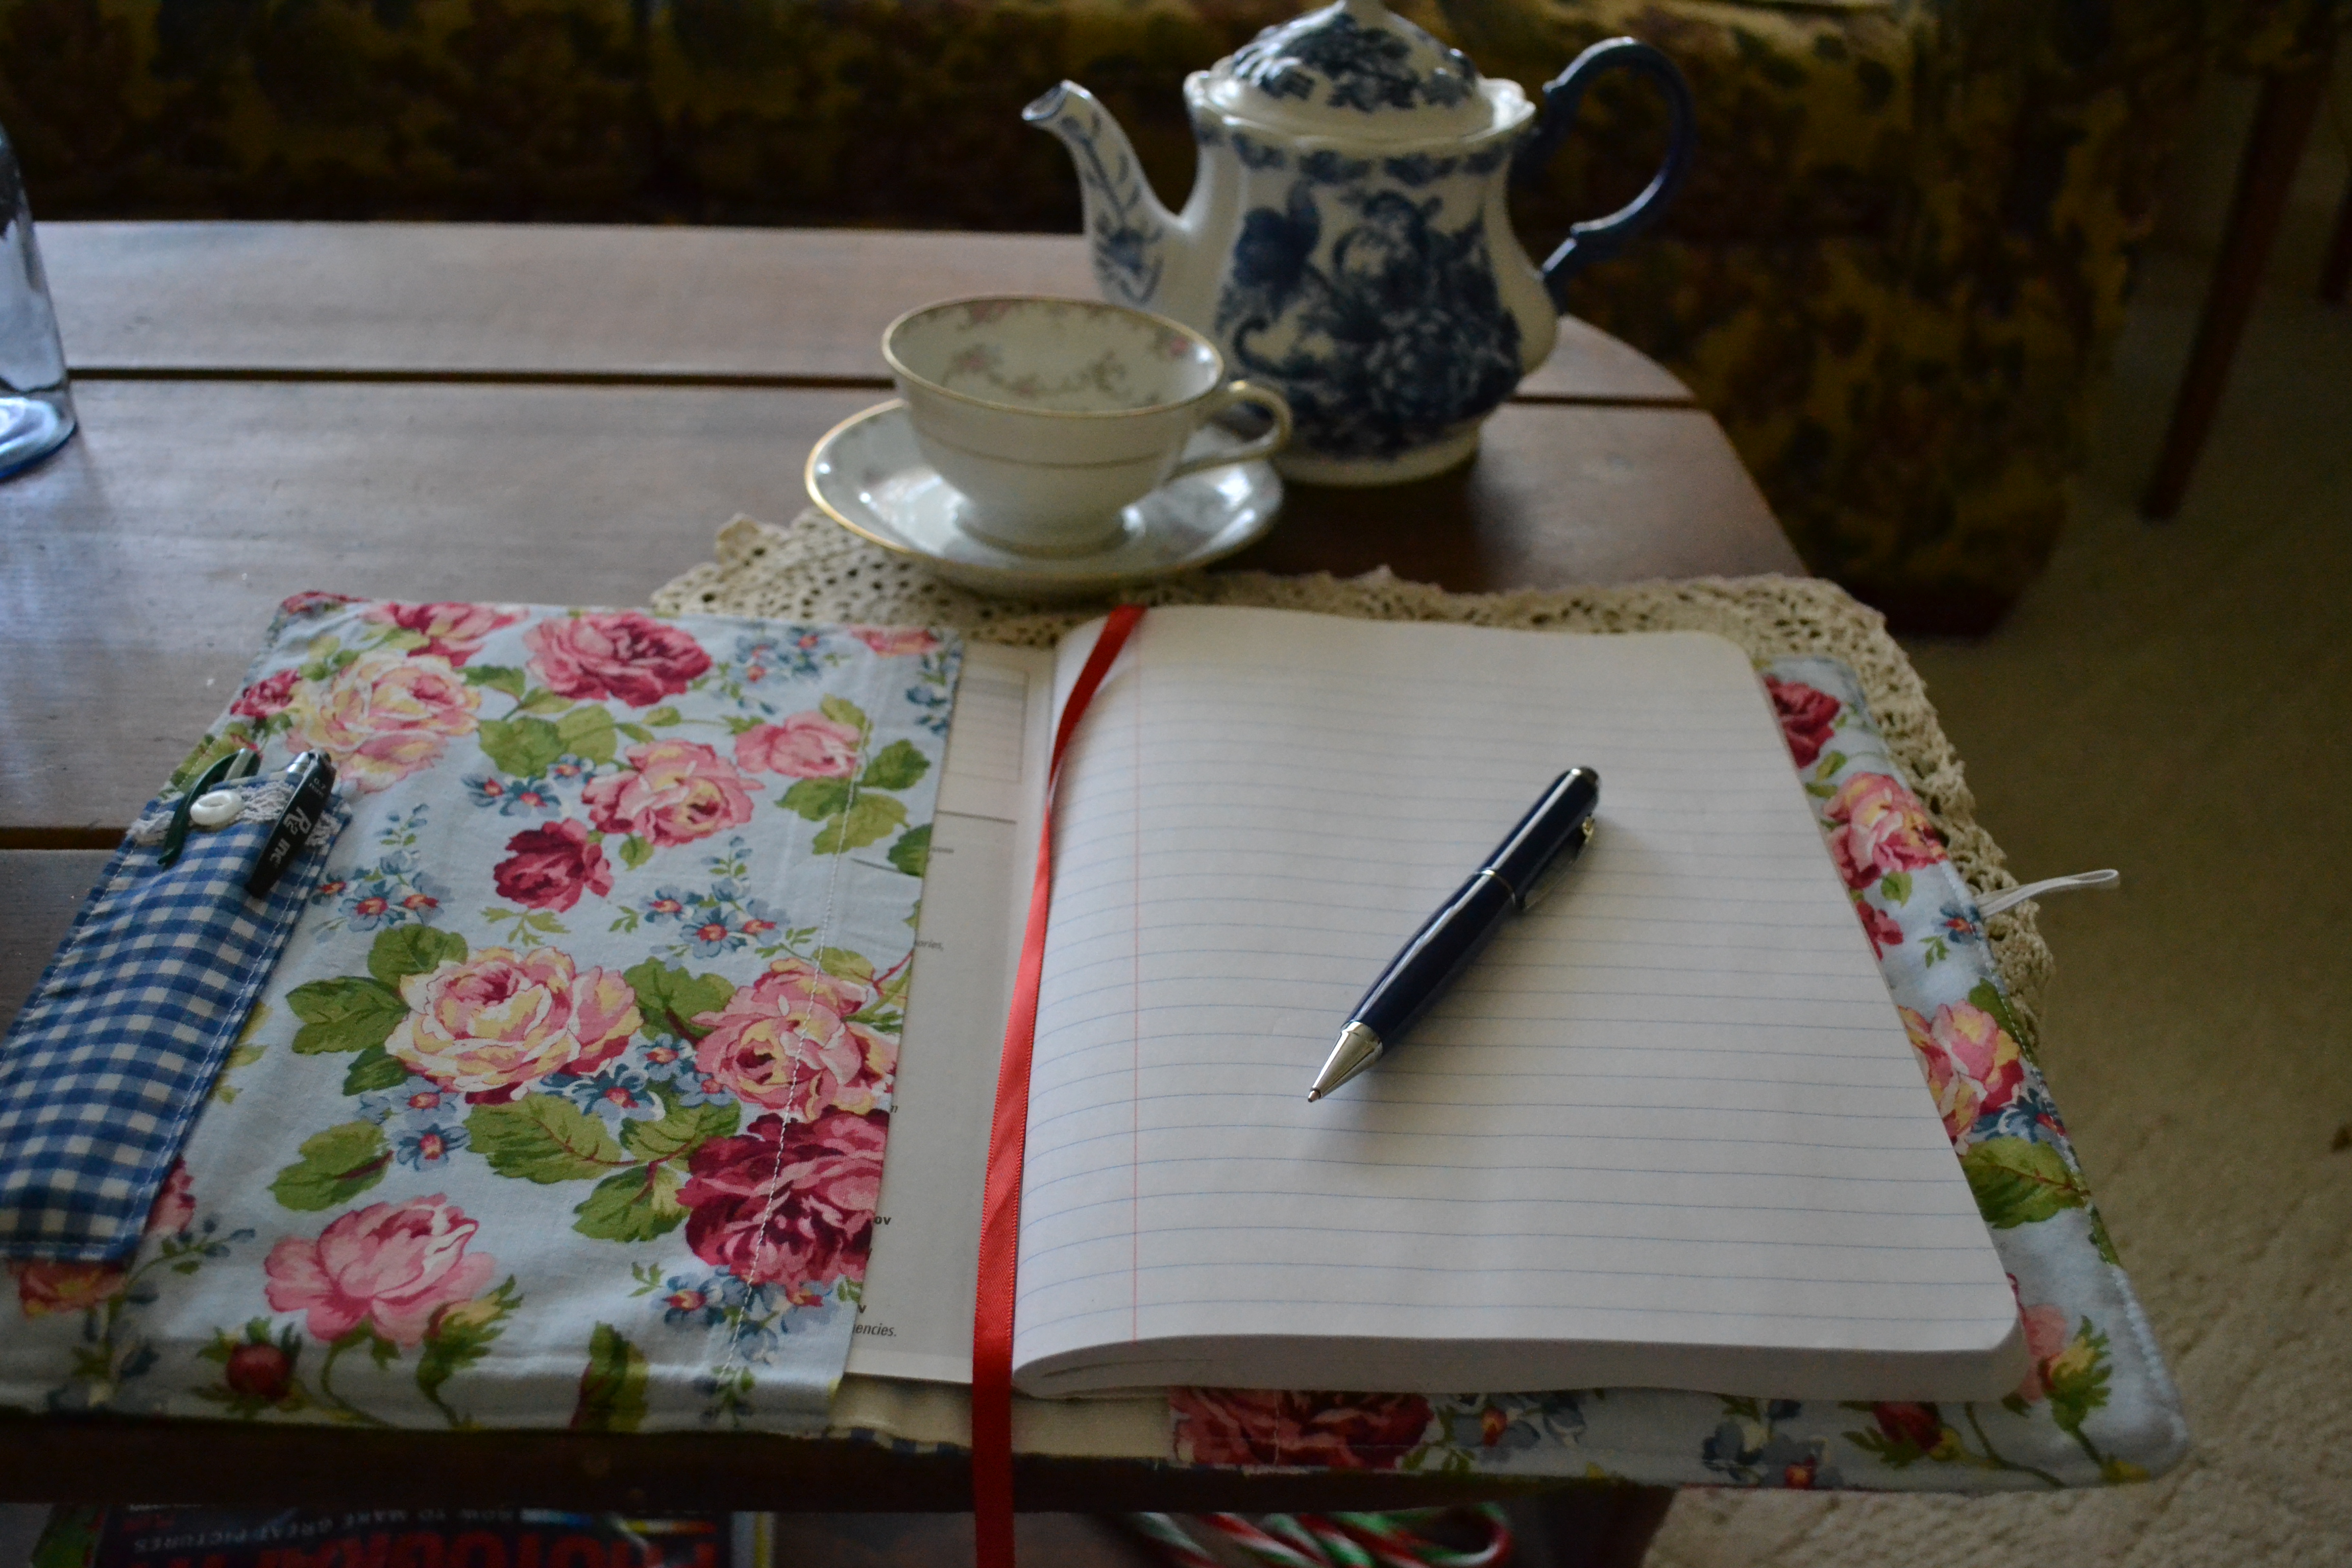
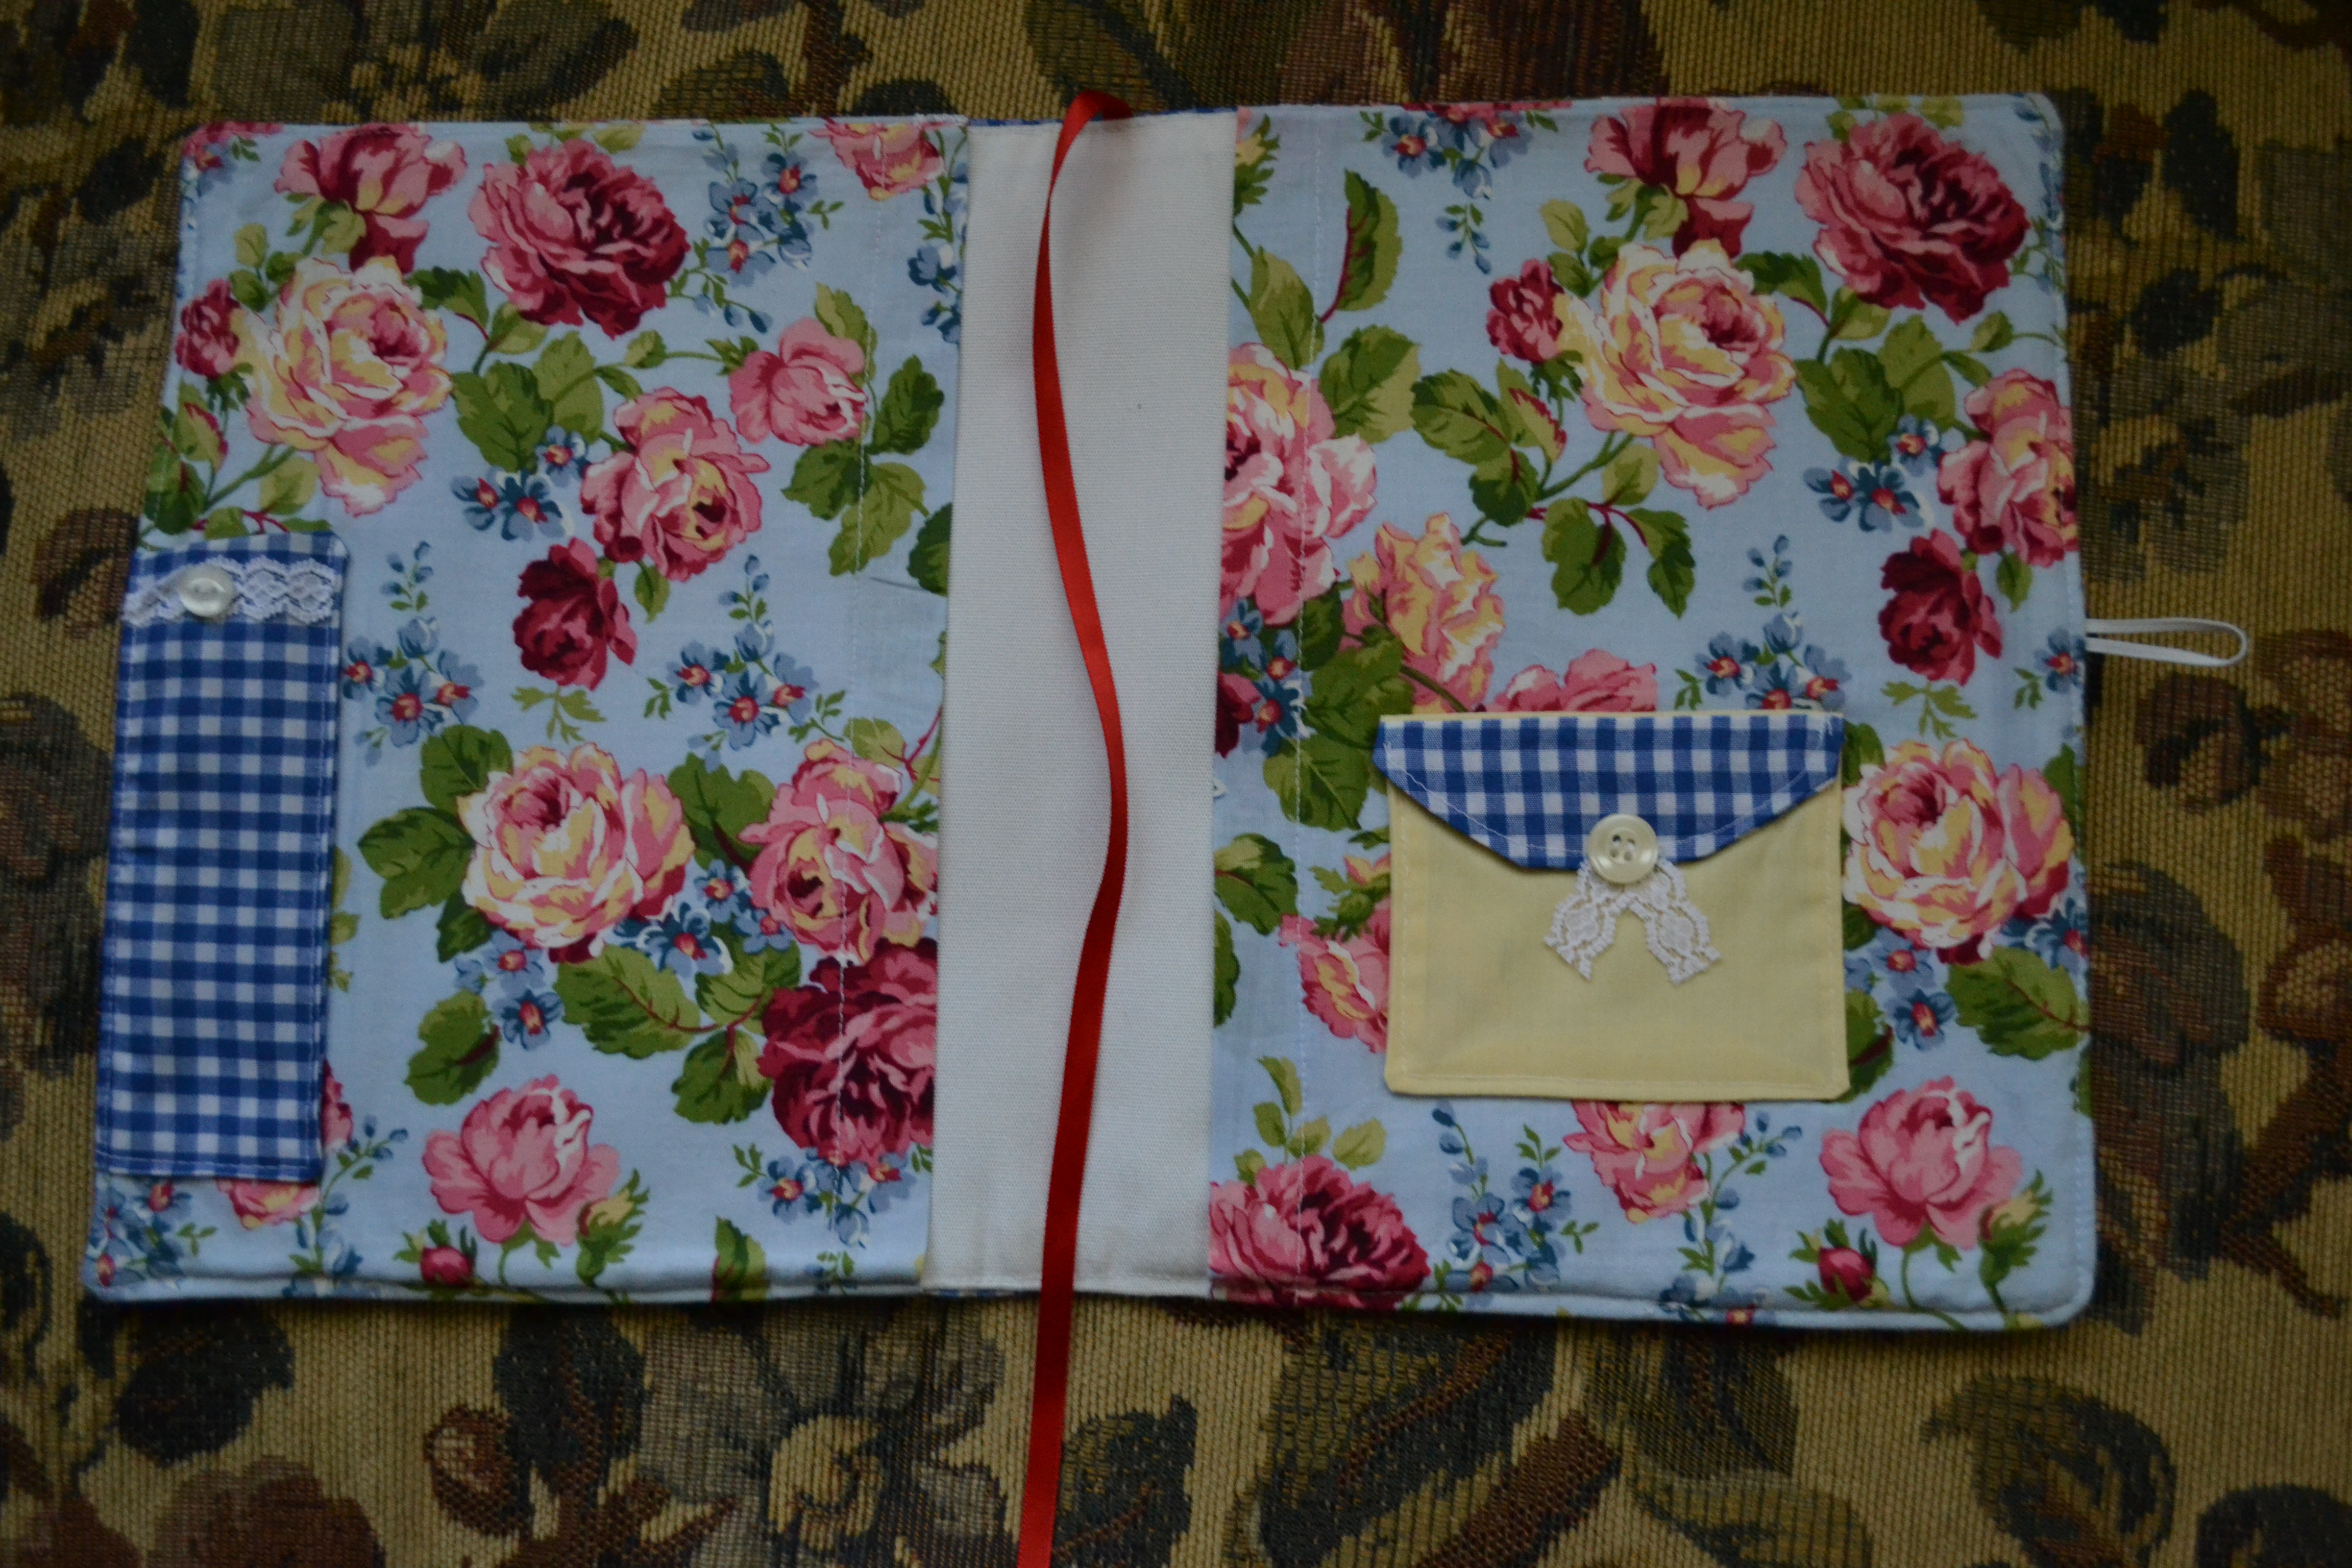
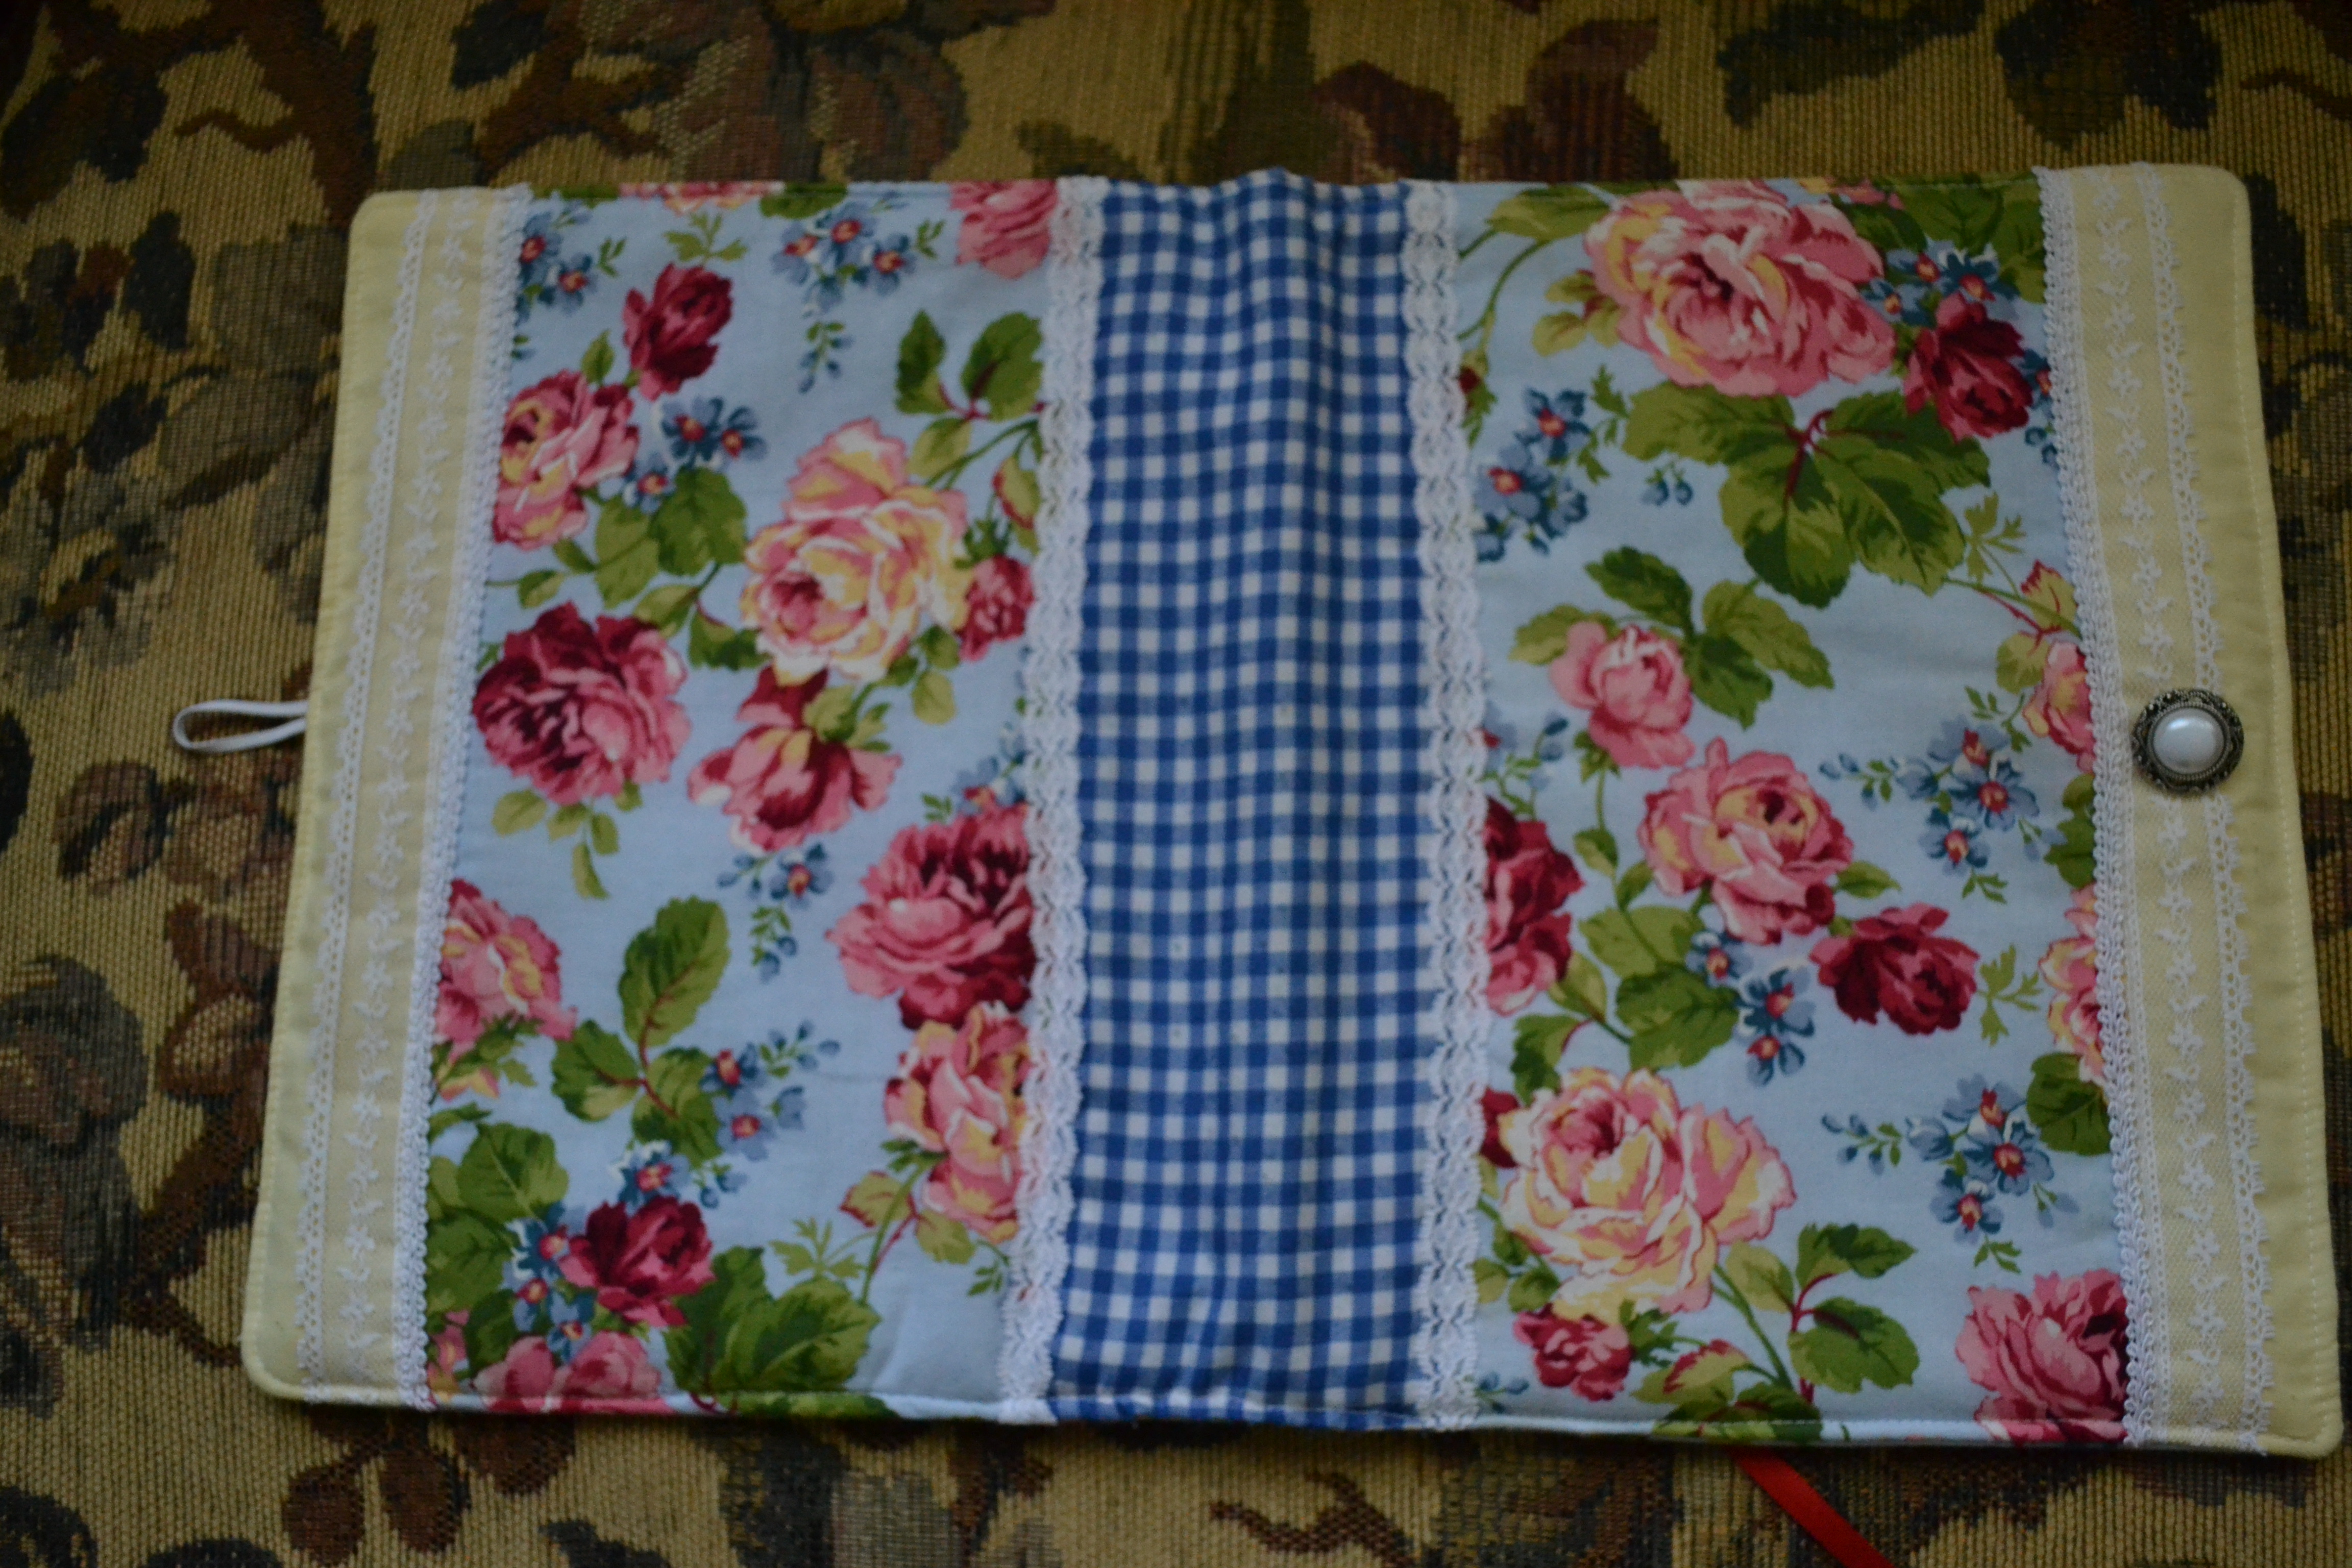
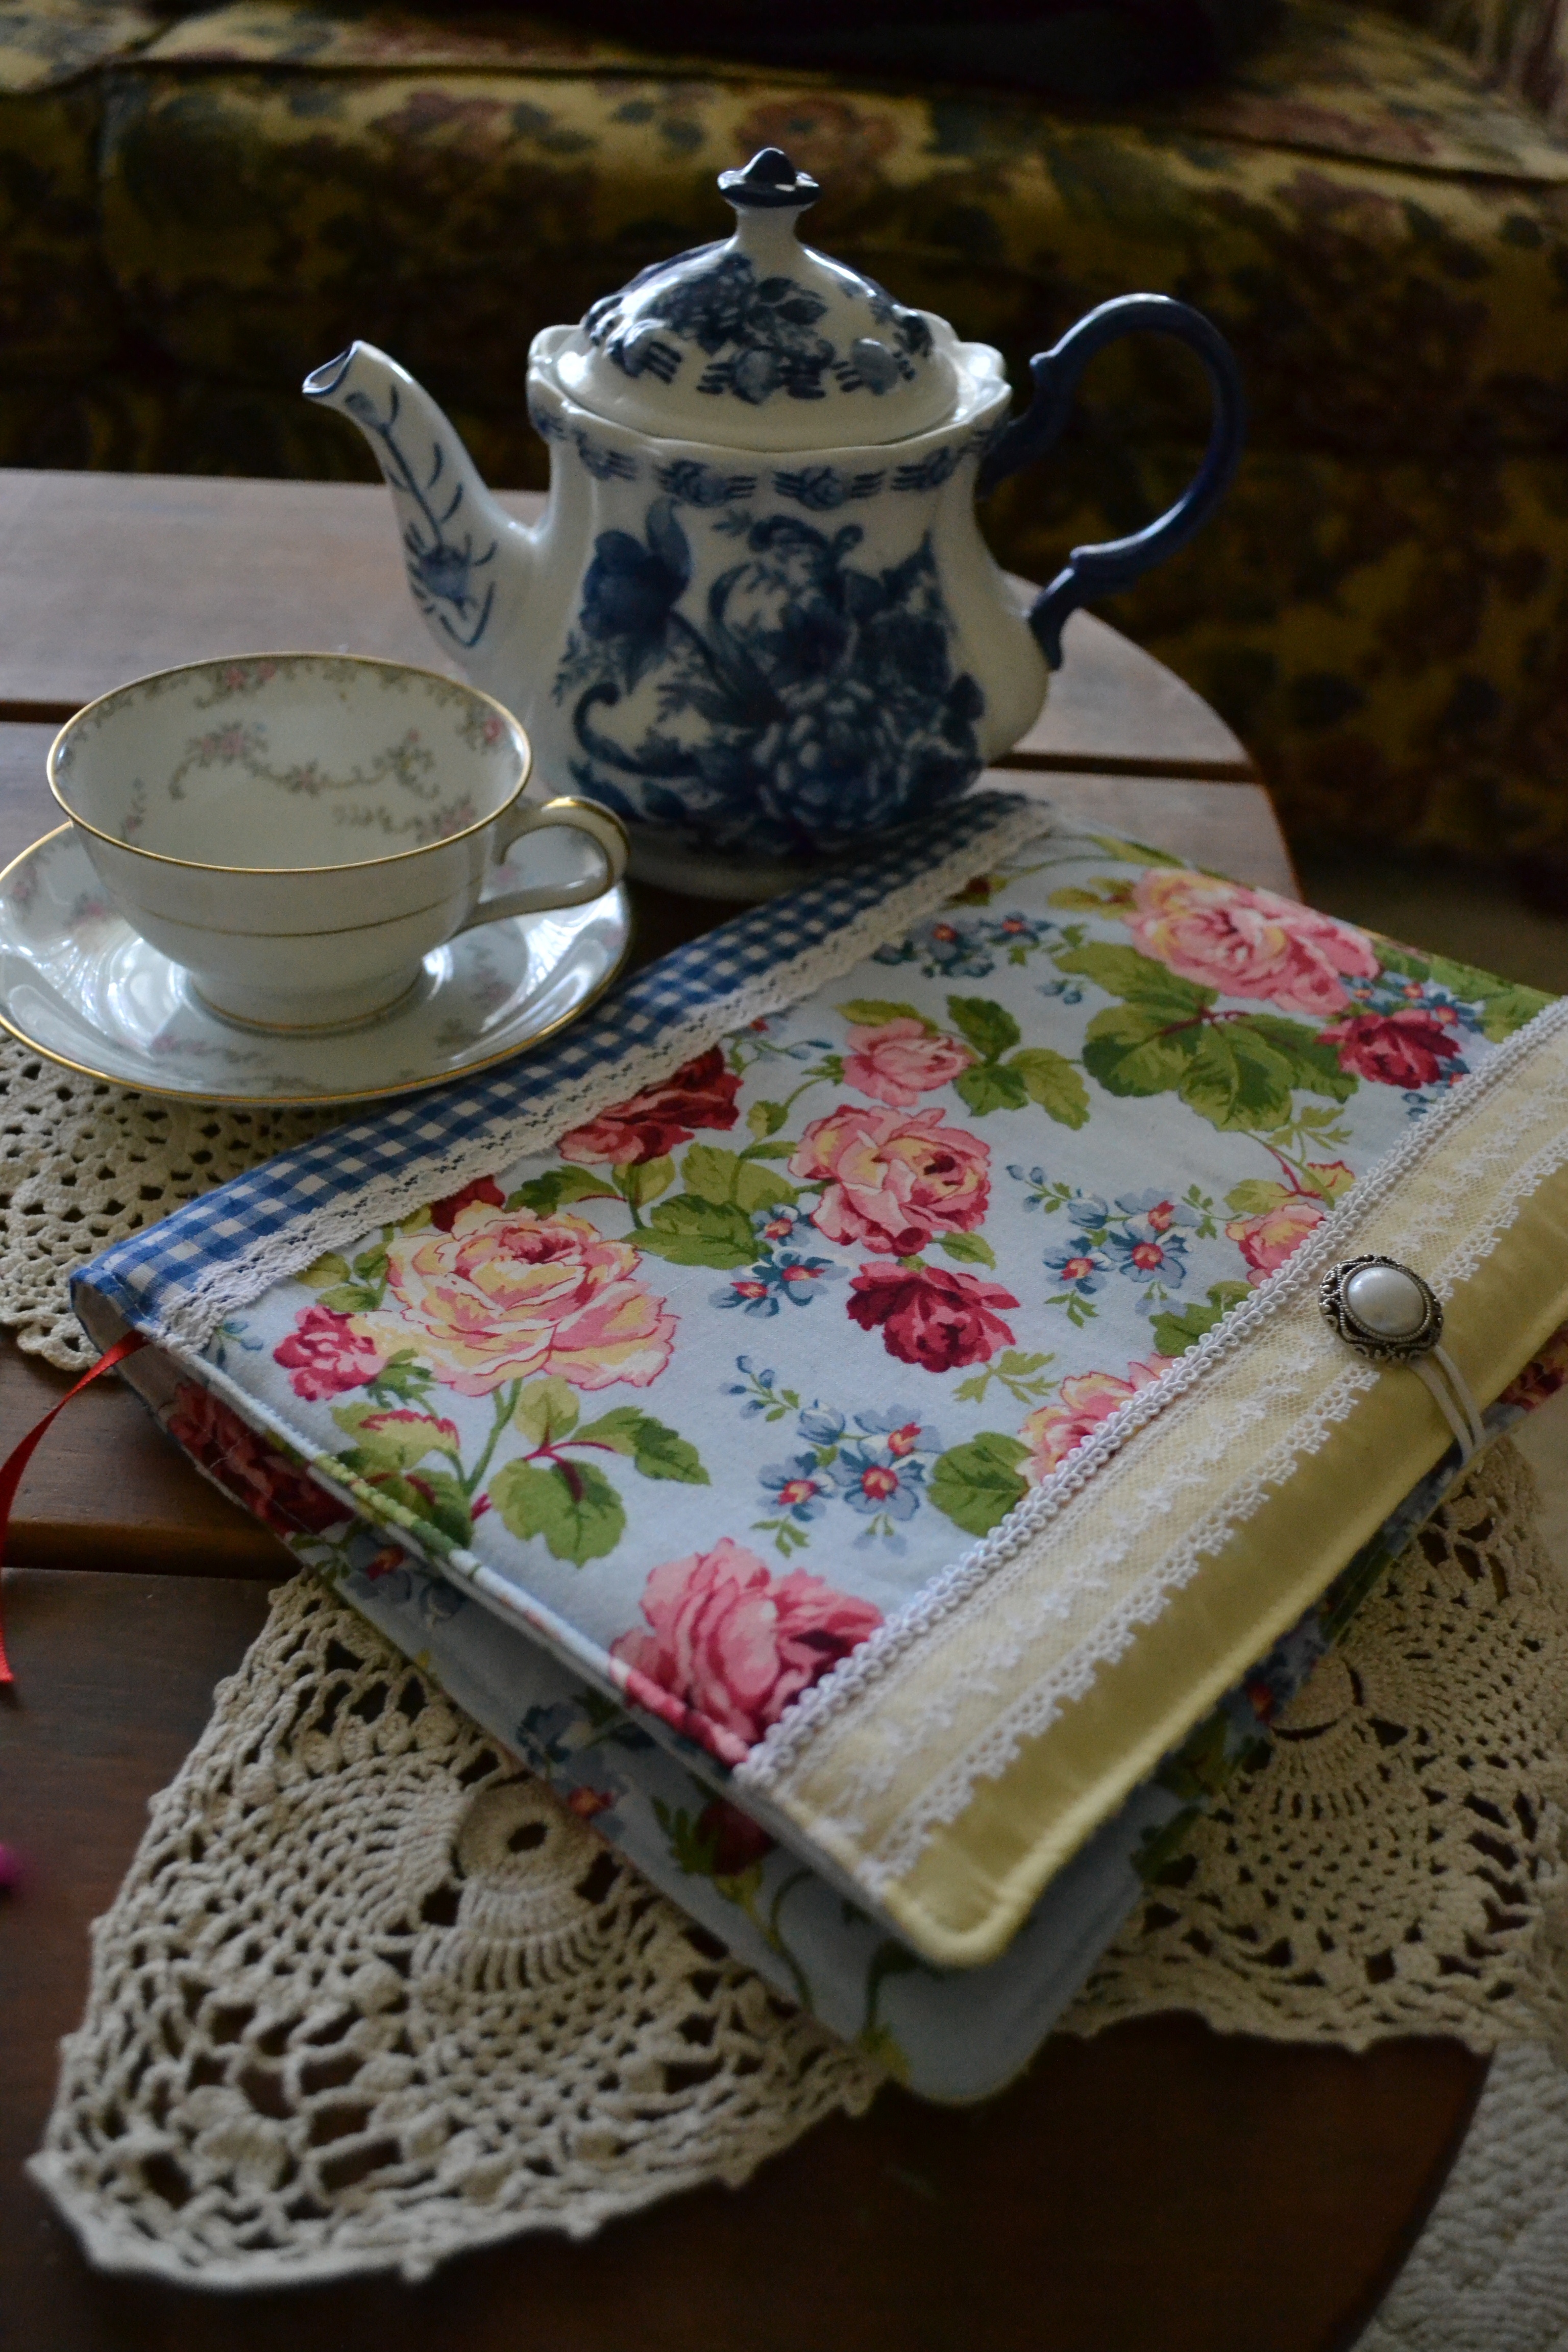
I also made her a small journal cover (out of the same fabric) to tuck into her tote bag.
She’s happily being creative with her new little gifts.


Have a wonderful weekend,

Daisy

Read Full Post »

Fun Gifts

For Christmas this year, I got some fun, unexpected gifts…

My daughter gave me this:

DSC_0027

It appears to be a camera lens.  In fact, it looks almost identical to MY camera lens.

But it’s not a lens…

DSC_0029

It’s a mug!  Stainless steel inside, nice twist-off cap…


DSC_0028

Which again, looks exactly like my lens cover.


DSC_0031

It’s very nice to use for either coffee or hot tea…
or hot chocolate,
or a latte…

you get the idea.


DSC_0038

It comes in its own little bag (just like the real thing)!


DSC_0043

She also gave me a subscription to Popular Photography!  So much fun to look through and learn from their articles.  But no pressure, right?  I’m still just an amateur 🙂

Well, if you know someone who enjoys photography… here’s two ideas for gifts.  I’m sure they’ll love it!  🙂

Happy Saturday!

Daisy

Read Full Post »

Quilt on a Budget

I’ve been working on this quilt on & off for a while and finally pieced it together.
It was fun!

I chose fabrics that I had in my stash, most of which I’d bought at WalMart.  I bought some extra to make sure I had enough variety.

Quilts don’t have to be expensive… the most I paid was $2 yard!


DSC_0021

It is a bright & cheery quilt with mostly yellows/blues/greens… one of my favorite combinations.

The “pattern” I chose to do is called a “Disappearing Nine Patch”.
It’s great for any skill level.


DSC_0238

I sewed the fabrics into strips of 3.  They strips measured 6 in x 45 in.


DSC_0241

I then cut the long strips into 6 in. strips, and sewed three random strips together to make a mock 9-square patch.


DSC_0242

I then cut the 9-patch block down the center, both vertically & horizontally.


DSC_0246

I put together random blocks, flipping them and trying to keep seams from meeting other seams…

Putting different fabrics together is what makes it fun.
The look I was going for was a totally random, unplanned look.


DSC_0023

Sewing the squares together and then the strips went quickly.
I enjoyed the bright fabrics.  I love blues.


DSC_0024

Here’s a closer look…


DSC_0021

Now, all I have to do is hand quilt it!
I picture evenings on the couch, while “watching” TV…


Have fun quilting,
or, if you don’t quilt,
enjoy the warmth of a cozy quilt.

Daisy

Read Full Post »

Journaling is so popular now, with so many different types of notebooks and even mixed media journals (I’m working on one now, and it’s so much fun!).  I thought I’d make my friend a cover for her personal Journal so she could take it with her on her many trips.  I had fun making it and she loved it.  Here’s what it looked like on the outside:

Okay, I’m blessed to have a Dad that’s an upholsterer and he gives me all kinds of fabric remnants, along with trims, tassels, and other left-overs.  I know! That’s pretty nice!!


This is what the inside looks like.  The gold quilted fabric is silk (SO nice!) and feels so soft and smooth, while the white & gold/yellow fabric has some texture to it and feels equally nice.  I sewed pockets on the “flaps” so she could put in a note pad and a pen or pencil.  I also sewed in a ribbon at the top center  so she could mark the spot in her journal and just open right up to it.  (I really like that little detail when I’m journaling).


I tucked in a lacy bookmark I made her and a pen.  Tucking in the journal or notebook of your choice is easy and quick.


I sewed a ribbon on the side back in the center so I could wrap it around the nice button sewn on the outside.  It keeps the journal secure while looking feminine and pretty as well.


Here’s another Journal cover I made for a friend:


I thought she would like the fabric.  This journal was made the same as the other, just a bit smaller. Here’s the inside:

Once again I sewed pockets for a notepad & pen, highlighter;  added the ribbon on center top for a marker, and a ribbon on side back for closure.


The button looks real fancy but I bought it at Wal-Mart very inexpensively.  I had purchased both these buttons for other projects but they went so well with these fabrics that I decided to go ahead and use them for these Journal covers.

It’s great when you can both give gifts that you know they’re going to love as well as have fun making them.

Happy Sewing! 🙂
Daisy 

Read Full Post »

« Newer Posts